
1.1 - VR Project Setup
Tutorial
Beginner
+10XP
1h 30m
Unity Technologies
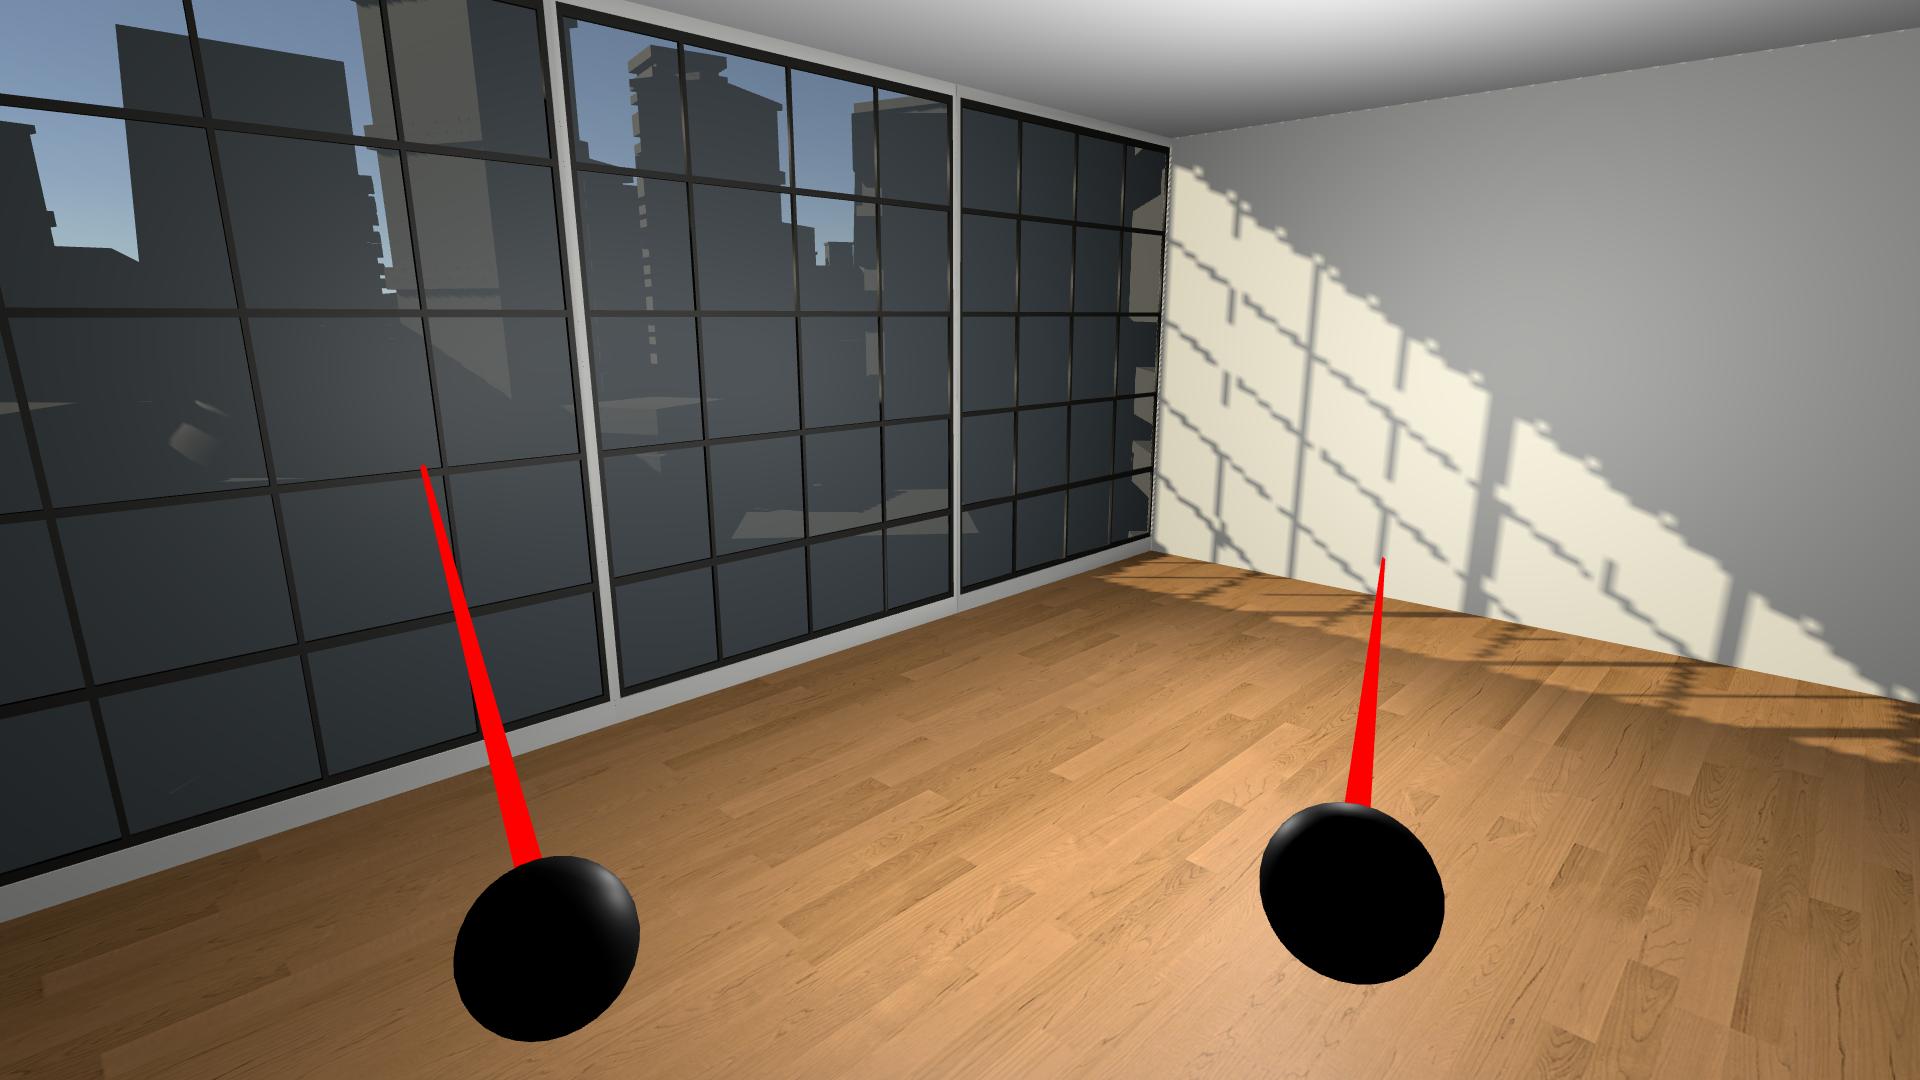
By the end of this lesson, you will have a new unity project with a big empty room that you will experience in VR
This unit is part of the Create with VR course.
Languages available:
Overview Video
1. Open a new VR project
The first thing you have to do is create a new Unity project configured for VR.
1. Download and extract the Create with VR starter project:
- Click to download the file: Create with VR Starter Project.
- To extract on Mac: double-click the downloaded file.
- To extract on Windows: right-click the downloaded file and select Extract All.
2. Rename and relocate the project on your computer:
- Located the folder called “VR Room Project” inside the extracted folder.
- If you want, rename the project folder to “VR Room - [Your Name]”
- Move the project folder to a logical directory on your computer (e.g. a folder called “Create with VR” on your desktop).
3. Add the VR Room project to Unity Hub:
- Open Unity Hub.
- Add your VR Room Project to the Unity Hub.
4. Open the project in Unity 2020.3 LTS (Long-Term Support):
- From Unity Hub, open your new project in Unity.
- Make sure the Unity version is set to 2020.3.
- If prompted to upgrade your project to a newer version of Unity 2020.3, click Confirm.
- If you do not know how to open a project from Unity Hub, follow the instructions in the Unity Hub manual.
5. Explore the contents of the starter project and how it differs from a typical empty project:
- From the top menu, select Window > Package Manager.
- In the left panel of the Package Manager, locate the packages installed in this project (with checkmarks next to them), including:
- XR Plugin Management
- XR Interaction Toolkit
- OpenXR Plugin
- Universal RP (Render Pipeline)
Note: to filter and view only packages currently installed in the project, from the top-left corner of the Package Manager window, select Packages: In Project.
You should now have your new VR starter project open to an empty scene and understand which packages allow for compatibility with VR.
Note: These are packages that have been pre-configured in this starter project, since they are required for VR development in this course. If you want to learn how to configure a VR-ready project similar to this from scratch, there are instructions in this tutorial: Create a VR Starter Project from Scratch.
Related Resources:
2. Open and explore the starter scene
Before you run the project, you should choose a more interesting environment to experience in VR.
1. Rename and open the Starter Scene:
- From the Project window, open the Scenes folder.
- Rename the “Create-with-VR_Starter-Scene” as “[Your_Name] Room”.
- Double-click on your renamed scene to open it.
2. Explore the contents of this scene and how it differs from a typical empty Scene:
- From the Hierarchy, select the XR Rig object and inspect the XR Rig component.
- Select XR Rig > Camera Offset > Main Camera and inspect the Tracked Pose Driver component.
- Select either the LeftHand Controller or RightHand Controller object and inspect the XR Controller component.
- Select the Input Action Manager object and inspect the Input Action Manager component.
You should now have your new scene open. You should also have a broad understanding of the components of the scene that make it different from a typical Unity scene.
3. Add a room and background
This empty scene would be boring to explore in VR, so you should add a room that will be a bit more interesting and will provide more perspective when you’re in VR.
1. Add a room to the scene:
- In the Project window, expand Course Library > _Prefabs > Rooms.
- Drag one of the Room_[style] prefabs into the Hierarchy.
- From the Hierarchy, delete the Plane object.
2. Add an environment outside the room’s windows:
- Open the Course Library > _Prefabs > Environments folder
- Drag one Foreground object and one Background object into the Hierarchy.
3. Adjust the sunlight in the room:
- Change the X and Y rotation of the Directional Light object to change the way sunlight enters your room.
You should now have room, foreground, and background objects in your scene from the course library, with sunlight entering the room at the desired angle.
4. Test with the Device Simulator
You can test the scene with a “Device Simulator.” This simulator allows you to test the app in-editor using the mouse and keyboard, rather than having to connect to a device and put it on. This can be helpful for quick tests.
1. Add the Device Simulator to the scene:
- From the Project window, open Samples > XR Interaction Toolkit > [version] > XR Device Simulator.
- Drag the XR Device Simulator Prefab into the Hierarchy.
- Click Play to test the simulator.
2. Experiment with the keyboard and mouse controls:
- Note: To use the simulator effectively, a mouse with a clickable scroll wheel is required.
- To control the camera: hold right-click.
- To control the left controller: hold Left Shift or toggle with T.
- To control the right controller: hold the Spacebar or toggle with Y.
- To pan around with a device: move the mouse.
- To rotate a device: hold the middle mouse button.
- To toggle rotation control, press R.
- To reset the position and rotation of devices: press V.
3. See more controls available for the device simulator:
- From the Hierarchy, select the XR Device Simulator.
- In the XR Device Simulator component, double-click on one of the Action variables to open the Action Editor.
- Expand the Actions to view their Bindings.
- From the left Action Maps panel, select either Main or Input Controls to view additional action mappings.
4. Important: disable the Device Simulator if you do not plan on using it:
- Select the Device Simulator object then disable it in the Inspector window.
- Having the device simulator active when running the project on your device will cause problems.
You should now be able to look around your room with your mouse and keyboard using the Device Simulator.
If you want, you can also download the Rig Simulator Keyboard Shortcut Cheat Sheet.
5. Test in VR through Unity
If you are using an Oculus device on a Windows computer, follow this step to test on your device. Otherwise, skip this step.
If you are using a Mac for Oculus development, this step is not relevant since the Oculus app is not yet Mac-compatible. You will learn how to test your app in the next step when you build your app onto your Oculus Quest.
In order to run the project on your Oculus Quest or Rift, you need to install the correct plugin and connect your app with “Oculus Link.” This allows you to run your project in the Unity Editor, but experience it on your Oculus device.
1. Install the Oculus Plugin for desktop testing:
- From the top menu, click Edit > Project Settings, then select the XR Plugin Management panel from the sidebar.
- In the PC, Mac, Linux & Standalone tab, select Oculus from the list of available Plugin Providers to install that plugin.
2. Connect your device through Oculus Link:
- Make sure your device is plugged into your computer using a compatible cable.
- Make sure the Oculus App is running and has successfully recognized your device.
- If you have not yet downloaded the Oculus App, you find it on the Oculus Link Setup page.
3. Test the project on your device:
- Make sure the VR Device Simulator in your scene is disabled. If it is enabled, your head tracking will not work.
- Select Play in the Unity Editor and put on your headset.
On a Windows computer, you should now be able to quickly test your app on your Oculus device through Oculus Link.
6. Build and run on your device
If you are using an Oculus Quest, follow this step to build the app onto your device. Otherwise, skip this step.
Since the Oculus Quest is a standalone device (meaning it does not need to be connected to a computer), you can build an app and test it directly on the device.
If you are on a Mac and cannot test your app through Oculus Link as in the previous step, this will be the primary way for you to test your app.
1. Install the Oculus plugin for Android build:
- From the top menu, click Edit > Project Settings, then select the XR Plugin Management panel from the sidebar.
- Select the Android tab, then select Oculus from the list of available Plugin Providers to install the plugin.
- This will allow you to build your project as an app on your device and test it as a standalone experience, untethered from your computer.
- Note: You will only have an Android tab if you installed the Android export module.
2. Prepare your scene for building:
- Make sure the VR Device Simulator in your scene is disabled. If it is enabled, your head tracking will not work.
- From the top menu, click File > Build Settings.
- Click Add Open Scenes to add your scene.
3. Switch to the Android build platform:
- In the Platform section, select Android.
- Click Switch Platform, and wait for your project to switch to the Android platform.
- Note: Android will only show up as a possible build target if you successfully installed the Android Export Module during installation of the Unity Editor.
4. Select your device as the build target:
- Make sure your VR device is turned on and plugged in.
- Next to the Run Device drop-down, click Refresh, then select your VR device.
- Note: If your device does not show up in the list, try restarting your device, making sure it’s in Developer Mode, or restarting Unity.
5. Build and run your project on your device:
- Click Build and Run.
- When prompted to choose a location, create a new “Builds” folder, then Save your project as “[YourName] - VR Room - 1.1”.
You should now be able to test the app on your device, untethered from your computer.
Note: The app is automatically saved onto your device in the “Unknown Sources” section of your App Library. You may need to follow steps to allow apps from unknown sources in order to locate your app.
Troubleshooting tips:
- If the app runs, but it does not take up the entire field of view, it is likely a problem with plugins.
- If the app runs, but the entire scene moves along with you, it is likely because you have the Device Simulator active or you do not have the Input Action Manager configured.
7. Test on other OpenXR compatible devices
If you are using a different OpenXR-compatible device, such as the Valve Index or HTC Vive, follow this step to test on your device. Otherwise, skip this step.
In order to test the project on one of these devices,, you need to install the OpenXR plugin and enable the feature set for your specific device.
1. Configure the OpenXR Plugin for your device:
- Follow the instructions on the OpenXR Manual page to install the OpenXR Plugin, enable it in XR Plugin Management, and configure it for your particular device.
2. Connect your device through the SteamVR app:
- Make sure your device is plugged into your computer using a compatible cable.
- Make sure the SteamVR app is running and has successfully recognized your device.
- If you don’t have SteamVR on your computer yet, review the steps in the VR Software Setup tutorial.
3. Test the project on your device:
- Make sure the VR Device Simulator in your scene is disabled. If it is enabled, your head tracking will not work.
- Select Play in the Unity Editor and put on your headset.
- You should now be able to quickly test your app on your HTC Vive or Valve Index through SteamVR.
You should now be able to quickly test your app on your HTC Vive or Valve Index through SteamVR.
8. Recap
New Features:
- Project is set up
- Scene set up with Room
- Tested with Device Simulator
- Run on device
New Concepts & Skills:
- Pipelines for different types of hardware
- Packages required for VR Development
- VR scene vs typical Unity scene
- Rig Simulator vs on-Device testing
- Tethered vs Standalone testing
Next Lesson:
- VR Locomotion
9. Extension Activities
If you want to further develop your skills, explore new concepts, and improve your project, check out some of the extension activities below. Each one is tagged as [Easy], [Medium], [Difficult], or [Expert] to indicate the level of challenge and will also include a [Requires Programming] tag if relevant.
These are completely optional, but highly encouraged if you want to take your VR development to the next level.
1. Play with Directional Lighting [Easy]
Experiment with the directional light to achieve the shadow and color you want in your room:
- Try rotating the Directional Light about the X and Y axes
- Try adjusting the color of the Directional Light to match the color of light to the time of day
2. Device Simulator Practice [Medium]
Get comfortable using the basic functions of the device simulator:
- Refer to the instructions in the step above for how to set up and use the device simulator.
- Note: Remember to remove or disable the Simulator before running the app in your device.
3. Add a functioning clock [Expert] [Requires programming]
Add a clock on the wall that either (a) tells the current time for the user in their local timezone, or (b) tells the time you intend it to be your VR room world.
- Find a clock Prefab in the Course Library > Prefabs > Objects > Electronics folder.
- Hint: To access the system’s current time, use the DateTime.now property.