Display character dialogue using raycasting
Tutorial
·
Beginner
·
+0XP
·
30 mins
·
(481)
Unity Technologies
In this tutorial, you’ll add a friendly NPC to your game to share a message with the player character.
By the end this this tutorial, you’ll be able to do the following:
- Create a UI display for NPC dialogue.
- Raycast to identify a specific GameObject.
- Display the dialogue UI when the raycast is successful.
1. Overview
You’ve almost finished creating your game’s basic functionality. The final stage is to add a friendly non-player character (NPC) to your game to share a message with the player character.
By the end this this tutorial, you’ll be able to do the following:
- Create a UI display for NPC dialogue.
- Raycast to identify a specific GameObject.
- Display the dialogue UI when the raycast is successful.
Working on your own project?
This tutorial is part of Beginner 2D: Adventure Game and we recommend completing the full course, but you might find the tutorial useful if you want to learn how to implement basic NPC dialogue messages using raycasting.
Note: For the purposes of this tutorial, we chose to use the Ruby’s Adventure asset set, and the file paths used in instructions will reflect this. If you chose another asset set, the file names will be the same, but in your corresponding theme folder.
2. Set up a new NPC
You’ve already configured the player character and enemy for your game, so this first stage of the tutorial will consolidate what you already know. This NPC also has a simple looping animation of three frames, which you can set up in a quick way.
To set up the NPC character for your game, follow these instructions:
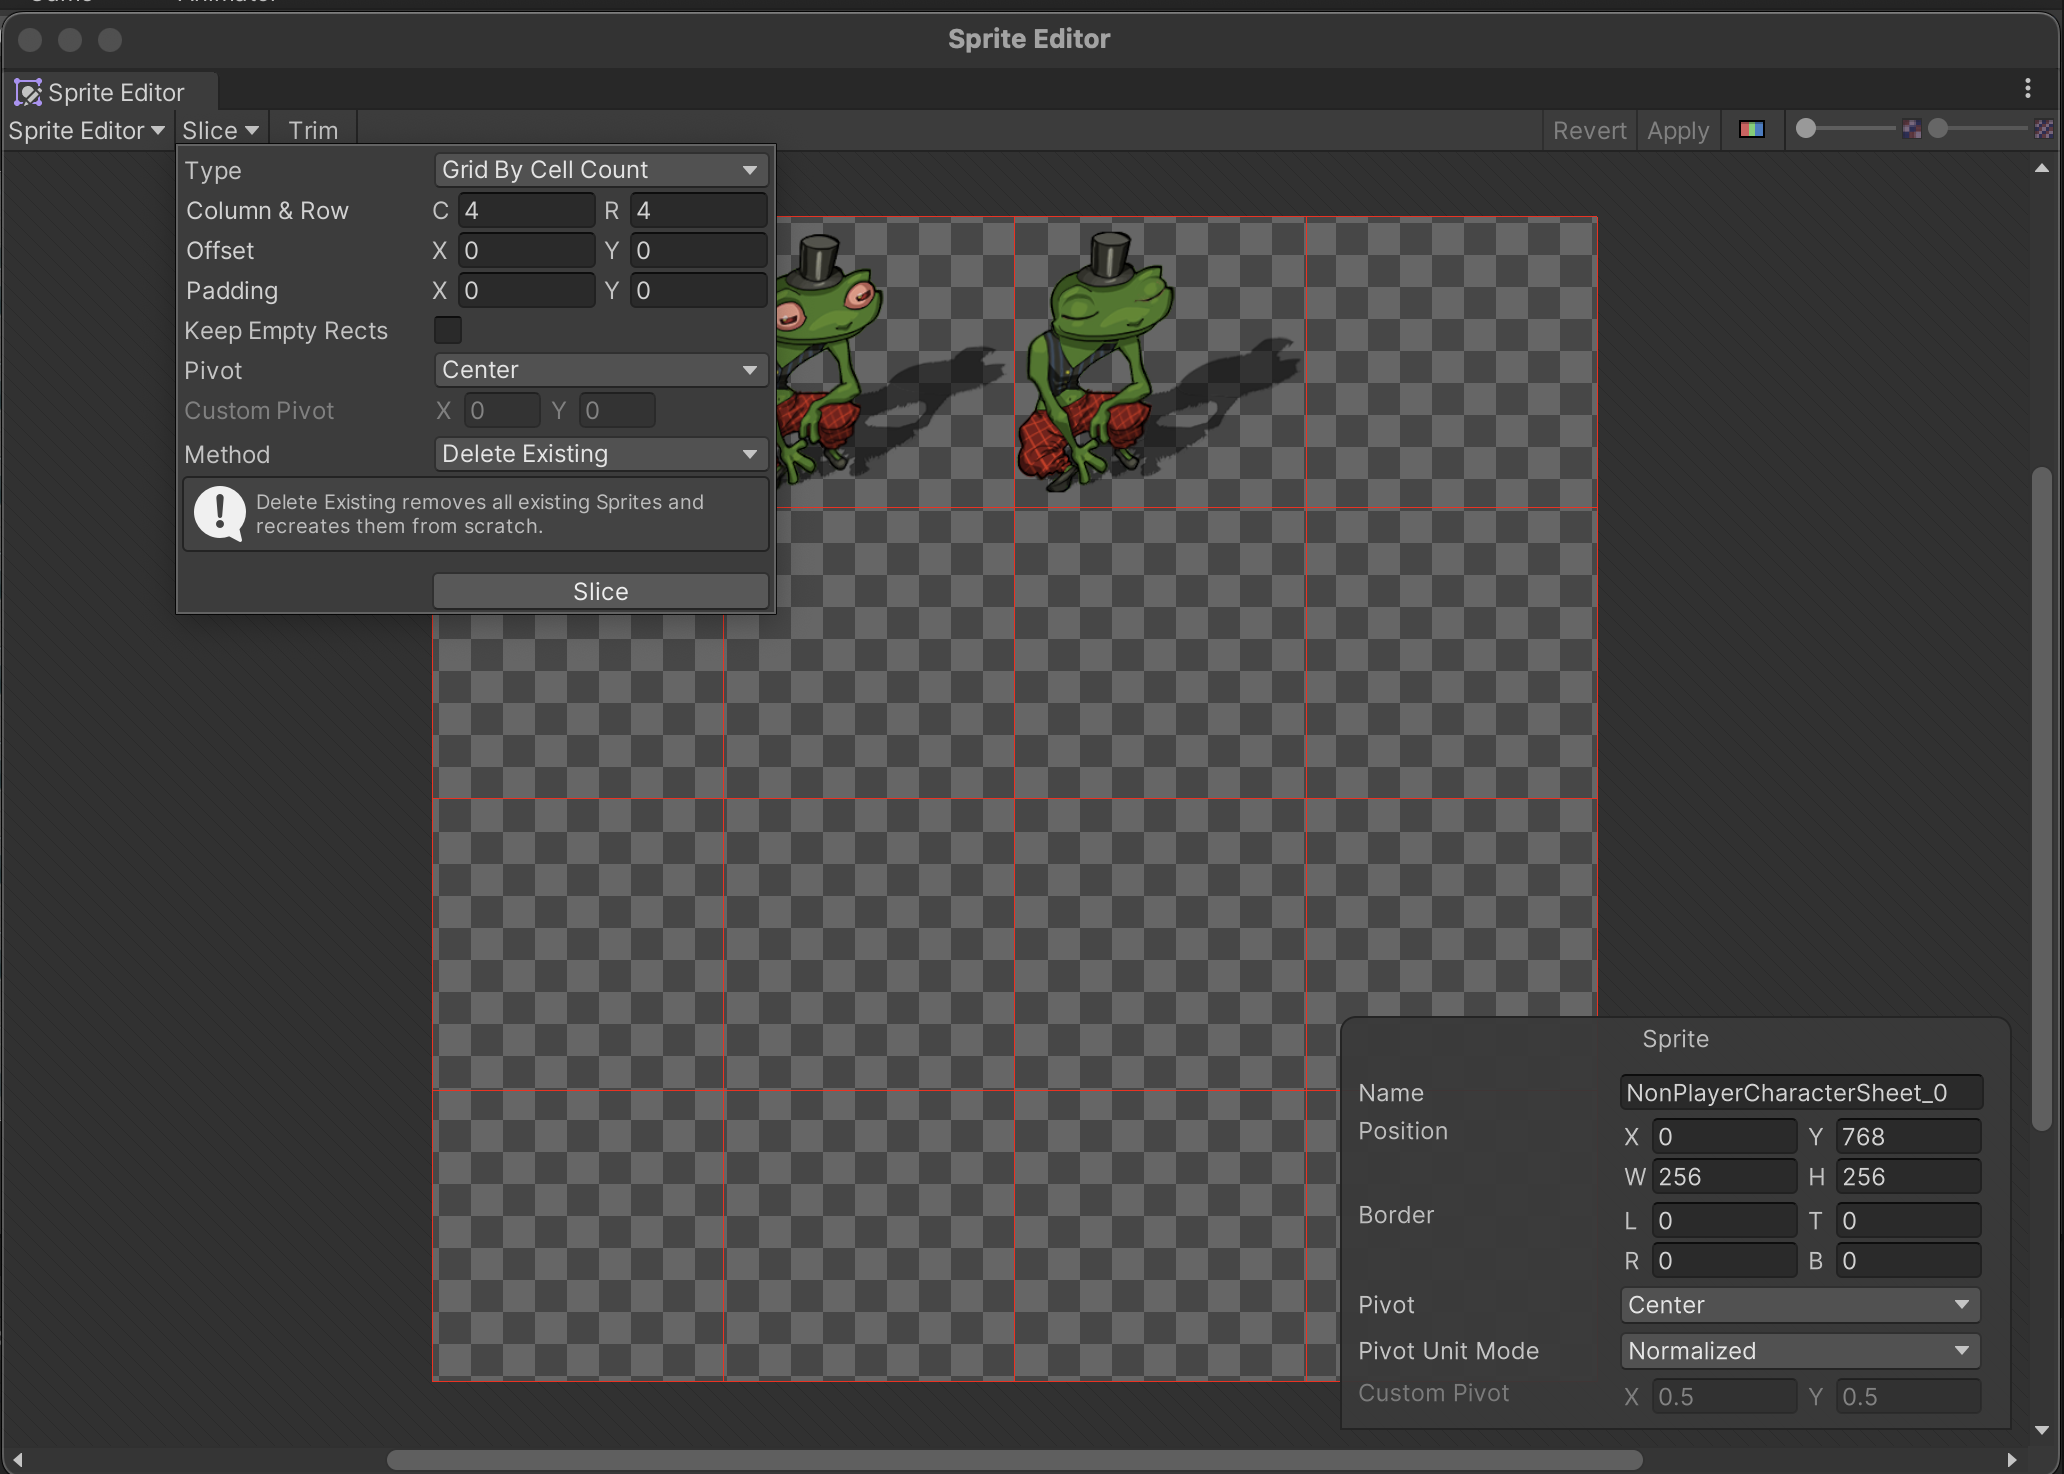
1. In the Project window, navigate to Art > [Your Chosen Project] > Characters. Select the NonPlayerCharacterSheet sprite.
2. From the Inspector window, open the Sprite Editor window and slice the sprite atlas in a 4 by 4 grid.
If you need to recap this process, review the guidance in Design and paint your game tilemap.
3. In the Project window, select the three sprites for the NPC animation, then drag and release them over the Hierarchy window.
This process will automatically create an Animator Controller set up with an animation clip using the sprites that you have chosen. This isn’t suitable for complex animations, but it can be a great way to set up basic animations quickly.
4. In the Create New Animation window, name the animation “NPC” and save it in a new folder inside your Animation > [Your Chosen Project] folder.
5. Rename the new GameObject in the scene “NPC”.
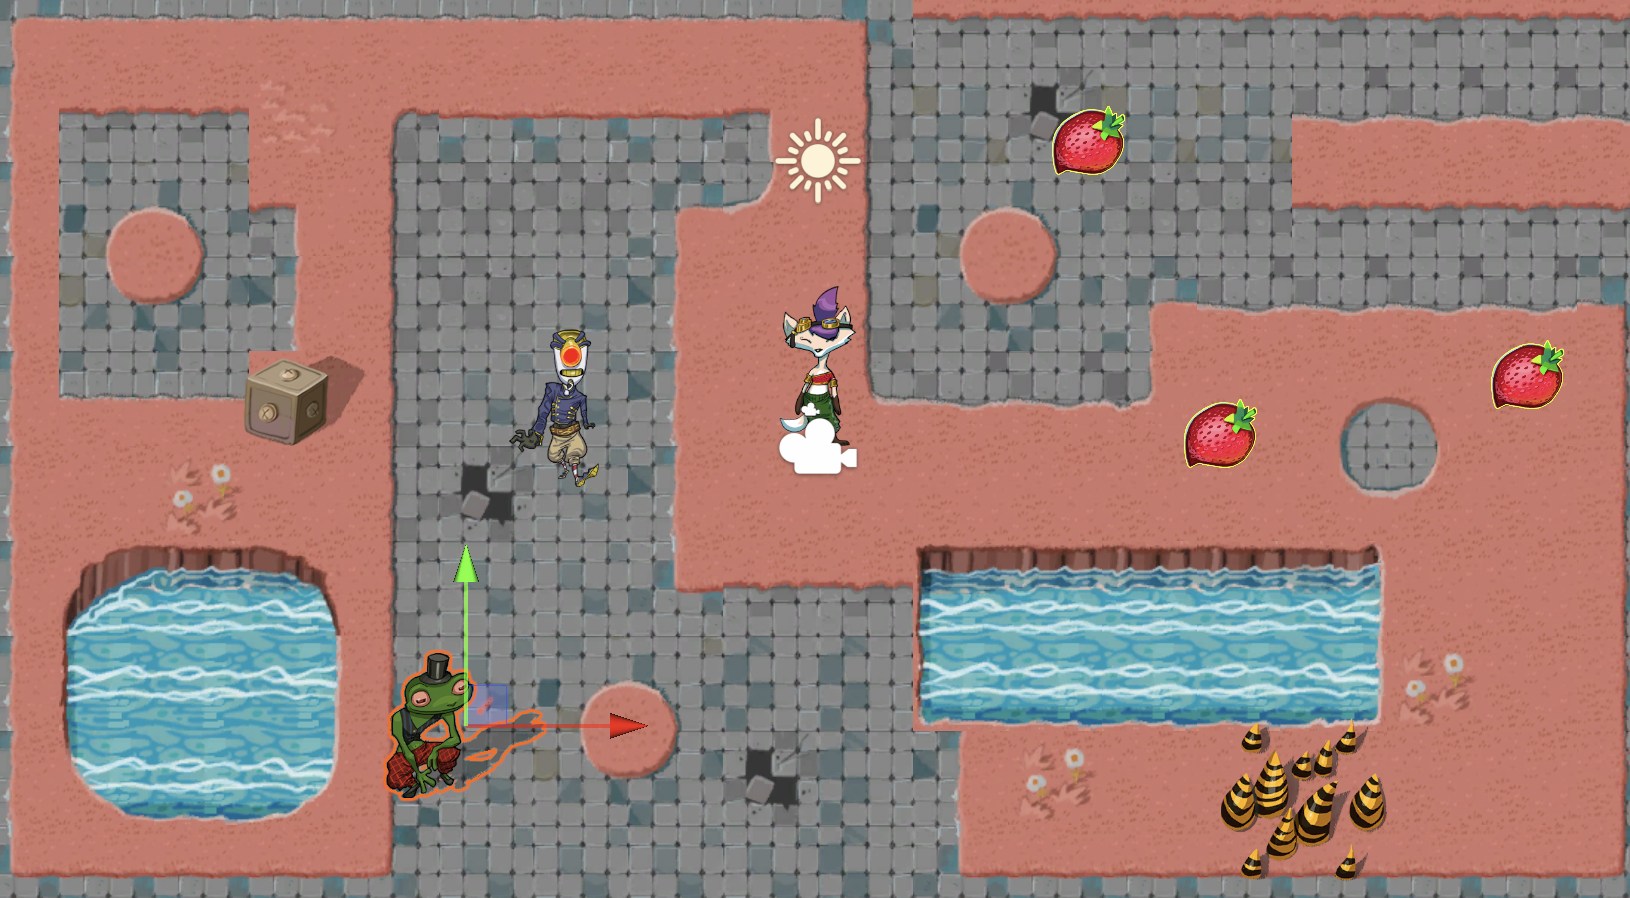
6. Now that the NPC sprite is visible in the Scene view, position it in the location where you want the character to stand to give the player their instruction.
You can also adjust the Pixels Per Unit value for the NPC sprite sheet if you want to.
7. Add a Box Collider 2D GameObject to the NPC GameObject and scale it to cover the bottom half of the sprite as you did for the player and enemy characters.
8. Create a new layer for the NPC and set the NPC GameObject to that layer.
9. Turn the NPC GameObject into a prefab.
10. Test the game and make sure that the animations and collisions work as expected.
Tip: If you find the default animation speed too fast, adjust the animation clip sample rate in the Animation window as you did for the animations that you configured yourself.
3. Raycast to the the NPC
The NPC is going to tell the player that they need to fix the robot enemies, but if that text is constantly displayed on screen that’s going to take up space that could be better used. The NPC’s dialogue should only display when the player character is within a certain range, so you need to determine when the player character is close and facing the NPC.
You could use a trigger, but this means that the player character could trigger the dialogue without facing the NPC, which can feel clunky in practice. Instead, you’re going to use a particular physics system feature called raycasting.
Raycasting is the action of casting a ray (straight line) in the scene and checking whether that ray intersects with a collider. A ray has a starting point, direction, and length. You cast a ray because the check is made from the starting point along the ray until its end. In this situation a short ray makes sense, so it doesn’t seem like the NPC is shouting over to the player character.
To set up the raycast check, follow these instructions:
1. Open the PlayerController script in your IDE.
2. At the top of the class, declare a new public input action, as you did for the projectile launch action:
public InputAction talkAction;3. Save your changes
4. In the Unity Editor, set up an event-based Input Action for the X key or your choice of alternative input, as you did when implementing projectile launch functionality.
5. Back in your PlayerController script, enable the Input Action in the Start function:
talkAction.Enable();6. Create the following function:
void FindFriend()
{
RaycastHit2D hit = Physics2D.Raycast(rigidbody2d.position + Vector2.up * 0.2f,  moveDirection, 1.5f, LayerMask.GetMask("NPC"));
}
Here’s an explanation of this code:
- The RaycastHit2D type variable hit stores the result of a raycast, which is obtained by calling Physics2D.Raycast. There are multiple versions of Physics2D.Raycast; the version used here has four arguments (values you can pass to it).
- The first argument is the starting point for the ray. Here it is an upward offset from the position of the PlayerCharacter GameObject, which will test from the center of the sprite rather than its feet.
- The second argument is the direction that the player character is looking, using moveDirection.
- The third argument is the maximum distance for the ray — 1.5 units here keeps the test within a short distance from the start point, because the characters aren’t shouting.
- The final argument defines a layer mask, which is a way to only check within specified layers. Any layers that are not within the mask are ignored during the intersection test. The NPC layer is the only layer relevant for this test, so it’s the only one in the mask.
7. Underneath the first instruction, add an if statement to execute if the test does find the NPC’s collider with the raycast:
if (hit.collider != null)
    {

    }
The conditional syntax here checks whether the variable that contains the raycast data is not null (empty).
8. Within the nested if statement code block, add the following instruction to print the GameObject found in the Console window:
if (hit.collider != null)
{
     Debug.Log("Raycast has hit the object " + hit.collider.gameObject);
}
9. Back in the Update function, add the instruction to call FindFriend when the correct input is provided:
if (Input.GetKeyDown(KeyCode.X))
        {
           FindFriend();
        }
10. Save your changes, then return to the Unity Editor and test your game to confirm that the raycast works.
4. Create the dialogue UI
Next you’re going to create the UI window to display the NPC dialogue to the player. If you need more support to complete this step, refer back to Create a health display with UI Toolkit for detailed guidance.
To set up the NPC dialogue UI, follow these instructions:
1. Create a new UI Document asset and call it “NPCDialogue”.
2. Add a VisualElement and name it “Background”.
3. In the Inspector window, set the Image property type to Sprite.
4. Select the Image property picker (circle icon), then search and choose the correct UIDialogueBox sprite for your asset pack.
5. Set the element’s Height and Width to 100% so that it fills the entire canvas.
6. In the Library window, find the Label element. Create a new Label child element of the Background element.
7. Set the Label element’s Height and Width to 100%
8. In the Inspector window, use the foldout (triangle) to expand the Margin & Padding section. In the Margin box enter “0” and in the Padding box enter “25px”, to set the same value for all sides.
Feel free to experiment with bigger or smaller values to find one that looks right to you.

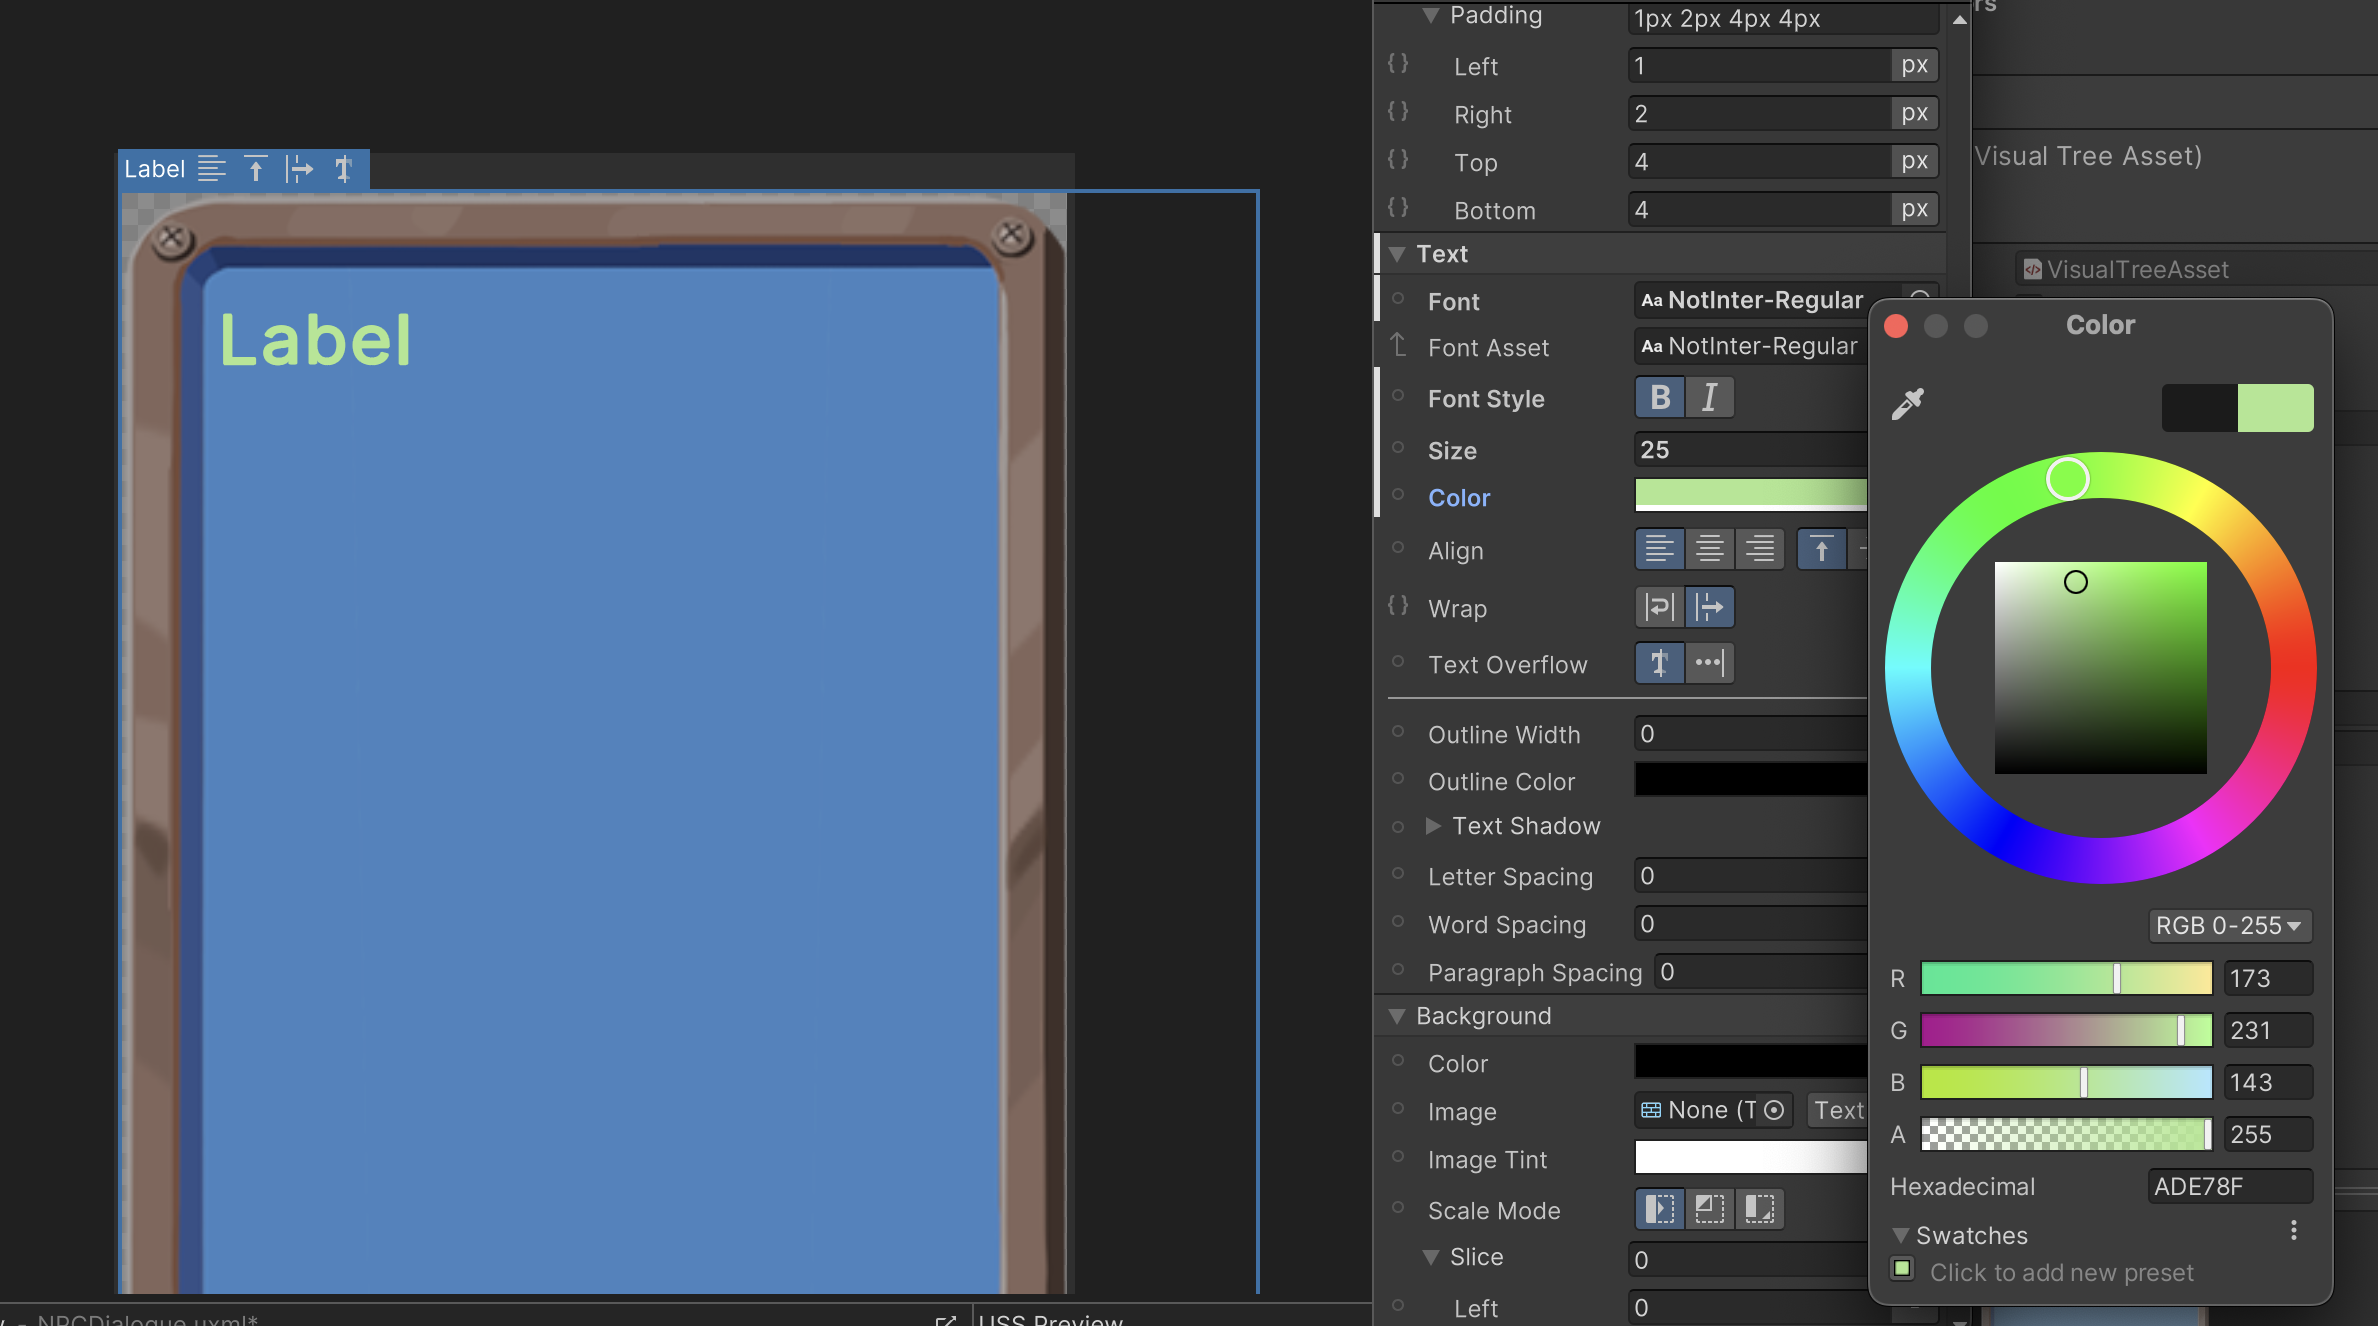
9. In the Inspector window, use the foldout (triangle) to expand the Text section. Set the Font, Size, and Color properties as you like.
10. Still in the Text section, set the Wrap property to normal.
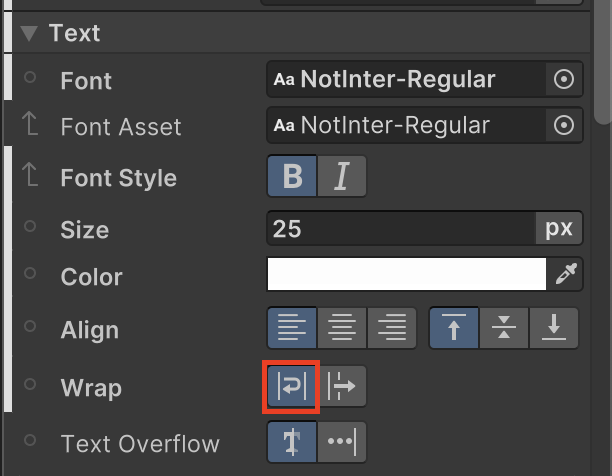
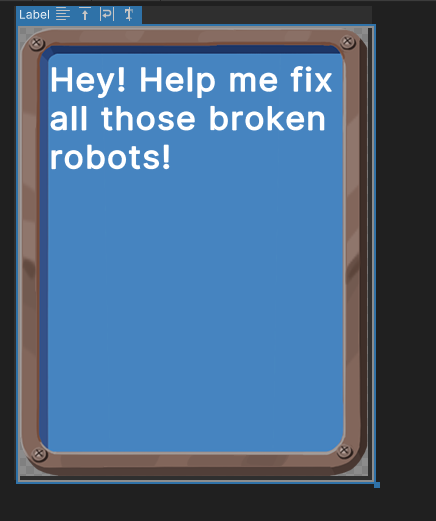
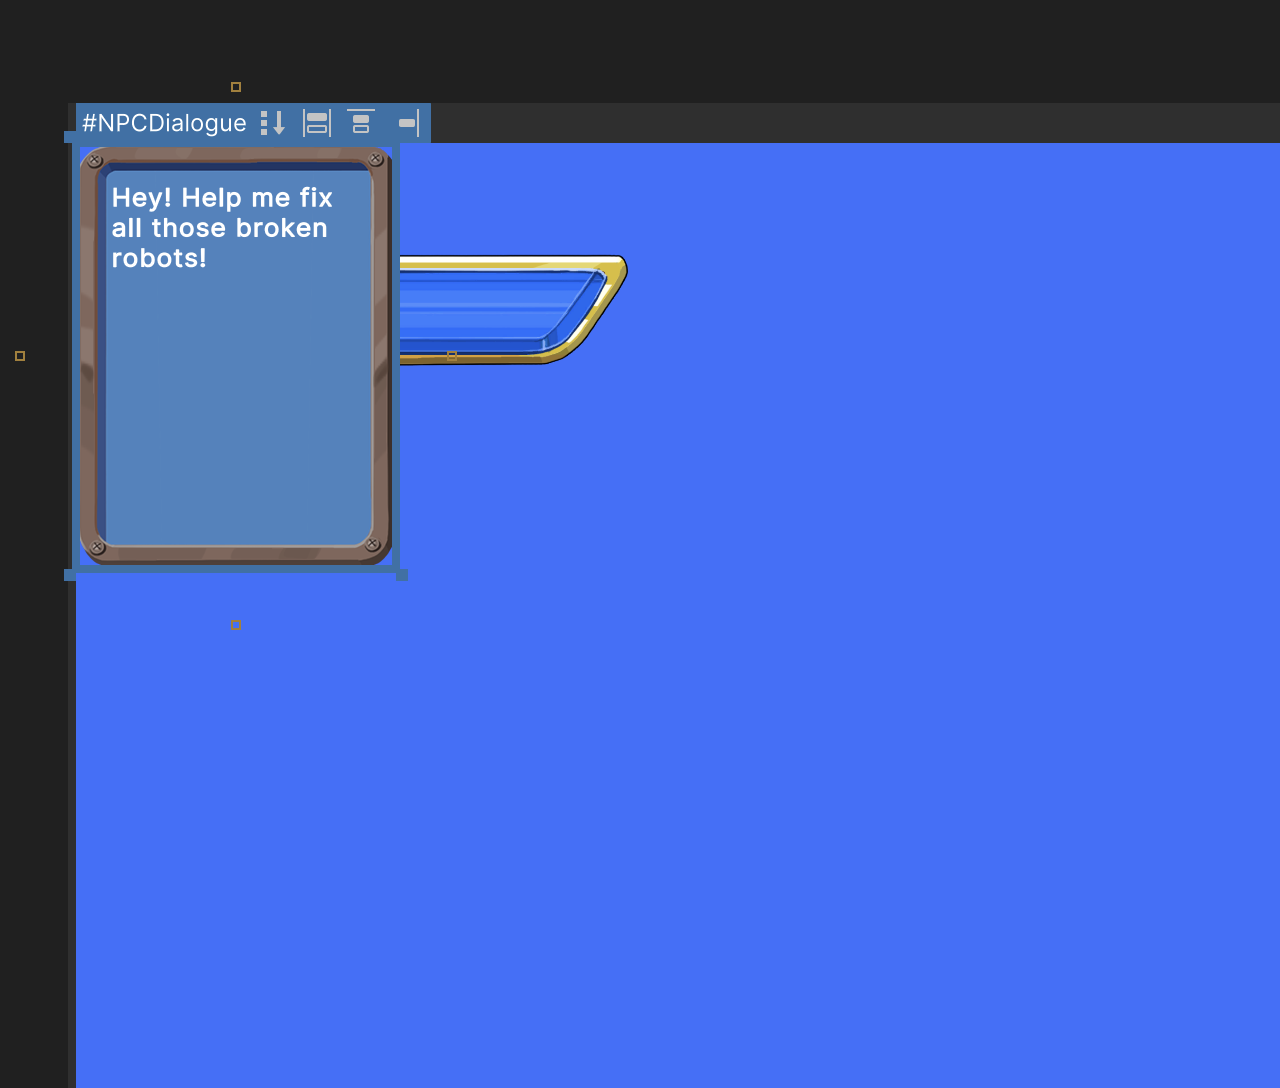
11. Use the foldout (triangle) to expand the Attributes section, the first section after the header in the Inspector window. In the Text box, enter what you want the NPC to say to the player character.
If you want to use rich text here, refer to the rich text styling guidance and list of supported tags in the Manual.
12. Save your changes. Your dialogue UI panel should look something like this:
5. Update the GameUI asset
Follow these instructions to link the dialogue window to the rest of the game UI:
1. Open the GameUI asset in the UI Builder window.
2. In the Library window, select the Project tab. Use the foldout (triangle) to expand the Assets foldout. You’ll find the two UI Document assets that you’ve created listed.
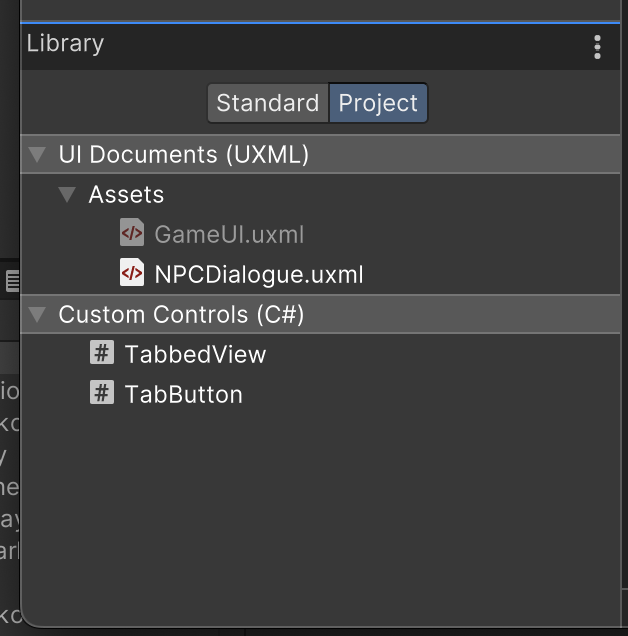
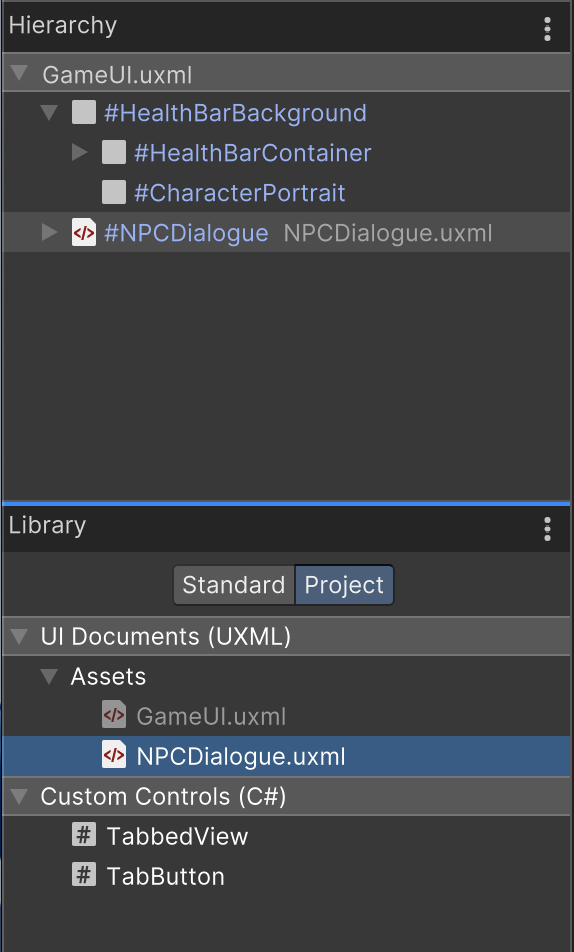
3. Drag and drop the NPCDialogue asset into the Hierarchy window — this instantiates the UI Document, like a prefab can instantiate a GameObject.
Note: The instance of the NPCDialogue asset in the Hierarchy window has a different icon.
Adding the additional UI here means that you can modify the individual asset you have created and the instance in the GameUI will reflect those changes. If you added multiple dialogue windows in your UI, you would then have to change the source asset once to update all instances.
4. Check that you still have NPCDialogue selected. In the Inspector window, use the foldout (triangle) to expand the Position section. Set the Position property to Absolute.
The UI window is in the center of the Viewport window (and so the player’s screen) and is stretched all the way across it. The positioning and size of the UI window are laid out this way because the UI instance is organized in the automatic layout system of UIElements. This default configuration is to support people making structured user interfaces, but it’s not what you need for this game.
5. Set the remaining property values in the Position section as follows:
- Left to 10%
- Top to 70%
- Right to 10%
- Bottom to 0%
If you want to adjust the exact positioning of the dialogue window on the screen, you can adjust the position values.
Important: Remember to set your Canvas to match the Game view so the Viewport window reflects the positioning that players will encounter in the game.
6. Update the UIHandler script
Now that you’ve created the UI for the dialogue, you need to update your scripts to ensure that it is displayed for a short amount of time after a raycast that finds the NPC’s collider.
To update the UIHandler script, follow these instructions:
1. Open the UIHandler script in your IDE.
2. At the top of the UI Handler class, declare the following three variables:
public float displayTime = 4.0f;
private VisualElement m_NonPlayerDialogue;
private float m_TimerDisplay;
Here’s an explanation of this code:
- The float variable displayTime stores the length of time that the dialogue window will be displayed, initialized to 4 but made public so you can adjust this in the Inspector window.
- The private VisualElement variable m_NonPlayerCharacterDialogue will store the reference to the VisualElement when you retrieve it.
- The private float variable timerDisplay is set to the value of displayTime when the dialogue window is instantiated, and will count down the time until the window needs to be hidden.
3. In the Start function, add the following three instructions:
 m_NonPlayerDialogue = uiDocument.rootVisualElement.Q<VisualElement>("NPCDialogue");
 m_NonPlayerDialogue.style.display = DisplayStyle.None;
 m_TimerDisplay = -1.0f;
Here’s an explanation of this code:
- The first instruction stores the reference to the NPCDialogue VisualElement in the m_NonPlayerDialogue variable.
- The second instruction hides the VisualElement when the UIDocument GameObject is instantiated at the start of the game.
- The third instruction sets the m_TimeDisplay countdown to -1. This value is just below zero, and so can be used as a default for not displaying the UI.
4. Save your changes.
Challenge: Add new functions
You now need to write two additional functions for the UIHandler script:
- An Update function that decrements (decreases) the display timer if it is above zero and then resets m_NonPlayerDialogue to DisplayStyle.None when the countdown is over.
- A public function to display the dialogue window when called and set the timer variable to begin the countdown.
The Display property value to display the dialogue UI window is DisplayStyle.Flex. Apply what you have learned so far in this course and try to write these functions yourself before you read on to review the solution.
Check your functions
To check your functions for the NPC dialogue window, review these instructions:
1. Create a new Update function:
   private void Update()
   {

   }
2. Add in if statement and code block that decrements the m_TimerDisplay variable by Time.deltaTime if the variable value is greater than zero:
 if (m_TimerDisplay > 0)
       {
           m_TimerDisplay -= Time.deltaTime;
       }
3. Nested within that same code block, add another if statement that hides the dialogue window when the countdown is over:
if (m_TimerDisplay < 0)
   {
       m_NonPlayerDialogue.style.display = DisplayStyle.None;
   }
4. Check the full Update function before you continue:
private void Update()
   {
       if (m_TimerDisplay > 0)
       {
           m_TimerDisplay -= Time.deltaTime;
           if (m_TimerDisplay < 0)
           {
               m_NonPlayerDialogue.style.display = DisplayStyle.None;
           }
       }
   }
5. Create a new public function called DisplayDialogue (or similar):
public void DisplayDialogue()
   {

   }
6. Add instructions to make the UI window visible and set the timer to its full count:
public void DisplayDialogue()
   {
        m_NonPlayerDialogue.style.display = DisplayStyle.Flex;
        m_TimerDisplay = displayTime;
   }
7. Save your changes.
7. Display the dialogue window in the game
The final step to complete is to detect when the raycast finds the NPC and to display the dialogue window when it does.
To implement this functionality, follow these instructions:
1. In the Unity Editor, create a new NonPlayerCharacter script. Open the script in your IDE.
2. Delete the Start and Update functions, then save the script.
The only purpose of this script is to identify the NPC GameObject so the raycast can check for that GameObject specifically,
3. In the Unity Editor, assign the script to the NPC GameObject as a component. Save your changes.
4. Open the PlayerController script in your IDE and go to the FindFriend function. Find your nested if statement that currently prints to the Console window when the raycast finds a GameObject with a collider in the NPC layer.
if (hit.collider != null)
  {
     Debug.Log("Raycast has hit the object " + hit.collider.gameObject);
  }
5. In the code block, delete the current instruction that prints to the Console window.
6. Create a new variable to store a reference to the Non Player Character (Script) component on the NPC GameObject identified by the raycast:
NonPlayerCharacter character = hit.collider.GetComponent<NonPlayerCharacter>();Note: GetComponent is relatively resource-intensive, so avoid calling it every frame. In this situation, GetComponent is only called when the player provides the correct input.
7. Nested in the code block, add an if statement that calls the DisplayDialogue function if the component is found on the GameObject:
if (character != null)
{
UIHandler.instance.DisplayDialogue();
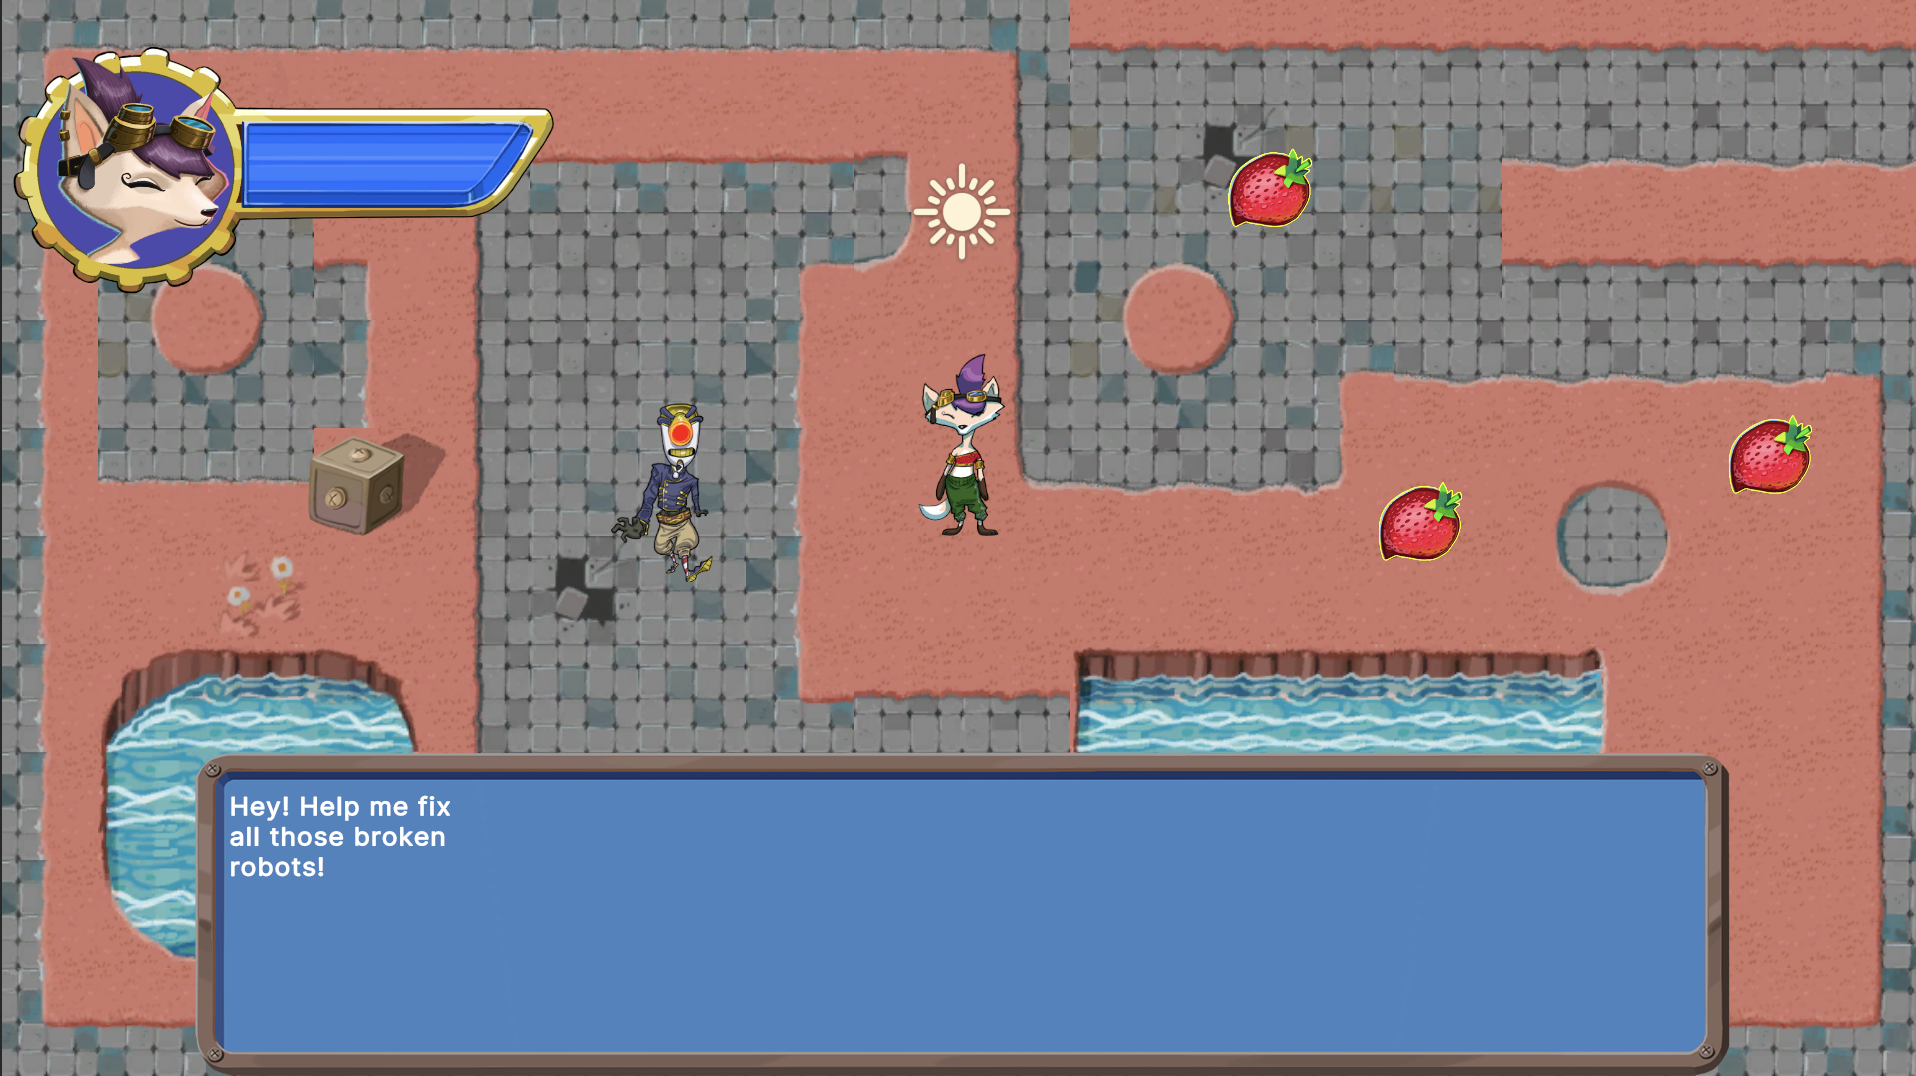
}8. Save your changes, then return to the Unity Editor and test the game. Now the NPC dialogue should display for a short time when the player is close to and facing the NPC and then provides the required input.
8. More to try
If you want to further develop your skills, explore new concepts, or improve your project, check out some of the optional activities below. Each one is tagged as either Easy, Medium, or Difficult, so you can choose the level of challenge.
These activities are entirely optional, so if you’re not interested, no problem — just skip this step. We do recommend attempting at least one of them in order to get the most out of this learning experience. Good luck!
Medium: Add a second NPC with a unique dialogue
One NPC is great, but two are even better! Add a second NPC to your scene and give them something different to say than the first NPC. To accomplish this task, you should do the following:
- Make the text displayed a parameter of the DisplayDialog function. (You’ll need to retrieve the Label child element of the DialogWindow to change it!)
- Make the text a public property of the NonPlayerCharacter script.
By making the text a public property, you can write whatever you like for each individual NPC.
9. Check your scripts
If you’re completing the 2D Beginner course, take a moment to check that your scripts are correct before continuing.
PlayerController.cs
Important: If you completed any extension work in your script beyond exposing the variable that controls movement speed, this will not be reflected in the reference script below.
using System.Collections;
using System.Collections.Generic;
using UnityEngine;
using UnityEngine.InputSystem;


public class PlayerController : MonoBehaviour
{
    // Variables related to player character movement
    public InputAction MoveAction;
    Rigidbody2D rigidbody2d;
    Vector2 move;
    public float speed = 3.0f;

    // Variables related to the health system
    public int maxHealth = 5;
    public int health { get { return currentHealth; } }
    int currentHealth;

    // Variables related to temporary invincibility
    public float timeInvincible = 2.0f;
    bool isInvincible;
    float damageCooldown;

    // Variables related to Animation
    Animator animator;
    Vector2 moveDirection = new Vector2(1, 0);

    // // Variables related to Projectile
    public GameObject projectilePrefab;


    // Start is called before the first frame update
    void Start()
    {
        MoveAction.Enable();
        rigidbody2d = GetComponent<Rigidbody2D>();
        currentHealth = maxHealth;
        animator = GetComponent<Animator>();
    }


    // Update is called once per frame
    void Update()
    {
        move = MoveAction.ReadValue<Vector2>();
        //Debug.Log(move);


        if (!Mathf.Approximately(move.x, 0.0f) || !Mathf.Approximately(move.y, 0.0f))
        {
            moveDirection.Set(move.x, move.y);
            moveDirection.Normalize();
        }

        animator.SetFloat("Look X", moveDirection.x);
        animator.SetFloat("Look Y", moveDirection.y);
        animator.SetFloat("Speed", move.magnitude);


        if (isInvincible)
        {
            damageCooldown -= Time.deltaTime;
            if (damageCooldown < 0)
            {
                isInvincible = false;
            }
        }


        if (Input.GetKeyDown(KeyCode.C))
        {
            Launch();
        }


        if (Input.GetKeyDown(KeyCode.X))
        {
           FindFriend();
        }
    }


    // FixedUpdate has the same call rate as the physics system
    void FixedUpdate()
    {
        Vector2 position = (Vector2)rigidbody2d.position + move * speed * Time.deltaTime;
        rigidbody2d.MovePosition(position);
    }


    public void ChangeHealth(int amount)
    {
        if (amount < 0)
        {
            if (isInvincible)
            {
                return;
            }
            isInvincible = true;
            damageCooldown = timeInvincible;
            animator.SetTrigger("Hit");
        }
        currentHealth = Mathf.Clamp(currentHealth + amount, 0, maxHealth);
        UIHandler.instance.SetHealthValue(currentHealth / (float)maxHealth);
    }


    void Launch()
    {
        GameObject projectileObject = Instantiate(projectilePrefab, rigidbody2d.position + Vector2.up * 0.5f, Quaternion.identity);
        Projectile projectile = projectileObject.GetComponent<Projectile>();
        projectile.Launch(moveDirection, 300);
        animator.SetTrigger("Launch");
    }


    void FindFriend()
    {
        RaycastHit2D hit = Physics2D.Raycast(rigidbody2d.position + Vector2.up * 0.2f, moveDirection, 1.5f, LayerMask.GetMask("NPC"));
        if (hit.collider != null)
        {
            NonPlayerCharacter character = hit.collider.GetComponent<NonPlayerCharacter>();
            if (character != null)
            {
                UIHandler.instance.DisplayDialogue();
            }
        }
    }


}
UIHandler.cs
using System.Collections;
using System.Collections.Generic;
using UnityEngine;
using UnityEngine.UIElements;

public class UIHandler : MonoBehaviour
{
   private VisualElement m_Healthbar;
   public static UIHandler instance { get; private set; }

   // UI dialogue window variables
   public float displayTime = 4.0f;
   private VisualElement m_NonPlayerDialogue;
   private float m_TimerDisplay;


   // Awake is called when the script instance is being loaded (in this situation, when the game scene loads)
   private void Awake()
   {
       instance = this;
   }

   // Start is called before the first frame update
   private void Start()
   {
       UIDocument uiDocument = GetComponent<UIDocument>();
       m_Healthbar = uiDocument.rootVisualElement.Q<VisualElement>("HealthBar");
       SetHealthValue(1.0f);


       m_NonPlayerDialogue = uiDocument.rootVisualElement.Q<VisualElement>("NPCDialogue");
       m_NonPlayerDialogue.style.display = DisplayStyle.None;
       m_TimerDisplay = -1.0f;


   }


   private void Update()
   {
       if (m_TimerDisplay > 0)
       {
           m_TimerDisplay -= Time.deltaTime;
           if (m_TimerDisplay < 0)
           {
               m_NonPlayerDialogue.style.display = DisplayStyle.None;
           }


       }
   }


   public void SetHealthValue(float percentage)
   {
       m_Healthbar.style.width = Length.Percent(100 * percentage);
   }


   public void DisplayDialogue()
   {
   m_NonPlayerDialogue.style.display = DisplayStyle.Flex;
   m_TimerDisplay = displayTime;
   }

}
NonPlayerCharacter.cs
using System.Collections;
using System.Collections.Generic;
using UnityEngine;

public class NonPlayerCharacter : MonoBehaviour
{

}
10. Next steps
You’ve created a functional 2D adventure game, but it’s not finished yet. In the next unit, you’ll enhance the overall player experience with a dynamic camera, game audio, and visual effects. You’ll then build your game!