Play animations based on game data
Tutorial
·
Beginner
·
+10XP
·
30 mins
·
(660)
Unity Technologies
In this tutorial, you’ll play specific animations based on the game data, for both the enemy and player character.
By the end of the tutorial, you’ll be able to do the following:
- Create Animator parameters for enemy movement.
- Send parameters to the Animator Controller.
- Pass data from the EnemyController script to the Animator parameters.
1. Overview
Now that you’ve set up the animations for the enemy, you’re ready to play the correct animation for the enemy’s movement direction. You’re also going to review and adjust the animations for the player character, passing the direction controlled by user input to Animator parameters so the player character animations are also correct.
By the end of the tutorial, you’ll be able to do the following:
- Create Animator parameters for enemy movement.
- Send parameters to the Animator Controller.
- Pass data from the EnemyController script to the Animator parameters.
Working on your own project?
This tutorial is part of Beginner 2D: Adventure Game and refers to the game project for that course, but this information may be helpful for any beginner creator who wants to add basic animations for characters in their own game. If you have no previous experience of animation in Unity and are not completing the Beginner 2D course, Creative Core: Animation will guide you through the absolute basics.
Note: For the purposes of this tutorial, we chose to use the Ruby’s Adventure asset set, and the file paths used in instructions will reflect this. If you chose another asset set, the file names will be the same, but in your corresponding theme folder.
2. Create parameters for movement
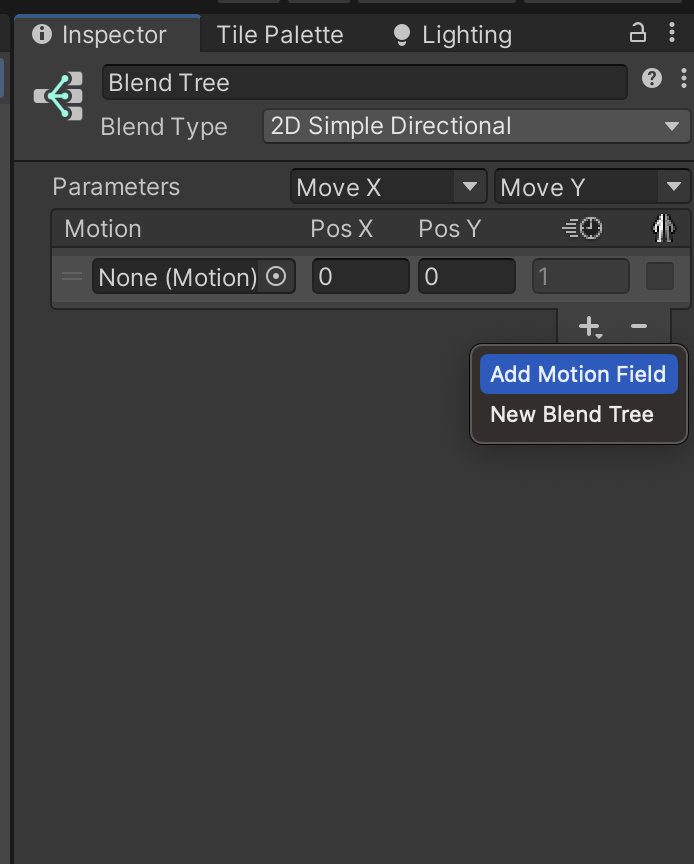
The Blend Tree that you created in the previous tutorial currently contains a parameter named Blend. This parameter was auto-generated by Unity when you created the Blend Tree. Blend Trees need parameters to define when they should switch between different animations. In the previous tutorial, you created animations for the enemy to use when moving along the horizontal axis, and you were provided animations for the enemy to use when moving along the vertical axis. You need parameters to define when these animations should transition to one and other. As a first step, you’ll set up two parameters for horizontal and vertical movement.
To create the parameters, follow these instructions:
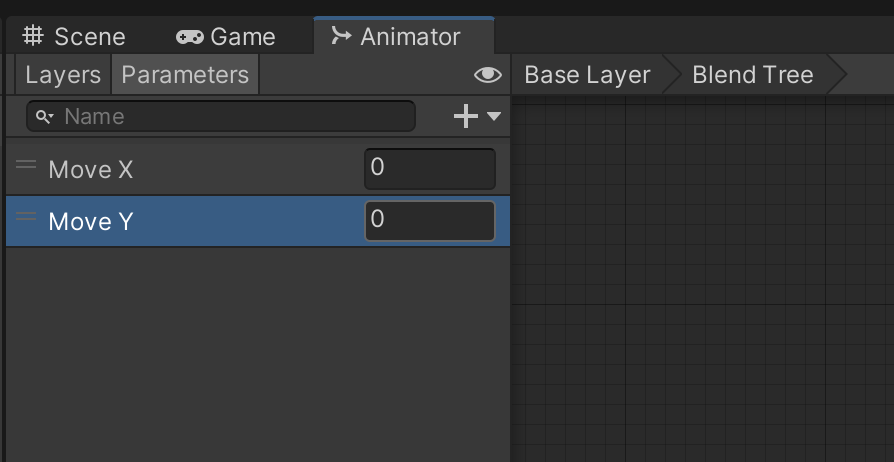
1. Open the Animator window, if you haven’t already done so, then select the Parameters tab.
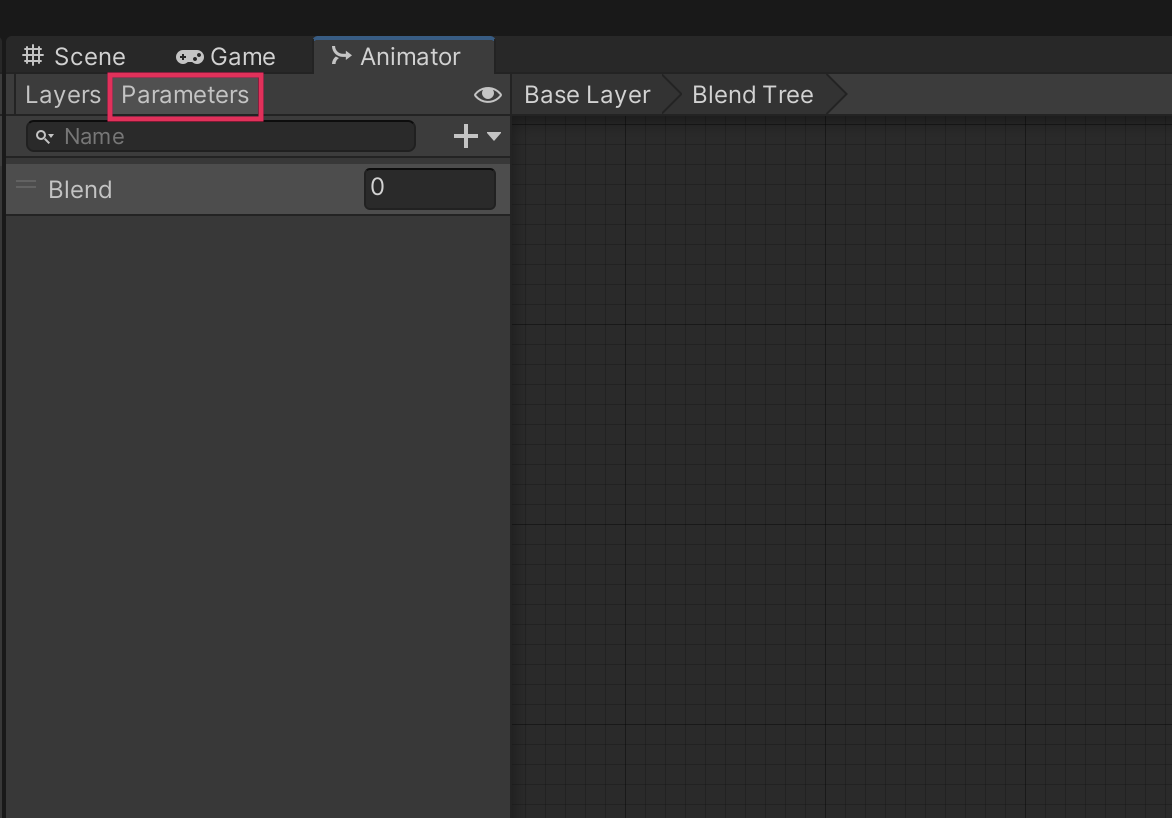
2. Double-click the Blend parameter name, and rename it “Move X”.
3. Select Add (+) > Float. Name the new parameter “Move Y”.
4. In the Inspector window, open the rightmost Parameter dropdown and select Move Y.
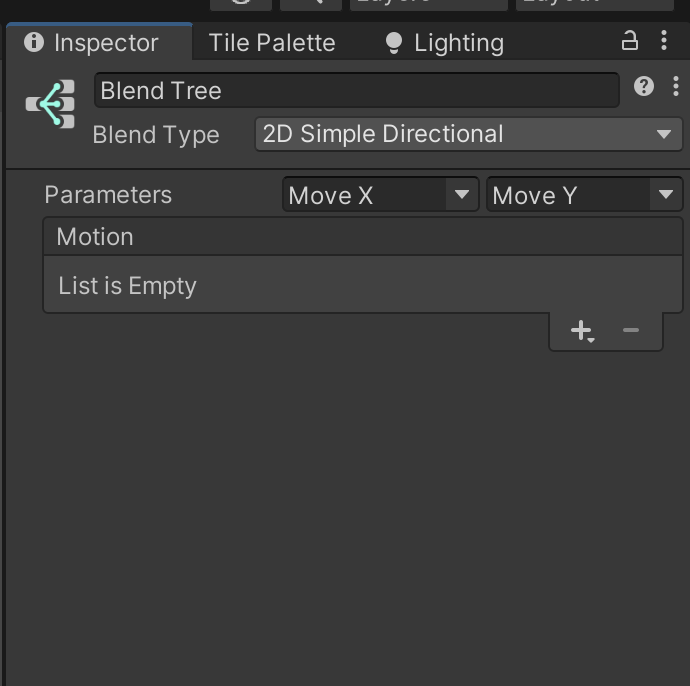
5. Go to the Motion list and select Add (+) > Add Motion Field. Create four Motion Fields, one for each animation.
6. Assign each of the movement animations to one of the Motion Fields (use the Motion picker (⊙) or drag each movement from the Project window and release it over the Motion property).
7. Set the Motion Field Pos X and Pos Y properties to the following values (X,Y):
- EnemyLeft: (-0.5 , 0)
- EnemyRight: (0.5 , 0)
- EnemyUp: (0 , 0.5)
- EnemyDown: (0 , -0.5)
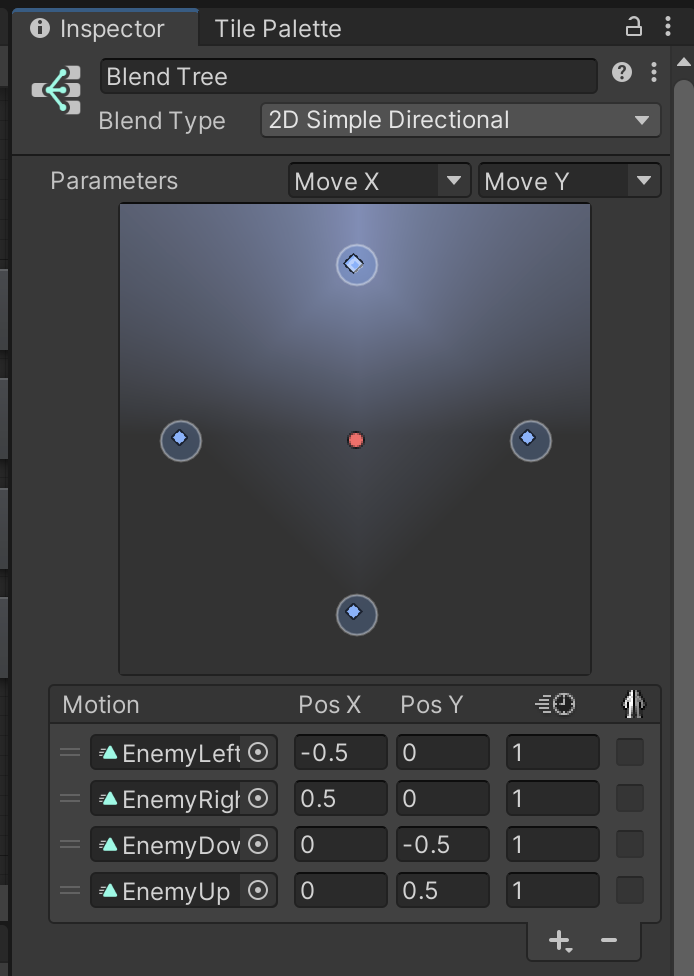
In the visualization, each blue diamond represents one of the animation clips. The red dot is the position given by the value of the two parameters. If you adjust one of the parameter values in the Blend Tree node, the red dot will move to reflect the parameter change.
8. In the Blend Tree preview pane, at the bottom of the Inspector window, select Play. Drag the red circle in the visualization to preview the actual animation that will play when the enemy character moves.
9. End playback and save your changes.
3. Send parameters to the Animator Controller
You’ve created movement parameters for the Blend Tree, but at the moment the Animator Controller has no information about the enemy character’s movement to determine which animation to play.
To send parameters to the Animator Controller, follow these instructions:
1. Open the EnemyController script in your IDE.
2. At the top of the EnemyController class, declare an Animator type variable:
Animator animator;3. In the Start function, retrieve the Animator component and store it in the new variable:
animator = GetComponent<Animator>();4. In the FixedUpdate function, find the if statement that executes when the enemy’s movement is vertical. Add the following two instructions to the code block:
animator.SetFloat("Move X", 0);
animator.SetFloat("Move Y", direction);
Here’s an explanation of your change:
- The Animator.SetFloat function sends float values to the Animator component to affect transitions between animations.
- When the enemy moves vertically, 0 is sent to the horizontal parameter and the direction variable controls whether the enemy moves up or down.
5. In the else block, which executes when the enemy is moving horizontally, add the following two instructions:
animator.SetFloat("Move X", direction);
animator.SetFloat("Move Y", 0);
These instructions are the inverse of the previous ones.
6. Check your script, then save and return to the Unity Editor.
Test the game in Play mode — the enemy character will now play the correct animation based on its direction of travel.
4. Review the PlayerCharacter’s Animator Controller
So far you’ve just worked with animations for the enemy character, but the player character will look a lot better with animations too. It’s a time-consuming process to set up controllers; we’ve pre-created one for the player character, so you can focus on the script changes that you’ll make to send movement parameters to the Animator Controller.
To review the player character Animator Controller, follow these instructions:
1. Open the PlayerCharacter in prefab editing mode and add an Animator component.
2. Navigate to Assets > Animation > [Your Chosen Project]. Assign the Player Animator Controller asset to the Controller property. You can use the selector tool or drag the asset from the Project window and release it over the property.
3. Save your changes to the prefab.
4. With the PlayerCharacter prefab selected, open or go to the Animator window. There is a selection of pre-configured states with transitions in the grid area. This overview representation of the states and their transitions is called a State Machine.
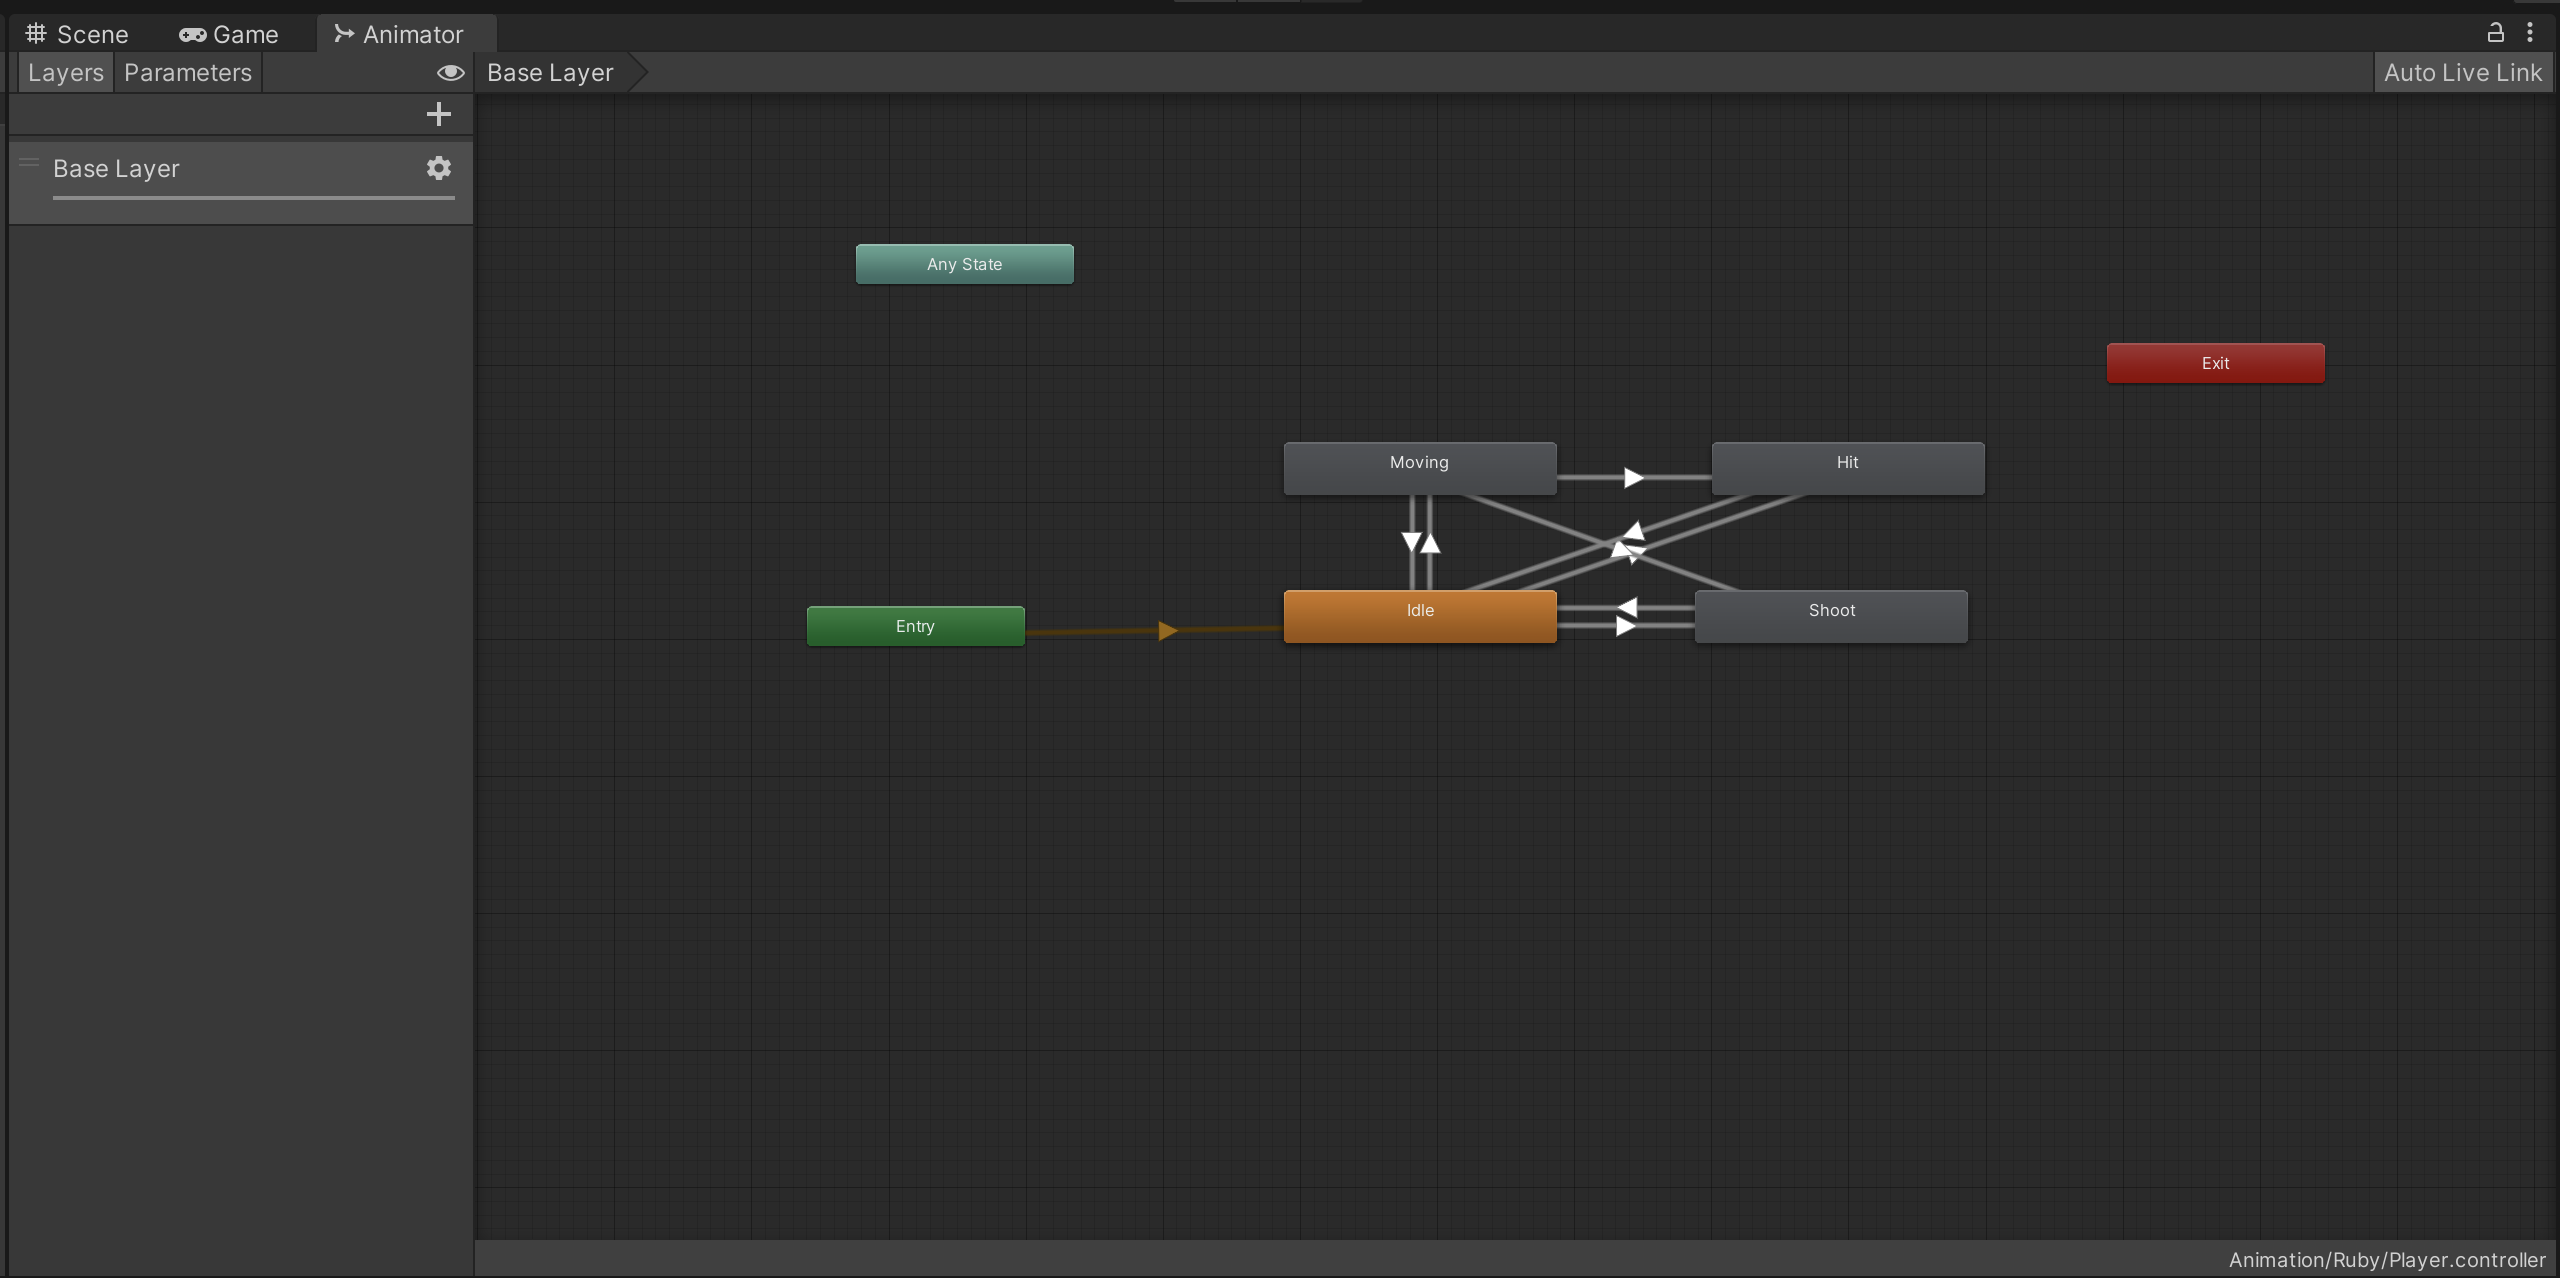
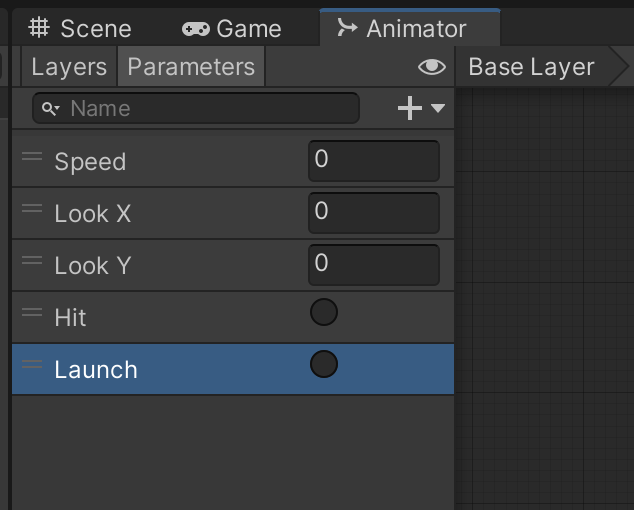
There are four Blend Trees in this State Machine:
- Idle: The animation that plays when the character is not doing anything.
- Moving: The animation that plays when the character moves around the environment.
- Hit: The animation that plays when the character collides with a damage zone or enemy.
- Launch: The animation that plays when the character launches a projectile.
The white arrows define the transition between states. For example, there are transitions between Idle and every other state because any of the transitions can happen from an idle state. But there is no transition between Hit and Launch, because the player can’t launch a projectile when their character is taking damage.
5. Select the transition between Moving and Idle (with the down arrow) and review the Inspector window.
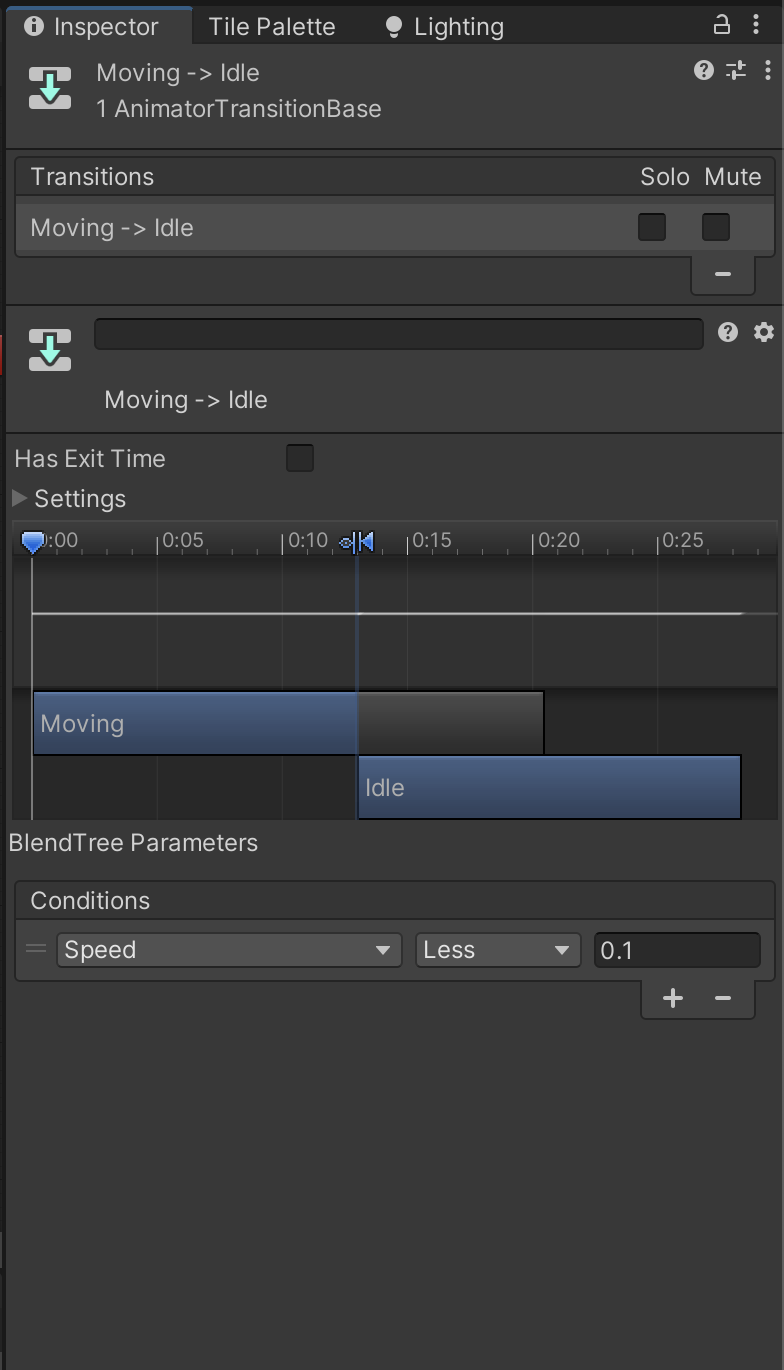
Transition configuration
Most of the transition settings, for example the bars on the graph, are useful for 3D where animation can be blended. For 2D animation, only a few settings are relevant.
HasExitTime
The HasExitTime setting controls whether the state immediately changes to a new state when conditions change, or whether it finishes playing the current animation first. In this case the property is not enabled, because the State Machine should immediately switch to the Idle animation when the character stops moving.
Conditions list
Conditions control when a transition happens. Transitions happen in two different ways:
- If no condition is set, the transition happens at the end of the current animation playthrough. In this case that configuration doesn’t work because the animation is looping, but for animations linked to specific events like the Hit animation this approach is a good fit.
- If a condition is set, the transition will happen when a defined condition based on the parameters is met. For example, here the transition from Moving to Idle happens when the Speed parameter is less than 0.1.
Trigger parameters
There’s one other thing to review in this Animator Controller before you continue: the Trigger parameter type. Hit and Launch are both Trigger parameters, which can be true or false rather than taking float values like the other parameters.
You can use a Trigger parameter when the animation is a one-time event, like taking damage or throwing a projectile. When you use a Trigger parameter as the condition for a transition, the transition happens when the Trigger is activated in a script. In this case, the transition triggers when the player character takes damage.
5. Adjust the PlayerController script
Just as you did for EnemyController, you now need to adjust the PlayerController script so that it sends parameters to the PlayerCharacter GameObject’s Animator Controller. This process will involve a few extra steps, because there are more parameters to set up.
To adjust the script, follow these instructions:
1. Open the PlayerController script in your IDE.
2. At the top of the PlayerController class, declare two variables:
 Animator animator;
 Vector2 moveDirection = new Vector2(1,0);
Here’s an explanation of this code:
- The Animator type variable will store the Animator component reference, just as you did in the EnemyController script.
- The moveDirection variable is important because the player character can stand still, whereas the enemy is always moving. When the character is still, both Move X and Move Y will be 0, so the State Machine needs to be explicitly provided with a direction, which this variable provides.
- The keyword new creates a space in memory to store a new variable instance. The new variable instance may or may not have associated parameters — here, moveDirection is a Vector2 type and takes the x and y value of the direction as parameters.
3. In the Start function, retrieve the Animator component and store it in the new variable:
animator = GetComponent<Animator>();4. Go to the Update function. At the top of the function, below the move variable declaration, add the following if statement:
if(!Mathf.Approximately(move.x, 0.0f) || !Mathf.Approximately(move.y,0.0f))
     {


     }
Here’s an explanation of this code:
- This if statement checks whether move.x or move.y (the current user input movement values, stored in the move variable declared in the Update function) are not equal to 0.
- The condition uses Mathf.Approximately to make the check instead of the equality operator (==) because the way that computers store float values means that there is a tiny loss in precision. This loss means that you should not test for perfect quality, because an operation that should return 0.0f could end up returning 0.0000000001f instead. The bool Approximately takes the imprecision into account, and returns true if the value can be considered equal minus that imprecision.
- || is the C# conditional OR operator, which determines the condition to be met if either side of the operator is true (one and/or the other). In this case, the code block executes if either move.x or move.y is not equal to zero — that is, if the player character is moving.
5. Within the if statement code block, add the following instructions:
 if(!Mathf.Approximately(move.x, 0.0f) || !Mathf.Approximately(move.y,0.0f))
     {
        moveDirection.Set(move.x, move.y);
        moveDirection.Normalize();
     }
Here’s an explanation of this code:
- The first instruction sets the moveDirection variable based on the current movement values. When the character is not moving, the moveDirection remains set to the last movement values provided.
- Vector2 type variables can store direction values as well as positions. The second instruction calls Normalize on moveDirection, which sets its length to 1 but keeps its direction the same.
- For example, a Vector2 set to (3,0) stores a position one unit to the right of the center of the scene, but it also stores the direction right — if you trace an arrow from (0,0) to (3,0) you get an arrow pointing to the right. Normalizing this vector will set it to (1,0), still pointing to the right but with a length of 1. In general, you normalize vectors that store direction because length is not important.
Important: Do not normalize vectors storing positions. Normalizing changes the x and y values, so normalizing position vectors will change the position.
6. Pass data to the Animator parameters
To finish adjusting your script by passing data to the Animator parameters, follow these instructions:
1. In the Update function, below the if statement code block you just added, add the following three instructions:
animator.SetFloat("Look X", moveDirection.x);
animator.SetFloat("Look Y", moveDirection.y);
animator.SetFloat("Speed", move.magnitude);
Here’s an explanation of this code:
- These instructions pass the direction data to the PlayerCharacter GameObject’s Animator component.
- The third instruction passes the length of the move vector to the Speed parameter. This length will be 0 if the player character is stationary, or 1 if the character is moving (because the length is normalized).
2. Check your Update function before you continue:
void Update()
  {
     if(!Mathf.Approximately(move.x, 0.0f) || !Mathf.Approximately(move.y,0.0f))
     {
        moveDirection.Set(move.x, move.y);
        moveDirection.Normalize();
     }

     animator.SetFloat("Look X", moveDirection.x);
     animator.SetFloat("Look Y", moveDirection.y);
     animator.SetFloat("Speed", move.magnitude);

  }
3. In the ChangeHealth function, at the bottom of the if (amount < 0) code block, add the following instruction:
animator.SetTrigger("Hit");This sets the Hit parameter to True if the player character is taking damage, so the correct animation plays.
4. Save your changes and return to the Unity Editor. Test your work — the player character animations will now all play based on its interactions in the game!
7. Check your scripts
If you’re completing the 2D Beginner course, take a moment to check that your scripts are correct before continuing.
PlayerController.cs
Important: If you completed any extension work in your script beyond exposing the variable that controls movement speed, this will not be reflected in the reference script below.
using System.Collections;
using System.Collections.Generic;
using UnityEngine;
using UnityEngine.InputSystem;

public class PlayerController : MonoBehaviour
{
  // Variables related to player character movement
  public InputAction MoveAction;
  Rigidbody2D rigidbody2d;
  Vector2 move;
  public float speed = 3.0f;


  // Variables related to the health system
  public int maxHealth = 5;
  int currentHealth;
  public int health { get { return currentHealth; }}


  // Variables related to temporary invincibility
  public float timeInvincible = 2.0f;
  bool isInvincible;
  float damageCooldown;


  // Variables related to animation
  Animator animator;
  Vector2 moveDirection = new Vector2(1,0);


  // Start is called before the first frame update
  void Start()
  {
     MoveAction.Enable();
     rigidbody2d = GetComponent<Rigidbody2D>();
     animator = GetComponent<Animator>();


     currentHealth = maxHealth;
  }

  // Update is called once per frame
  void Update()
  {
     move = MoveAction.ReadValue<Vector2>();


      if(!Mathf.Approximately(move.x, 0.0f) || !Mathf.Approximately(move.y,0.0f))
        {
           moveDirection.Set(move.x, move.y);
           moveDirection.Normalize();
        }


     animator.SetFloat("Look X", moveDirection.x);
     animator.SetFloat("Look Y", moveDirection.y);
     animator.SetFloat("Speed", move.magnitude);


     if (isInvincible)
       {
           damageCooldown -= Time.deltaTime;
           if (damageCooldown < 0)
               isInvincible = false;
       }
   }

// FixedUpdate has the same call rate as the physics system
  void FixedUpdate()
  {
     Vector2 position = (Vector2)rigidbody2d.position + move * speed * Time.deltaTime;
     rigidbody2d.MovePosition(position);
  }


  public void ChangeHealth (int amount)
  {
     if (amount < 0)
       {
           if (isInvincible)
               return;

           isInvincible = true;
           damageCooldown = timeInvincible;
           animator.SetTrigger("Hit");
       }


     currentHealth = Mathf.Clamp(currentHealth + amount, 0, maxHealth);
     UIHandler.instance.SetHealthValue(currentHealth / (float)maxHealth);
  }

}
EnemyController.cs
using System.Collections;
using System.Collections.Generic;
using UnityEngine;

public class EnemyController : MonoBehaviour
{
   // Public variables
   public float speed;
   public bool vertical;
   public float changeTime = 3.0f;

   // Private variables
   Rigidbody2D rigidbody2d;
   Animator animator;
   float timer;
   int direction = 1;


   // Start is called before the first frame update
   void Start()
   {
       rigidbody2d = GetComponent<Rigidbody2D>();
       animator = GetComponent<Animator>();
       timer = changeTime;

   }

   void Update()
   {
   timer -= Time.deltaTime;


      if (timer < 0)
      {
           direction = -direction;
           timer = changeTime;
      }
   }


  // FixedUpdate has the same call rate as the physics system
  void FixedUpdate()
  {
       Vector2 position = rigidbody2d.position;

       if (vertical)
       {
           position.y = position.y + speed * direction * Time.deltaTime;
           animator.SetFloat("Move X", 0);
           animator.SetFloat("Move Y", direction);
       }
       else
       {
           position.x = position.x + speed * direction * Time.deltaTime;
           animator.SetFloat("Move X", direction);
           animator.SetFloat("Move Y", 0);
       }


       rigidbody2d.MovePosition(position);
  }


   void OnTriggerEnter2D(Collider2D other)
   {
       PlayerController player = other.gameObject.GetComponent<PlayerController>();


       if (player != null)
       {
           player.ChangeHealth(-1);
       }
   }

}8. Next steps
Now the enemy and player character in your game are much more engaging; animations have a significant impact on the overall experience of a game. In the next tutorial, you’ll create something that the player can use to deal with enemies: a projectile.