Implement a dynamic camera
Tutorial
·
Beginner
·
+10XP
·
25 mins
·
(419)
Unity Technologies

The gameplay area for your game is currently the same size as the camera view. In this tutorial you’ll implement a dynamic camera that will follow the player character as they move around the world that you’ve created.
By the end of this tutorial, you’ll be able to do the following:
- Configure a Cinemacine virtual camera to follow the player character.
- Set camera bounds for the game.
- Create a new layer to address a collision error.
1. Overview
So far your game has used a static (fixed) camera. This approach doesn’t stop you from creating engaging gameplay, but it does restrict the game world that players can explore to what’s displayed on screen at the start of the game.
A dynamic camera that follows the player around a gameplay area within set bounds means you can expand the scope of the game environment, including hiding things that players will be able to reveal once they fix enemies and move beyond the initial view.
By the end of this tutorial, you’ll be able to do the following:
- Configure a Cinemacine virtual camera to follow the player character.
- Set camera bounds for the game.
- Create a new layer to address a collision error.
Working on your own project?
This tutorial is part of Beginner 2D: Adventure Game, but you might find it useful if you want to implement a dynamic camera in your own 2D game.
Note: For the purposes of this tutorial, we chose to use the Ruby’s Adventure asset set, and the file paths used in instructions will reflect this. If you chose another asset set, the file names will be the same, but in your corresponding theme folder.
2. Set up Cinemachine for your project
You can use Unity’s Cinemachine package to automatically control the camera in your project without using code, configuring virtual cameras for camera movement and cuts between different views of the scene. The main camera in the scene will copy the settings of the active virtual camera to render your desired visuals for the player. For example, you can use virtual cameras to cut between the player character and NPC character’s faces if your game included an extended conversion.
You’re going to configure a camera to follow a target — the PlayerCharacter GameObject. Cinemachine also includes 2D helper functionality to constrain the camera to bounds that you can set.
To set up Cinemachine for your project, follow these instructions:
1. Install the Cinemachine package via the Package Manager.
2. In the Hierarchy window, right-click and select Cinemachine > 2D Camera. This creates a new GameObject called Virtual Camera.
3. Select the Game tab to preview the Game view.
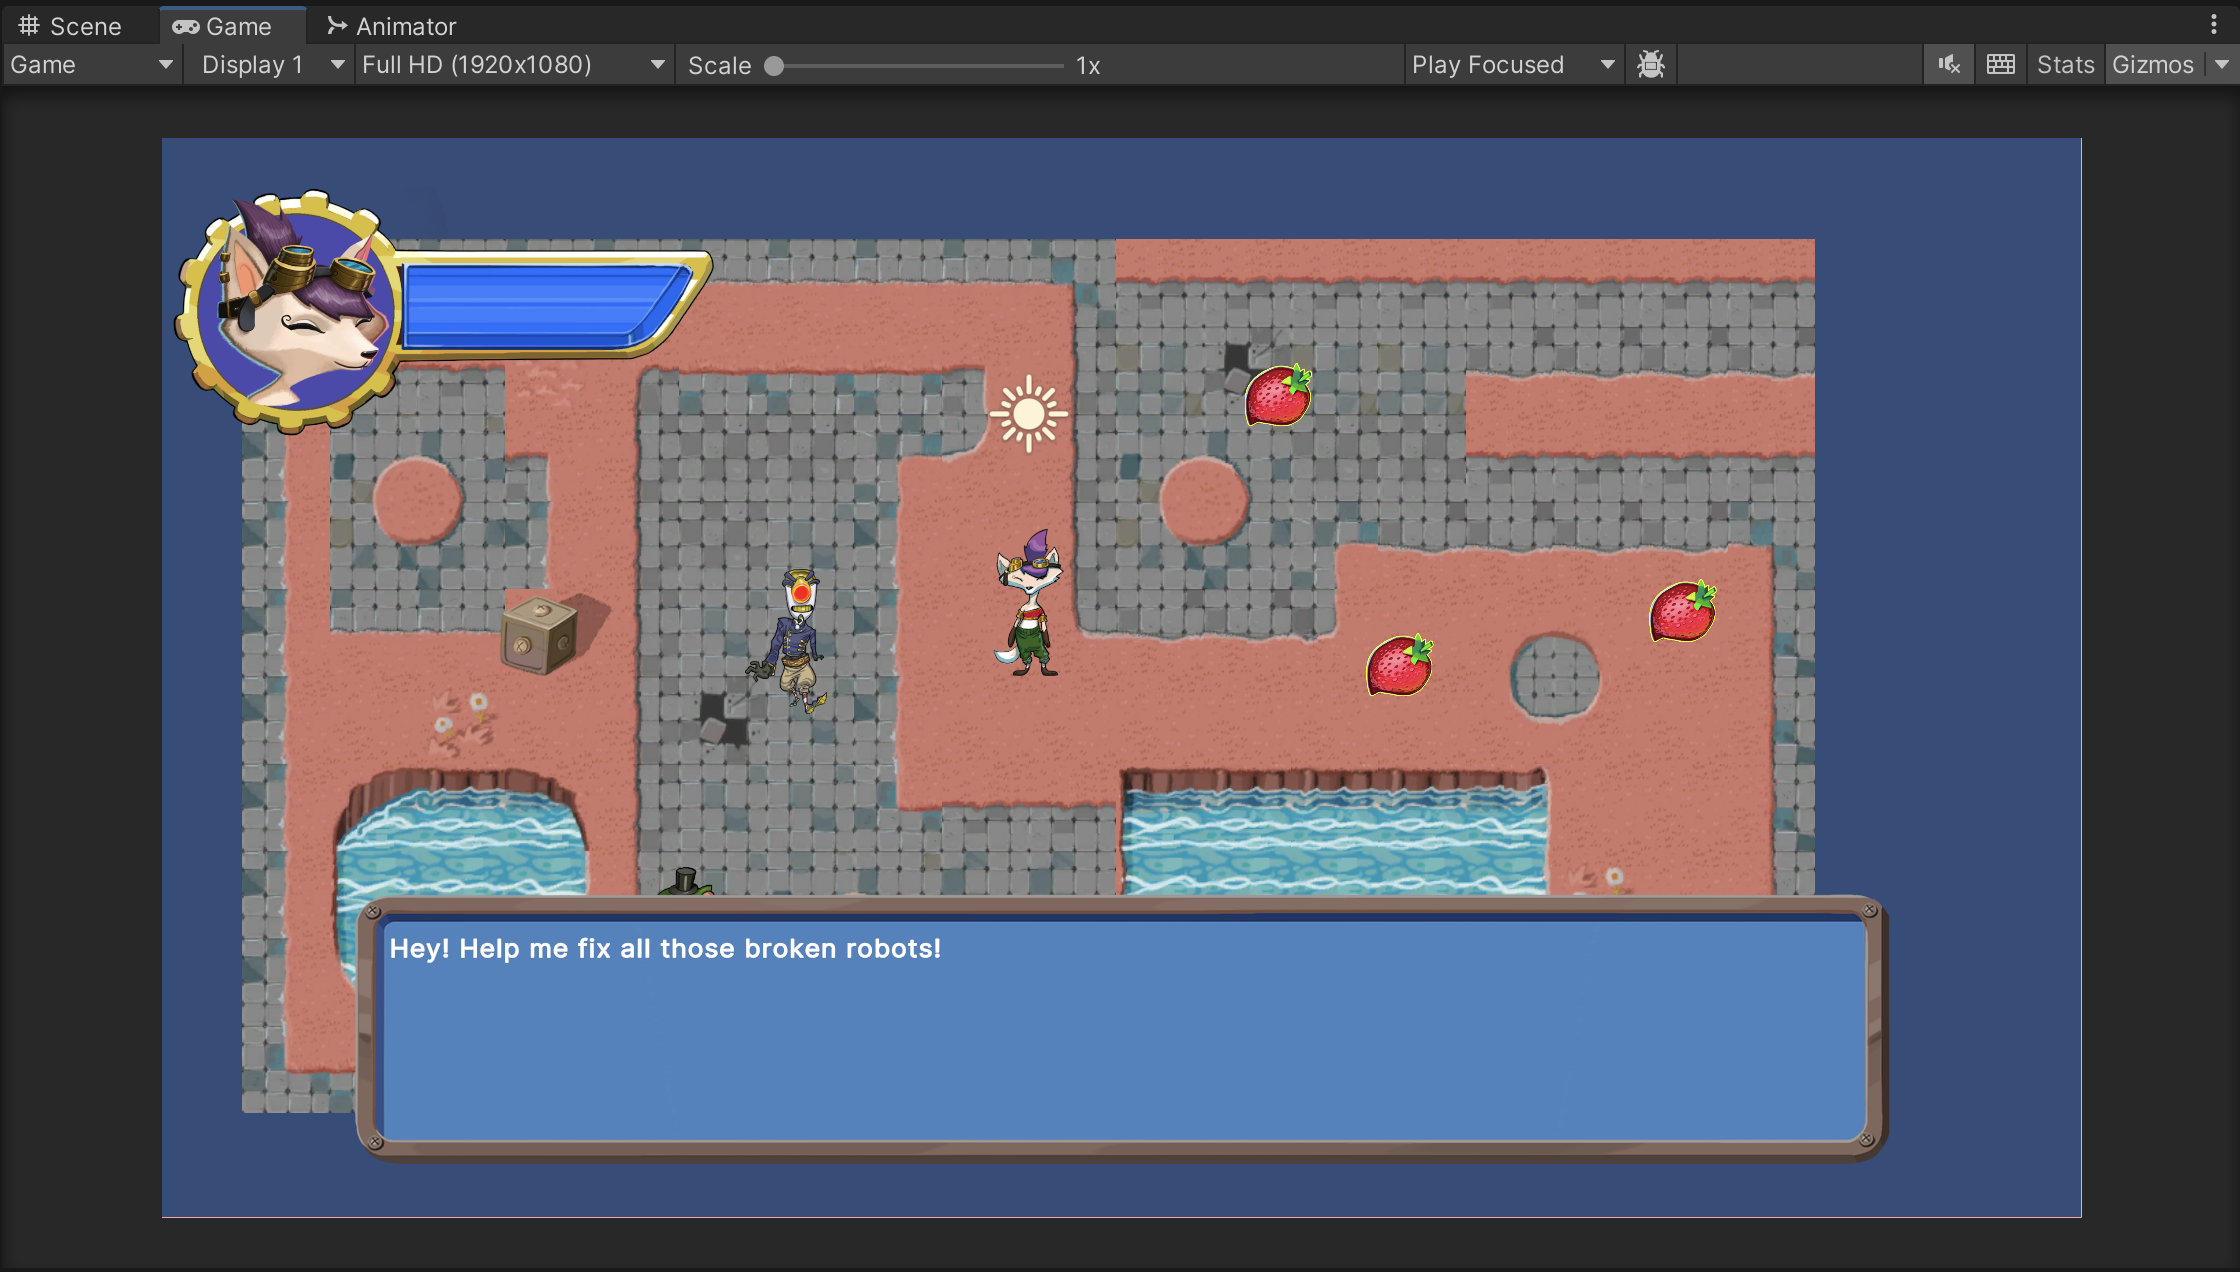
The camera will now seem further away than it previously did when you were testing the game, and you’ll be able to view more of the gameplay environment. If your initial environment was small, the blue background will be visible too. This change is because the Main Camera GameObject is now using the Virtual Camera GameObject’s default settings, which are slightly different.
4. In the Hierarchy window, select the Virtual Camera GameObject.
5. In the Inspector window, go to the CinemachineVirtualCamera component. Set the Lens Ortho Size property to 5.

6. Save your changes.
3. Unity’s camera modes
In 3D applications like Unity, cameras can have two modes:
- Perspective mode: All lines away from the camera converge to a point, making things appear smaller as they get farther away from the camera. This mode is a bit like a straight road disappearing in the distance, its two sides seeming to converge into a single point.
- Orthographic: All parallel lines away from the camera stay parallel; there is no appearance of convergence.
Your game is 2D, so the camera should be in orthographic mode; things in your game shouldn’t get smaller when they’re further away. You used the 2D template to create the Unity project you’re working in, which automatically set the Main Camera GameObject to orthographic mode.
Orthographic size
Orthographic size is how many units the camera fits in half of its height. When you set the Lens Ortho Size property to 5, 10 units of the world are displayed vertically on screen. You can adjust this value to test different options.
You’ve set the height rather than the width because the width changes depending on the resolution the user sets for their game window. Screens can have a lot of resolution ratios, for example 4:3, 16:9, and 16:10. The camera will display more or less of the gameplay area width depending on the screen shape, but it will always show the same vertical height.
4. Configure the Virtual Camera to follow the player character
To configure the Virtual Camera to follow the PlayerCharacter GameObject, follow these instructions:
1. Drag the PlayerCharacter GameObject from the Hierarchy window and assign it to the Follow property in the CinemachineVirtualCamera component.
2. If your Tilemap is small, extend it out to give the player character a larger area to explore.
3. Add water tiles around the edges of the map.
4. Enter Play mode to test the camera functionality. Now the camera should follow the player character around the environment.
You previously configured the water tiles with colliders; the player character won’t be able to move over these tiles, and when you test you’ll be able to see the space off the tilemap beyond them
5. Set camera bounds for the game
You can set camera bounds to make sure that the camera doesn’t display anything beyond the tilemap that you’ve created.
To set bounds for the virtual camera, follow these instructions:
1. In the Hierarchy window, select the Virtual Camera GameObject.
2. In the Inspector window, go to the CinemachineVirtualCamera component and find the Extensions section.

3. Select the Add Extension property dropdown and select CinemachineConfiner2D. The newly added Cinemachine Confiner component will display a warning that a Bounding Shape is required.
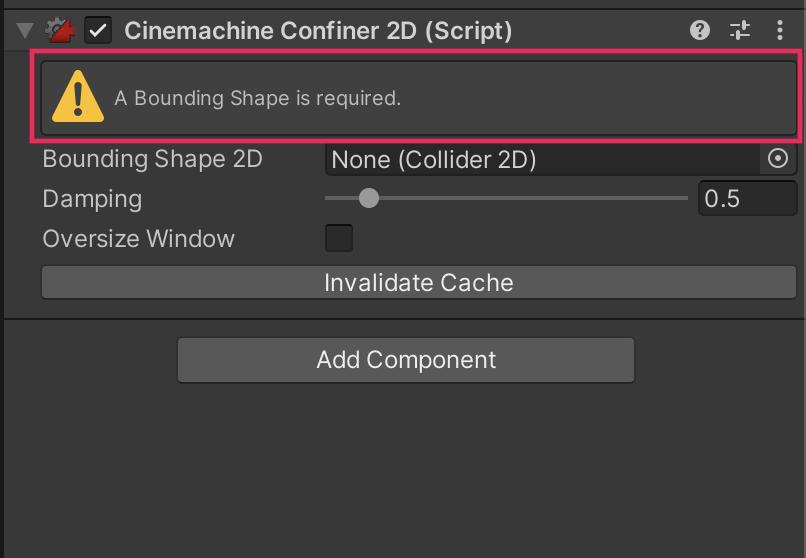
The confiner can use either a Composite Collider 2D or a Polygon Collider 2D component to establish the bounds.
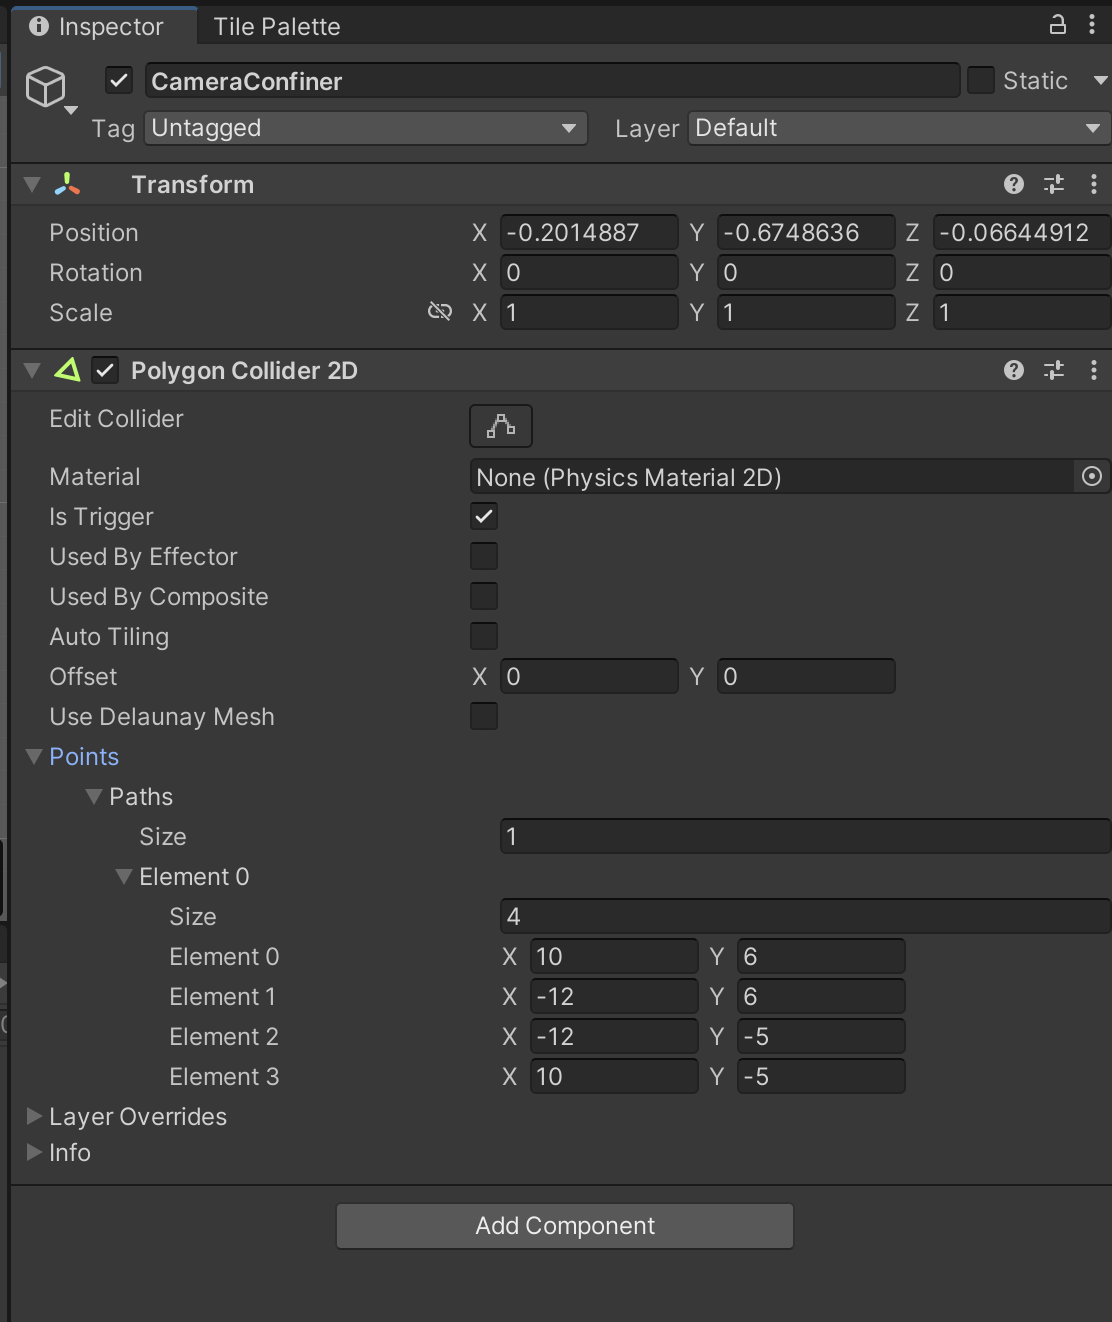
4. In the Hierarchy window, create a new empty GameObject and name it “CameraConfiner”.
5. In the Inspector window, add a Polygon Collider 2D component to the CameraConfiner GameObject.
6. Select Edit Collider. Move the points of the collider to the center of the water tile at the four corners of the gameplay space.
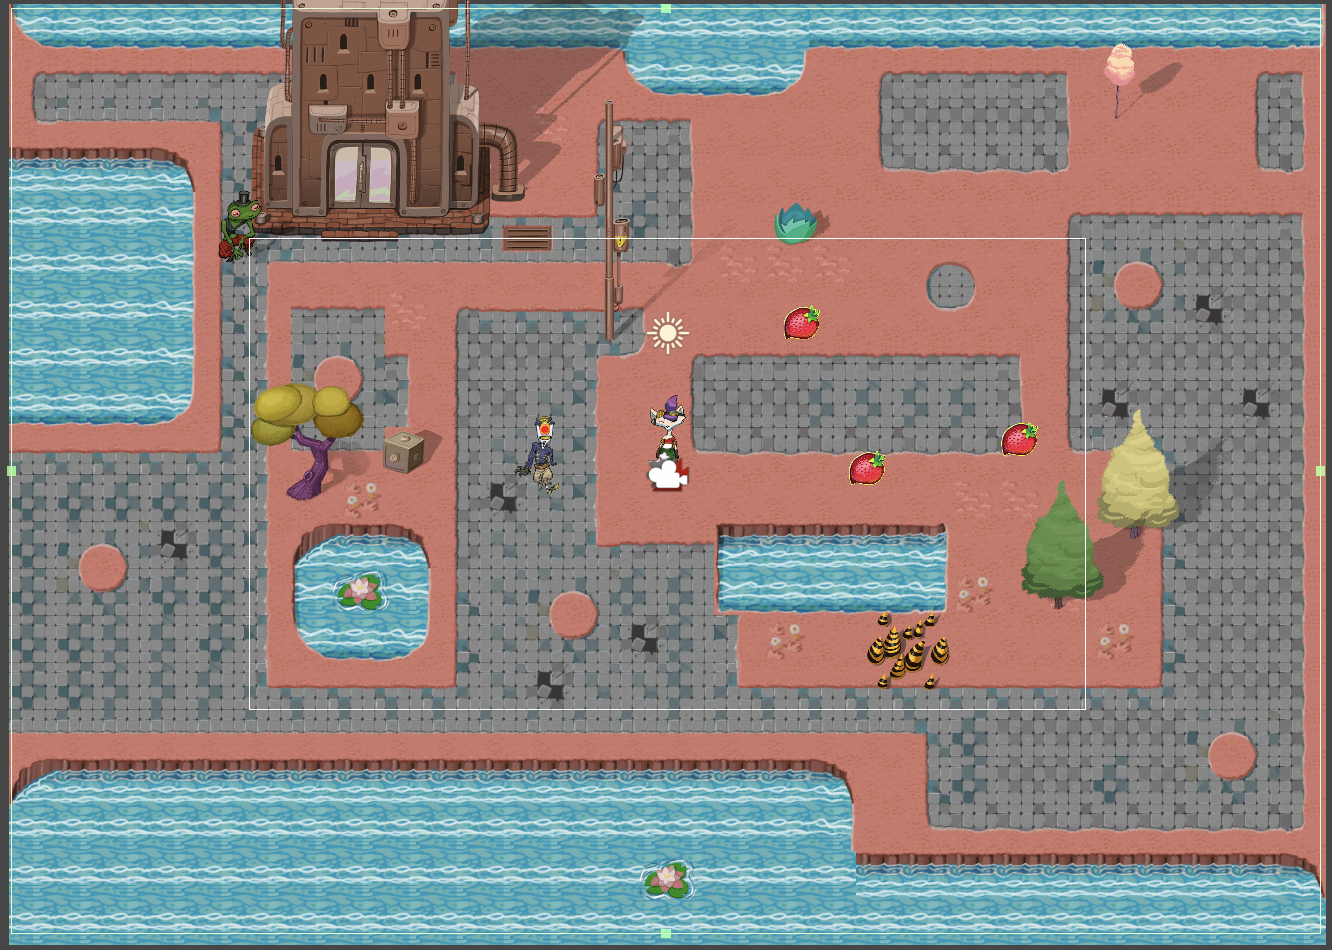
Remember to select Edit Collider again when you’re done.
7. If you’d like to make your collider edges neater, use the foldouts (triangles) to expand the Points > Paths > Element 0 sections and round the X and Y values of each Element variable to a whole number.
8. In the Hierarchy, select the Virtual Camera GameObject.
9. Assign the CameraConfiner GameObject to the Bounding Shape 2D property in the Inspector window.
10. Test your changes in Play mode. The player character will be pushed to the edge of the gameplay environment — because the world is now inside a big collider, the physics system is trying to push the character out.
6. Stop the character getting pushed out
You’ve already used something that can address this issue — layers.
to configure a new layer for the the game bounds, follow these instructions:
1. In the Inspector window header, select the Layer dropdown, then select Add Layer….
2. Create a new layer called “Confiner”.
3. Set the CameraConfiner GameObject layer to Confiner.

4. From the main menu, select Edit > Project Settings > Physics 2D.
5. Disable the Confiner layer’s collisions with every other layer.
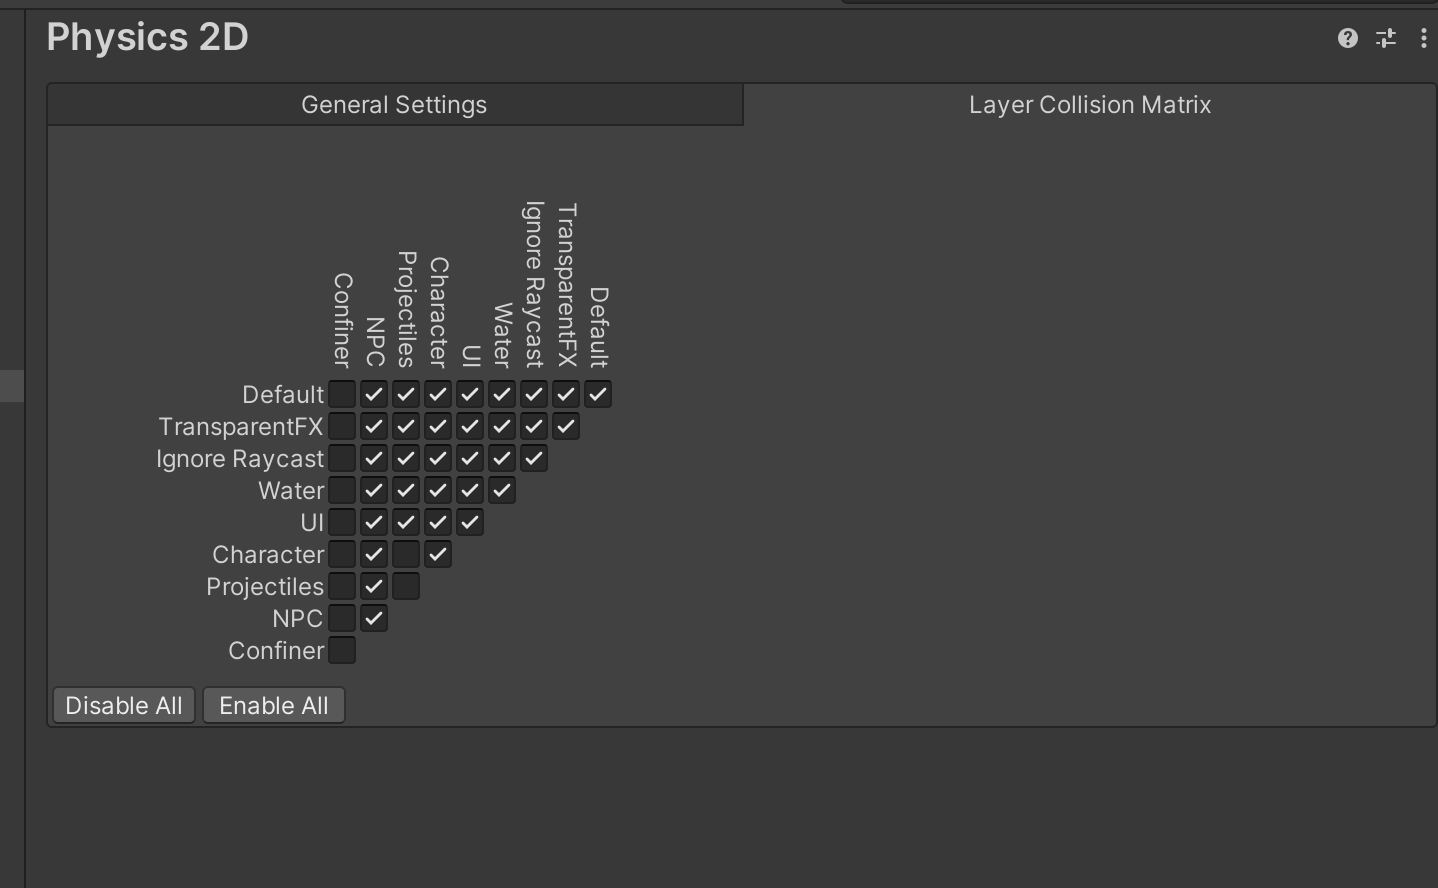
6. Save your changes.
7. Test the game in Play mode — now the player character will behave as expected, and the camera will stop displaying the background beyond the edge of the map.
7. More things to try
If you want to further develop your skills, explore new concepts, or improve your project, check out some of the optional activities below. Each one is tagged as either Easy, Medium, or Difficult, so you can choose the level of challenge.
These activities are entirely optional, so if you’re not interested, no problem — just skip this step. We do recommend attempting at least one of them in order to get the most out of this learning experience. Good luck!
Easy: Configure additional virtual camera setting
If you want to, you can further customize the virtual camera that follows the player character. In the Cinemachine Virtual Camera component, Use the foldout (triangle) to expand the Body property and review the different settings you can configure. Take note of the default configuration so you can revert back to the previous values if you’re not happy with your changes.
Easy: Extend the gameplay area
You can now create a much larger space for the player to explore, if you want to. Think about how your design impacts player experience:
- Are you using space to engage the player and encourage them to explore?
- Do you need to adjust your design to make the most of this functionality? For example, you could position something where it will only be visible after the player character has moved past an enemy.
8. Next steps
Now that you’ve added a dynamic camera to your game, you’re going to implement something that will have a transformational impact on the player experience: game audio.