Build and share your game
Tutorial
·
Beginner
·
+10XP
·
15 mins
·
(251)
Unity Technologies
Now that you’ve created your own complete game, create a build to share it with your community.
1. Overview
You’ve created a game, and now you’re ready to share it with others — perhaps you want to get playtest feedback or perhaps you want to publish your game for the wider world! To do this you need to create a build — a standalone, playable version of your game. This tutorial will guide you through making a computer build for Windows, macOS, or Linux.
By the end of this tutorial, you’ll create a shareable build of your game. We’ll also share some further resources to help you continue your 2D learning journey.
Note: If you want to make an online playable build that you can publish on Unity Play or other sites like itch.io, you can find specific guidance in Create and publish WebGL builds.
Working on your own project?
This tutorial is part of Beginner 2D: Adventure Game, but the guidance in this tutorial is relevant for any beginner who wants to create a computer build of their real-time experience.
Note: For the purposes of this tutorial, we chose to use the Ruby’s Adventure asset set, and the file paths used in instructions will reflect this. If you chose another asset set, the file names will be the same, but in your corresponding theme folder.
2. Check that you have the correct Build Support module
Before you can create a build of your game for a particular platform, you need to add the Build Support module for that platform to your Unity installation. You may have already done added the module at the point of installing the current LTS version of Unity, but if not then add one of the following modules now:
- Linux Build Support (IL2CPP)
- Mac Build Support (IL2CPP)
- Windows Build Support
To install the relevant module for the build that you want to create, follow these instructions.
3. Configure your Player Settings
1. Open your project in the Unity Editor.
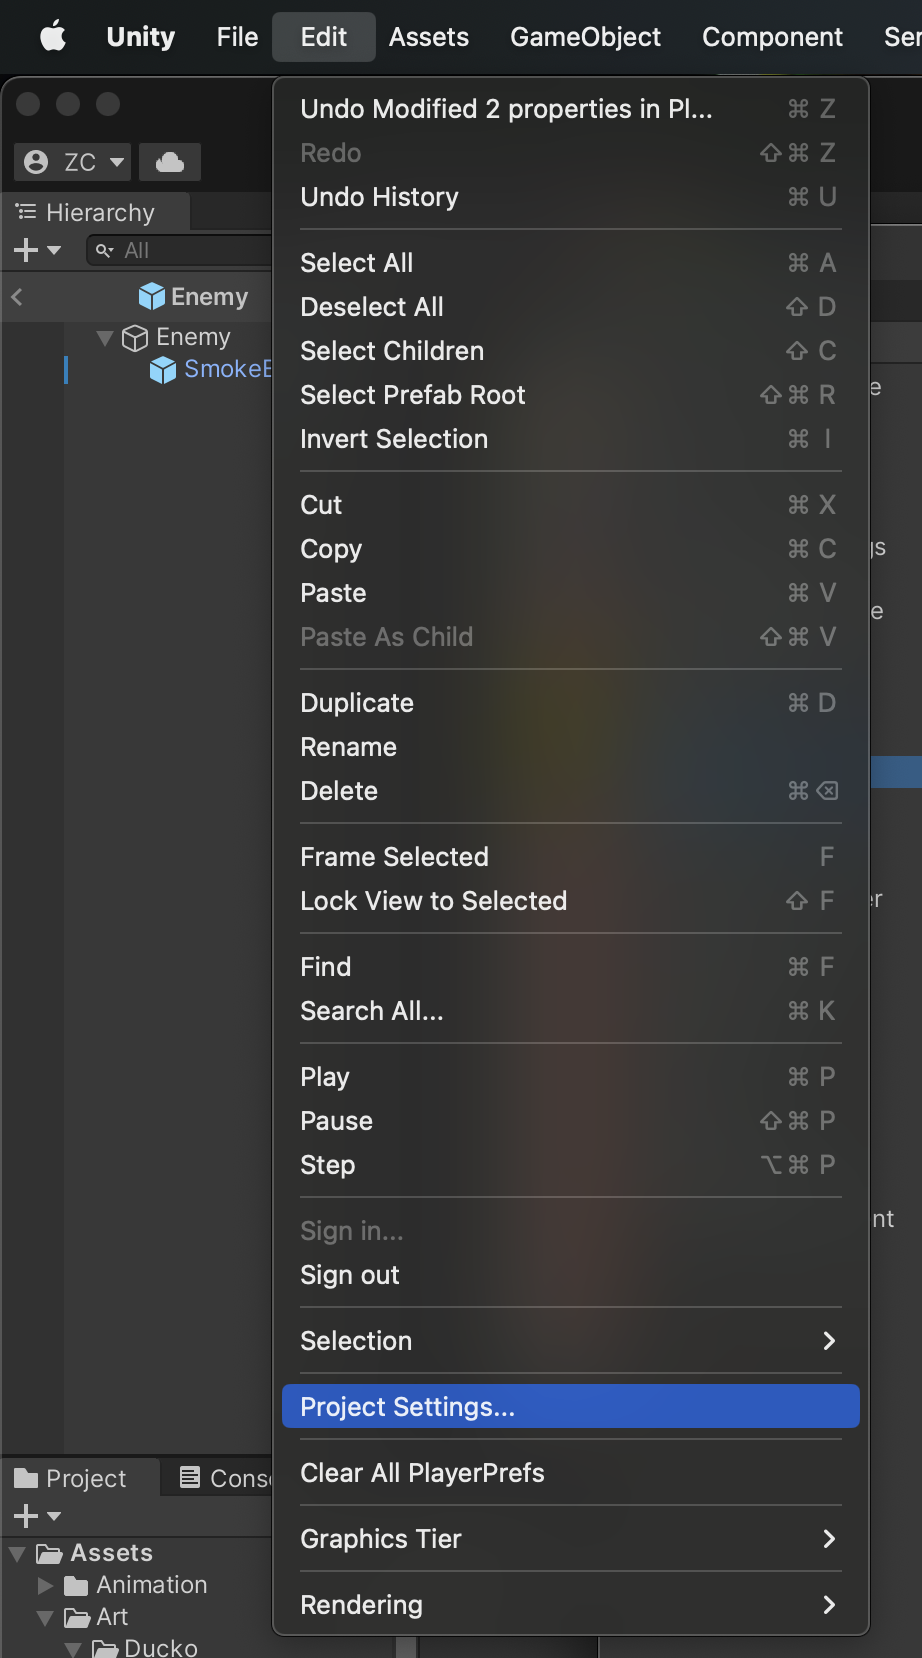
2. In the main menu, go to Edit > Project Settings…, then select Player.
3. At the top of the settings list, you can add the following details for your game:
- Company Name
- Product Name
- Version
- Default Icon, for the executable file
4. Further down the list, find the Settings for Windows, Mac, Linux section. Use the foldout (triangle) to expand the Resolution and Presentation section. You don’t need to make any changes here, but if you want to then you can review the options available in the following platform-specific documentation:
5. Close the Project Settings window.
4. Create your game build
To configure and create the build for your game, follow these instructions:
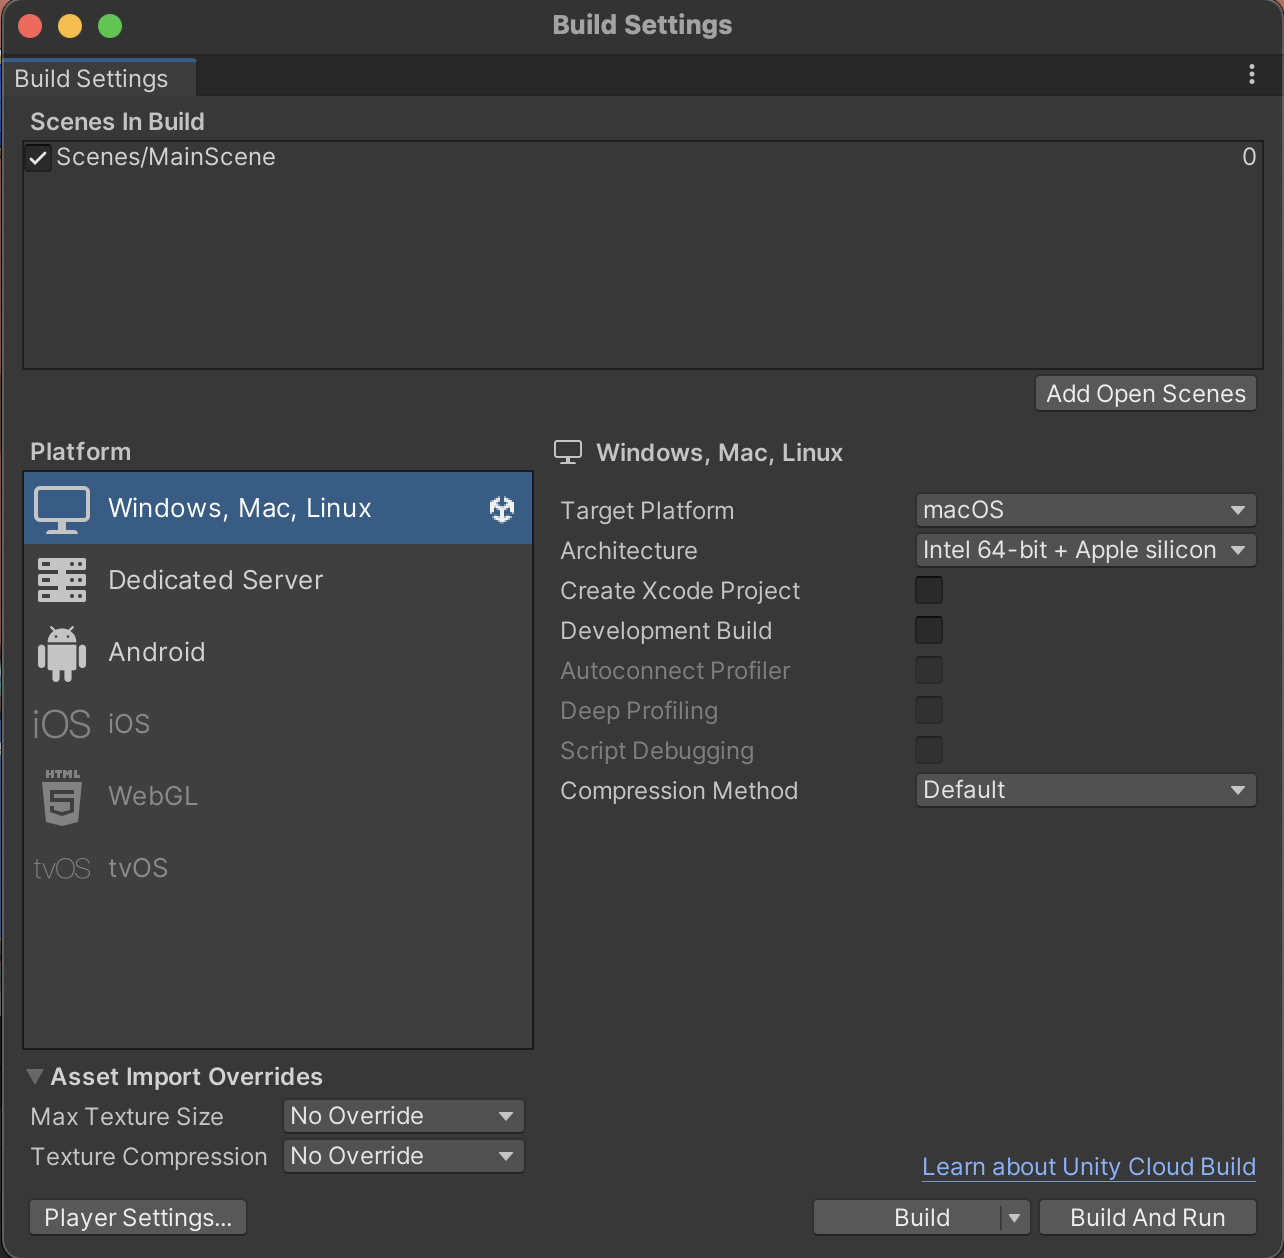
1. In the main menu, go to File > Build Settings….
2. Below the Scenes in Build list, select Add Open Scenes. The scene that you have created your game in will be added to the list.
3. If there are any other scenes listed, such as an example scene from the project files, right-click its listing and select Remove Selection.
Note: If you are working with your own project you may have multiple scenes that you want to include in the build. Make sure that they are all added here — you can drag scene assets from the Project window and release them over the Scenes in Build list.
4. In the Platform section, confirm that Windows, Mac, Linux is selected.
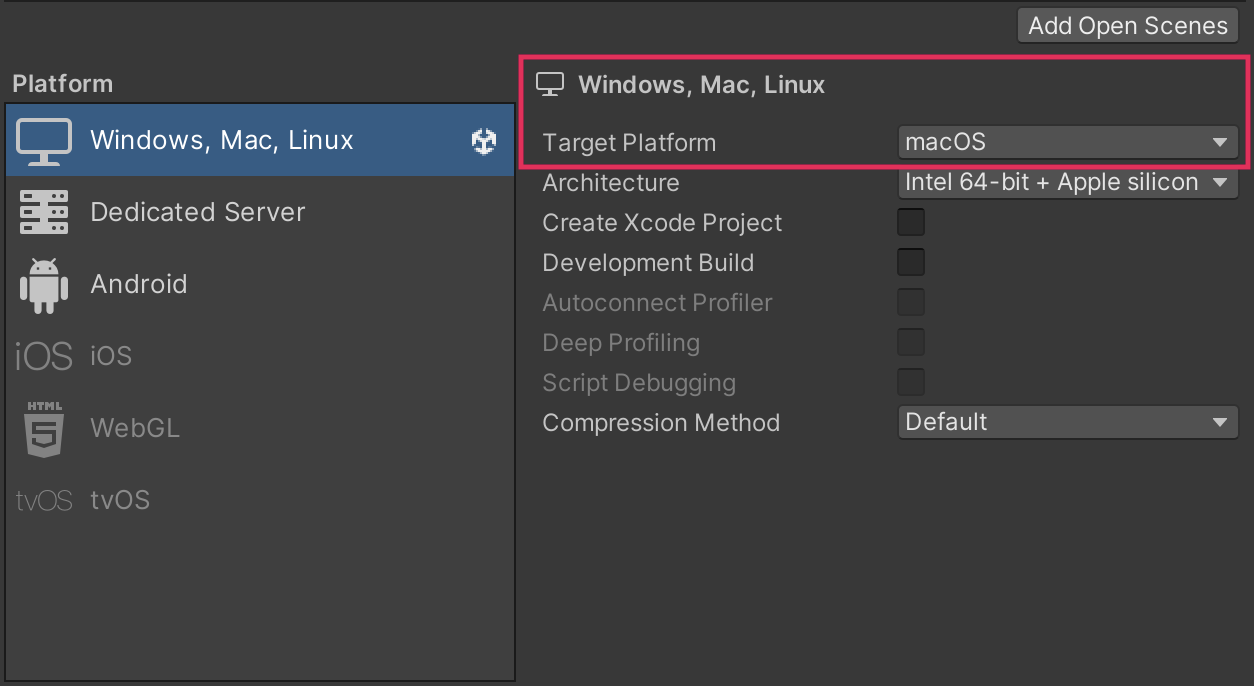
5. Set Target Platform to your chosen build platform.
6. Select Build.
7. In the dialog, enter a name for your build and create a new folder named “Builds” to contain it, then select Save. Unity then compresses the assets, compiles the scripts, and does everything else necessary to create the executable file. When this process is complete, the Builds folder will open.
8. If you have created a build for the platform you are currently using, double-click the executable file to launch your game. Share this file so others can play your game!
Note: Your Beginner 2D adventure game has no menu or exit functionality. If you run the game in fullscreen, use the following shortcut to end the game:
- Alt + F4 (Windows and Linux)
- Cmd + Q (macOS)
5. Next steps
You have now created your own 2D adventure game from scratch and created a playable version to share with your community! That’s a huge achievement. Here are some additional resources to help you continue your learning journey with Unity:
- Advance to the next level by completing our Create a 2D Roguelike Game course. In this course, you'll learn to create your own procedural level game from scratch and master the essentials of roguelike game mechanics, procedural generation, and enemy AI.
- Learn more about Unity’s 2D tools and how they can support you in your ongoing learning journey.
- For creators interested in art, animation, and lighting, the 2D game art, animation, and lighting for artists ebook is a free and comprehensive guide for creators aiming to make a commercial 2D game.
- Check out Unity’s session on URP 2D Lights at GDC 2023 (YouTube) to develop your knowledge of how you can enhance the visuals of your 2D game.
We can’t wait to see what you create!