
Changing Skyboxes
Tutorial
intermediate
+10XP
15 mins
7
Unity Technologies
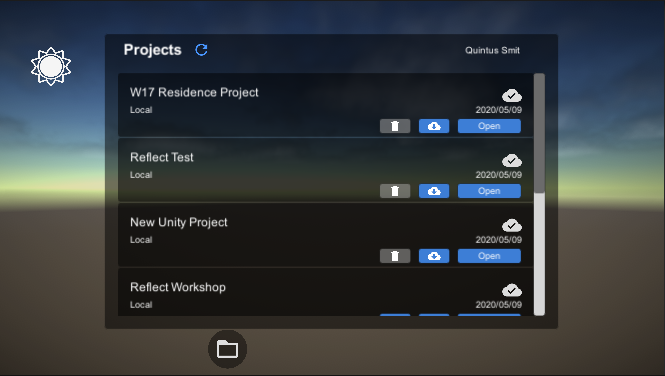
In this tutorial we’ll explore how to change the sky in the Scene at runtime when a button is clicked.
Materials
1. Introduction
The Reflect Viewer uses the standard Skybox that is defined in the game Scene. This Skybox Material can be accessed at runtime via the RenderSettings.skybox class.
For this tutorial, you will need:
- The Reflect Package installed via the Package Manager
- A Pro license for the Unity Editor
The Unity custom package, ChangingSkyboxes.unitypackage
2. Creating the Button
We’ll start by creating a new button that will change the sky when clicked. This button will be created under the existing Settings Canvas and will appear after the splash screen sequence.
1. Import the ChangingSkyboxes package from the tutorial resources.
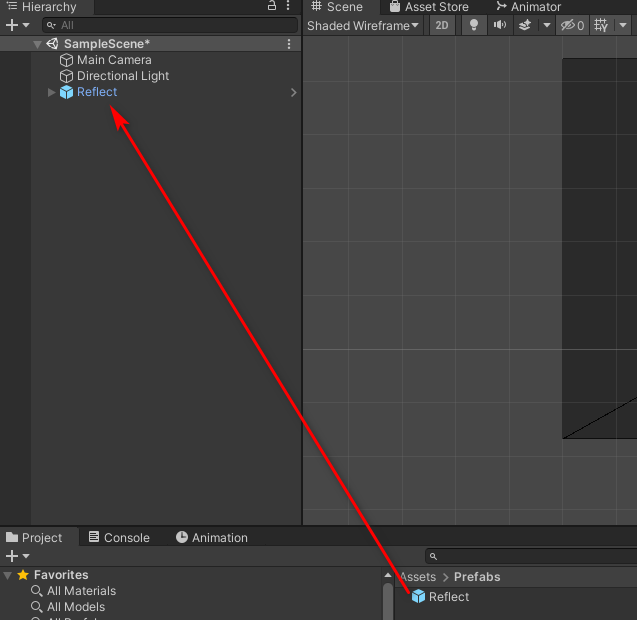
2. Drag the Reflect Prefab from the Assets > Prefabs folder into the Scene Hierarchy (Figure 01).
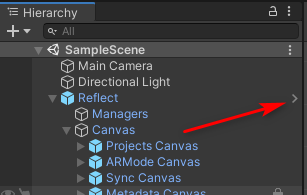
3. Open the Reflect Prefab by clicking on the arrow to the right of the Reflect element in the Scene Hierarchy (Figure 02).
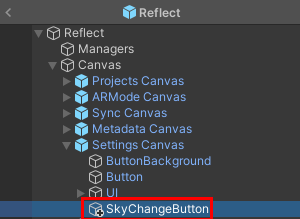
4. Right-click on the Settings Canvas element and create a new UI > Image element. This will be the button you will use to change the sky.
5. Select the new image element and rename it SkyChangeButton (Figure 03).
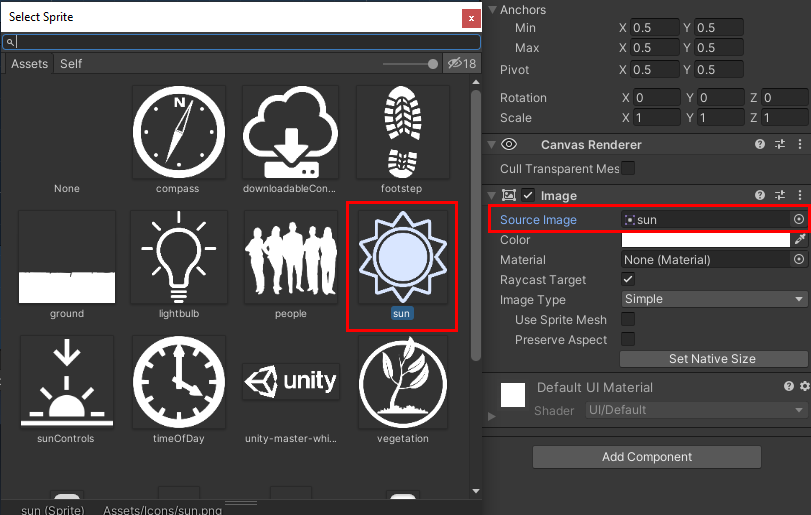
6. With the SkyChangeButton element still selected, change the Source Image to Sun (Figure 04).
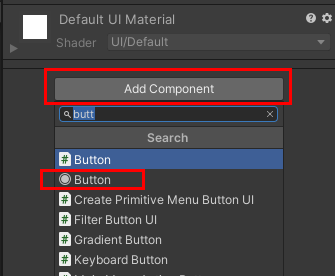
7. Click Add Component to add a Button component. This will make the image clickable and allow you to add interaction to the button (Figure 05).
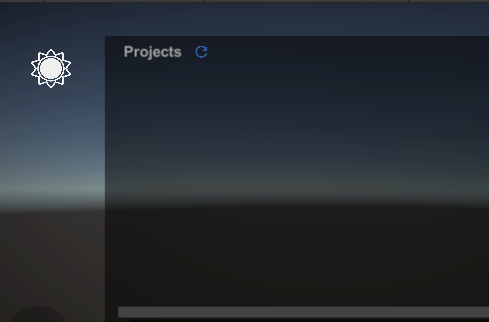
8. Using the Move and Scale tools, change the position and size of the sun icon to fit in the top left corner (Figure 06).
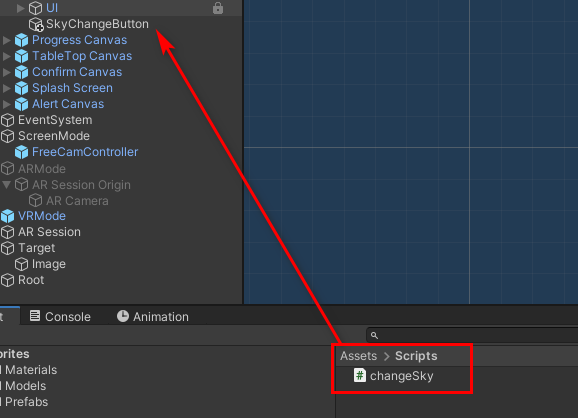
9. Drag the ChangeSky script provided in the Assets > Scripts folder onto the new SkyChangeButton element (Figure 07).
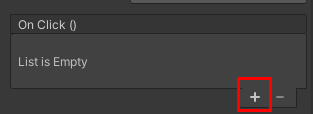
10. Now you’ll need to link the script to the On Click event for the button. In the Inspector, under the Button component that was added earlier, select + (Figure 08).
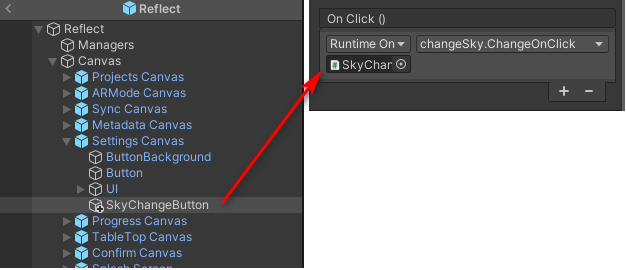
11. Drag the SkyChangeButton element into the new On Click event in the Inspector (Figure 09).
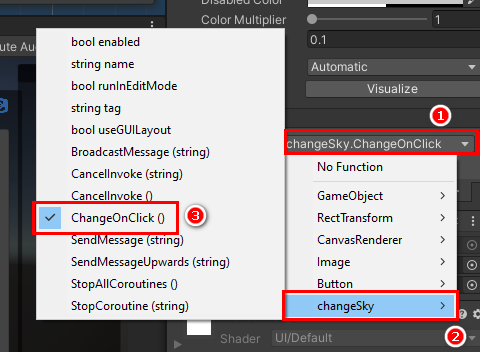
12. Select the changeSky.ChangeOnClick function in the script (Figure 10).
13. In the Inspector, on the added script component, add the CloudSkybox Material to the Skybox One slot by selecting the radio button next to it and then selecting the relevant sky (Figure 11).

This animated Skybox is part of the imported resources for this tutorial. It’s provided by Keijirro and can be downloaded from https://github.com/keijiro/CloudSkybox.
14. Repeat Step 11 for the Skybox Two slot and add the Default-Skybox Material (Figure 12).

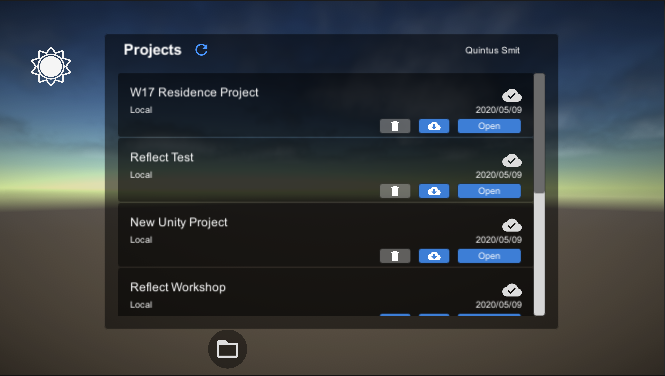
15. Run the project. Clicking the SkyChangeButton should switch between the two Skyboxes that were added to the Material slots (Figure 12). You may change the Materials in these slots to any Skybox you wish to use.
3. Understanding the Script
The script used in this project is a very simple one that takes an On Click event and switches between two Materials.
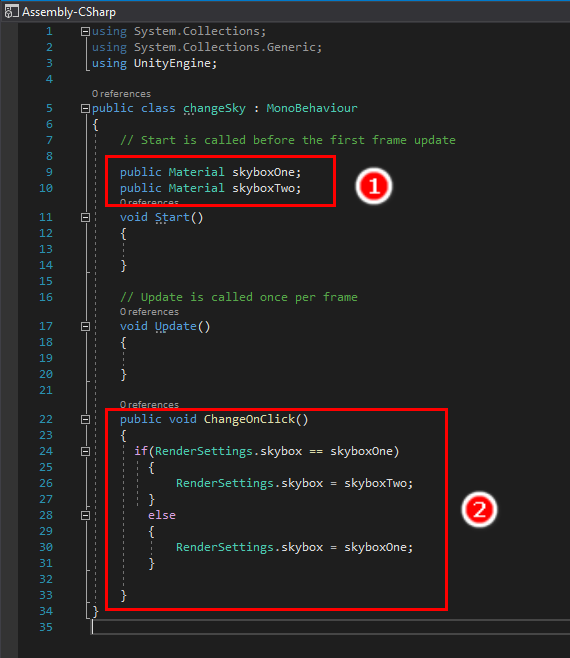
Two Material variables are declared (01), which creates the two slots for the Materials in the Inspector
The ChangeOnClick (2) function checks if Material One is applied when the button is clicked. If it finds this to be true, it changes the sky to Material Two. If not, it switches to Material One.
4. Next Steps
This tutorial covered changing the Skybox Materials when a button is clicked. You should now have an understanding of how to access the Skybox Material at runtime and how to specify which Material is to be used in the script. Using these techniques, you can create your own Skybox options and even use 360 images of specific sites to show the project in context.