
Populate your World
Tutorial
·
Beginner
·
+10XP
·
10 mins
·
(688)
Unity Technologies

Now that you’ve created a world for your players to explore, you can begin to populate it with other characters (NPCs) for them to interact with.
In this tutorial, you’ll:
- Add an NPC to your game
- Create an interaction between the NPC and player character
- Test your game
1. Add an NPC to your game
To add the first NPC to your game:
1. In the Scene view, right-click the location where you want to add an NPC.
2. In the context menu that appears, select Gameplay Prefabs > Add NPC Here. Your new NPC will appear in that location.
3. If you need to adjust the NPC’s position, select the box at the intersection of the red and green arrows and drag to move it.
4. Save your changes to the Scene.
5. Press Play to enter Play Mode and send your character to find the new NPC. They’ll be in your Scene, but at the moment they won’t move like the characters you met in the example Scene.
2. Animate your NPC
Different characters have different animations, and you’ll need to select one correct to get your NPC moving.
There are three choices of NPC available in this Creator Kit:
- Warrior (the default NPC)
- Thief (the default player character)
- Archer
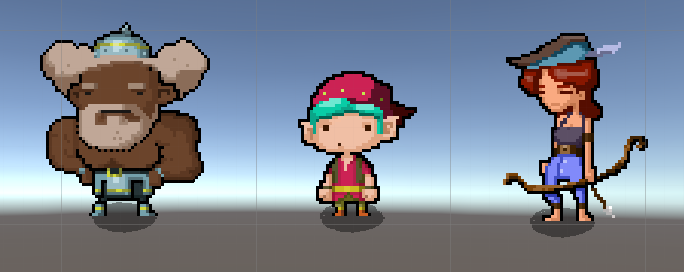
Each character has a slightly different movement animation. By selecting an animation, you’ll also be selecting the character you want to use for the NPC.
Let’s turn this NPC into an Archer:
1. In the Inspector, find the Animator component.
2. Click the circle select button to the right of the Controller property.
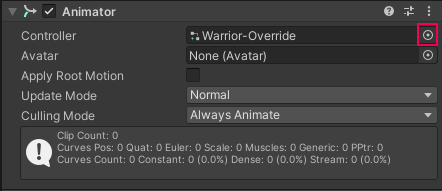
3. For this NPC, select the Archer-Override Animator Controller. This will give them the movement designed specifically for this character type.
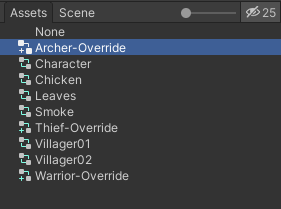
NOTE: In the Scene view, you will see that the Sprite displayed for your NPC is still the Warrior default. Don’t worry — this is just a placeholder. You will see your selected Sprite with animation when you enter Play Mode.
4. Press Ctrl + S (Windows) or Cmd + S (macOS) to save your Scene.
5. In the toolbar, select Play to enter Play Mode. Navigate the player character to the Archer NPC — you’ll see that they are animated and ready for you to give them something to say!
Remember to exit Play Mode when you’re done, so you can begin to design an NPC interaction.
3. Design an NPC Interaction
Now your NPC is ready to interact with the player character! Conversations with NPCs are a key mechanic for most RPG games: they provide quests, useful items, and sometimes even comic relief. Think about the RPG games that you most enjoy playing — what’s distinctive about the way their NPC interactions have been designed?
Plan your branching conversation
In the RPG system designed for this Creator Kit, you need to create the NPC’s responses to chosen player dialogue before you can assign dialogue choices to the player.
First, let’s add a simple branching dialogue example to set up a quest:
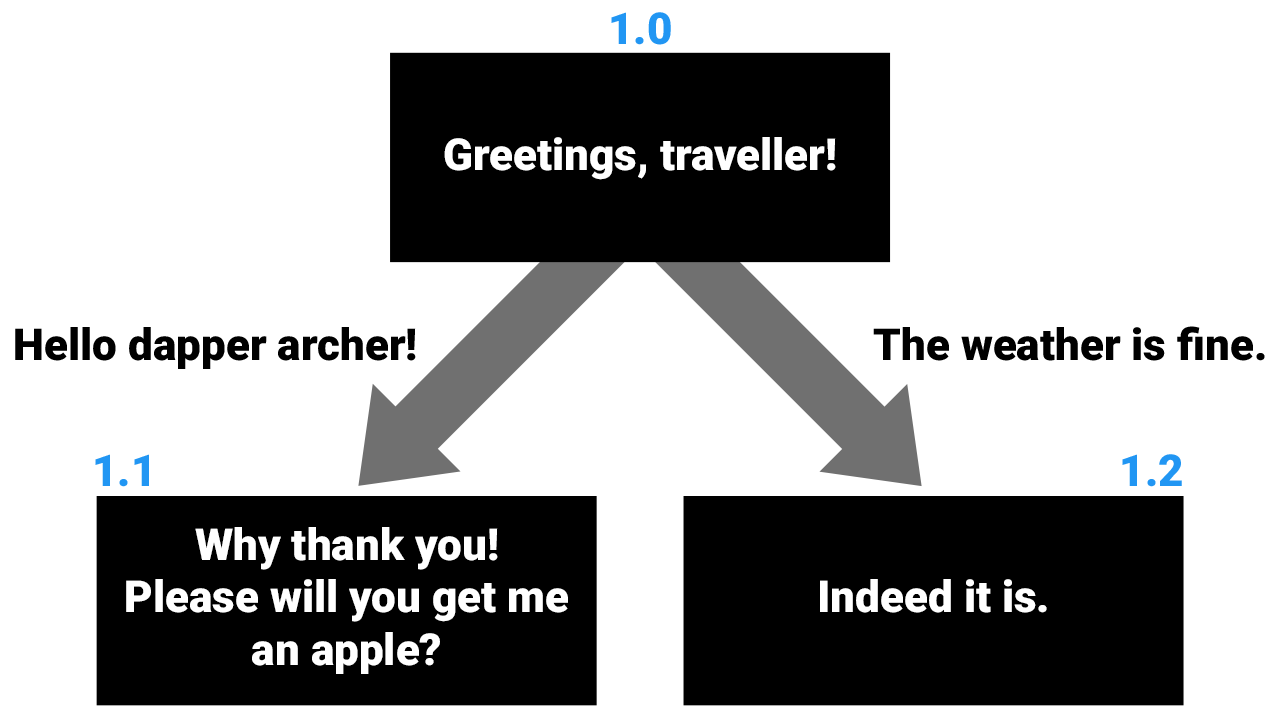
The dialogue in the black boxes will be spoken by the NPC, and the player’s response options are shown along the arrows.
4. Add the NPC Dialogue
The first step to creating an NPC interaction is adding their dialogue:
1. In the Hierarchy, select the NPC GameObject. You can rename this GameObject to a character name or other identifier, if you prefer.
2. In the Inspector, find the Conversation Script component. This will enable you to create different interactions between the player character and NPCs.

3. Select the default Conversation Script Item (A1) and click the - button to clear it.
4. Click the + button to add a new Conversation Script Item. This will open the New Conversation Piece window:
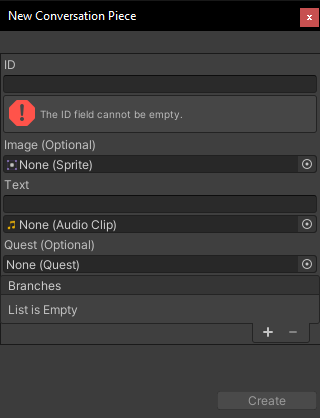
5. In the ID field, assign the value 1.0 for the first piece of dialogue.
TIP: ID values are unique to a particular conversation, so this value could be reused in a separate NPC interaction elsewhere in your level. You can use any identifiers which will help you keep your dialogue organised. Plan your approach to assigning ID values in advance, so you remain consistent.
6. In the Text field, add the NPC’s speech: Greetings, traveller!
7. Click Create to add the dialogue.
8. Enter Play Mode to test your dialogue. When the player approaches the NPC, this dialogue should appear. Remember to press Play again and exit when you’ve finished testing — changes made in Play Mode are not saved.
9. Repeat this process and add the remaining two pieces of dialogue for the NPC:
- 1.1: Why thank you! Please will you get me an apple?
- 1.2: Indeed it is.

You won’t be able to see the two branching dialogue items in Play Mode until you’ve added the player choices which trigger these responses — let’s add these choices next.
5. Add the Player’s Dialogue Choices
To give the player branching dialogue choices in response to the NPC’s greeting:
1. In the Hierarchy, select your NPC GameObject.
2. In the Inspector, find the Conversation Script component.
3. In the Conversation Script Items list, select Script Item 1.0 (“Greetings, traveller!”) and click Edit.

4. In the Branches field, click the + button at the bottom of the list.
5. In the drop-down ID menu, select 1.1.
6. In the text box to the right, add the player’s first dialogue choice: Hello dapper archer!

This attaches the player’s first choice of reply to Script Item 1.1, the NPC’s request for an apple.
5. Click Update.
6. Repeat this process and add the player's second choice of reply (“The weather is fine.”) to NPC Script Item 1.2.

7. Save your changes to the Scene.
8. Enter Play Mode to test the dialogue choices.