Create custom editor windows using attributes
Tutorial
intermediate
+10XP
25 mins
12
Unity Technologies

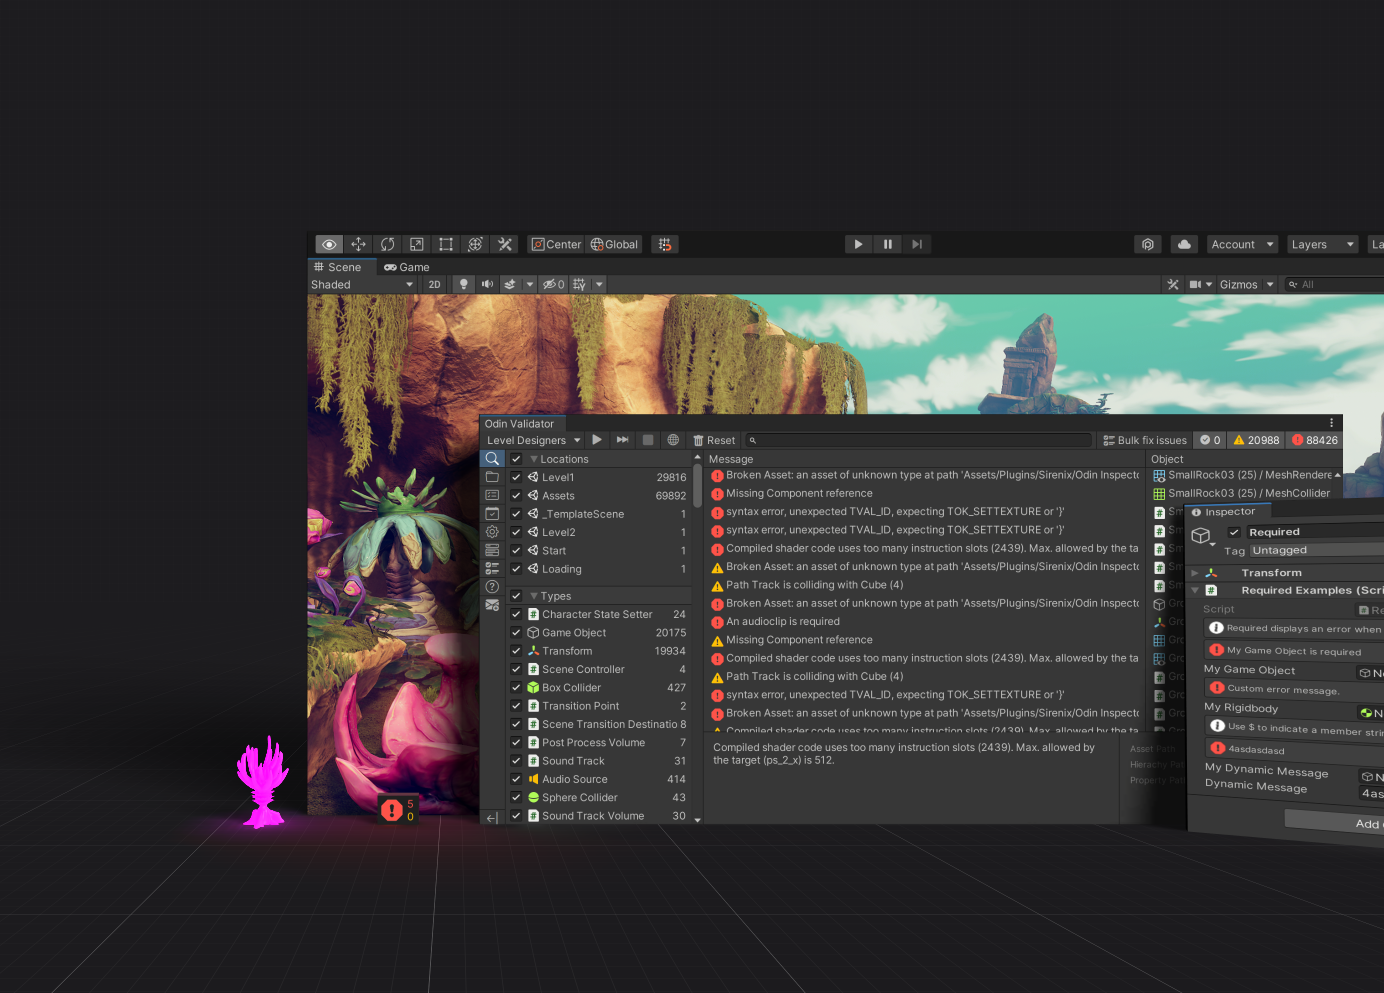
Whether it is to get an overview of your project, handle large sets of data, or even to create custom tooling, making editor windows can go a long way to ease and streamline the production workflow of a project. However, it can be a pain to keep them maintained and relevant as the project changes.
One of the unique features of Odin is the ability to create custom editor windows using attributes. This allows you to create powerful and user-friendly editors with little to no effort, whereas in Unity you would have to write a lot of custom editor code to achieve the same result.
1. Create your first Odin editor window
To create a basic custom editor window, you need to create a new class and make it inherit from OdinEditorWindow.
Note that when it comes to editor scripts in Unity, it’s important to remember to create your scripts in an assembly definition file that is marked as an editor assembly. This will ensure that your editor scripts are only compiled when building the editor, and not the game. You can also create a folder called Editor in your project and place all your editor scripts in there, or you can use the #if UNITY_EDITOR preprocessor directive to ensure that your editor scripts are only compiled when building the editor.
How it works
By inheriting from OdinEditorWindow instead of EditorWindow, you get the ability to render fields, properties and methods in the window without writing any custom editor GUI code, just as if you were working with a MonoBehaviour or ScriptableObject in the inspector.
Let’s check out a simple example:
using Sirenix.OdinInspector; // Odin attributes
using Sirenix.OdinInspector.Editor; // OdinEditorWindow
using UnityEditor; // GetWindow
using UnityEngine; // Debug.Log

public class MyCustomEditorWindow : OdinEditorWindow
{
    [MenuItem("My Game/My Editor")]
    private static void OpenWindow()
    {
        GetWindow<MyCustomEditorWindow>().Show();
    }

    public string Hello;

    [Button(ButtonSizes.Gigantic), GUIColor(0, 1, 0)]
    public void LogHello()
    {
        Debug.Log(Hello);
    }
}
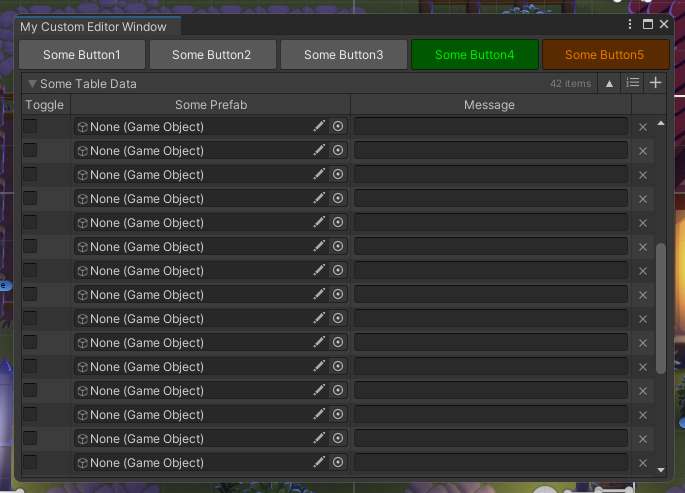
You can imagine how useful this can be when you start using Odin attributes to design your editor windows. You can create powerful and user-friendly editors with little to no effort. Here is an example of a more complex editor window:
using Sirenix.OdinInspector;
using Sirenix.OdinInspector.Editor;
using System;
using System.Collections.Generic;
using UnityEditor;
using UnityEngine;

public class MyCustomEditorWindow : OdinEditorWindow
{
    [MenuItem("My Game/My Window")]
    private static void OpenWindow()
    {
        GetWindow<MyCustomEditorWindow>().Show();
    }

    [PropertyOrder(-10)]
    [HorizontalGroup]
    [Button(ButtonSizes.Large)]
    public void SomeButton1() { }

    [HorizontalGroup]
    [Button(ButtonSizes.Large)]
    public void SomeButton2() { }

    [HorizontalGroup]
    [Button(ButtonSizes.Large)]
    public void SomeButton3() { }

    [HorizontalGroup]
    [Button(ButtonSizes.Large), GUIColor(0, 1, 0)]
    public void SomeButton4() { }

    [HorizontalGroup]
    [Button(ButtonSizes.Large), GUIColor(1, 0.5f, 0)]
    public void SomeButton5() { }

    [TableList(DrawScrollView = true)]
    public List<SomeType> SomeTableData;
}

[Serializable]
public class SomeType
{
    [TableColumnWidth(50, Resizable = false)]
    public bool Toggle;

    [AssetsOnly]
    public GameObject SomePrefab;

    public string Message;

    [TableColumnWidth(160)]
    [HorizontalGroup("Actions")]
    public void Test1() { }

    [HorizontalGroup("Actions")]
    public void Test2() { }
}
2. Create a custom game manager with OdinMenuEditorWindow
Another useful utility for creating editor windows in Odin is the OdinMenuEditorWindow.
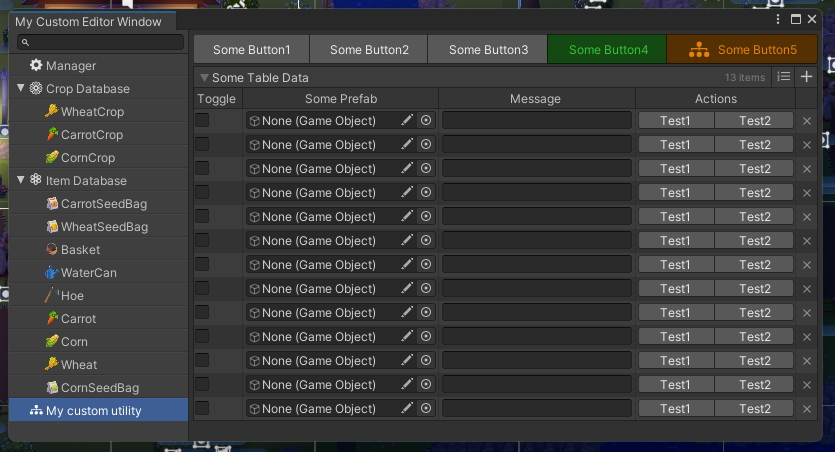
OdinMenuEditorWindow is a base class for creating editor windows that use Odin's menu system. It provides a simple API for creating a menu tree, and automatically handles drawing the menu and the selected menu item.
When you inherit from OdinMenuEditorWindow, you must implement the BuildMenuTree method, which returns an OdinMenuTree. This tree is used to build the menu that is displayed in the editor window.
To showcase some use cases for OdinMenuEditorWindow, we've provided a unitypackage that contains a few scriptable objects we can put into our menu tree. You can try to add your own assets, or if you want, you can find the script below and its dependencies in this unitypackage.
using Sirenix.OdinInspector;
using Sirenix.OdinInspector.Editor;
using UnityEditor;

public class MyCustomEditorWindow : OdinMenuEditorWindow
{
    [MenuItem("My Game/My Custom Editor Window")]
    public static void OpenWindow()
    {
        // Open the custom editor window
        GetWindow<MyCustomEditorWindow>().Show();
    }

    protected override OdinMenuTree BuildMenuTree()
    {
        var tree = new OdinMenuTree();
        tree.DefaultMenuStyle = OdinMenuStyle.TreeViewStyle;
        tree.Config.DrawSearchToolbar = true;

        // In this game, there exist a couple of ScriptableObject singletons.
        // We can add them to the menu like this, and provide a
        tree.Add("Manager", GameManager.Instance, SdfIconType.GearFill);
        tree.Add("Crop Database", CropDatabase.Instance, SdfIconType.Flower1);
        tree.Add("Item Database", ItemDatabase.Instance, SdfIconType.Flower3);

        // We're not limited to added Unity objects, any reference type can be added to the menu.
        tree.Add("My custom utility", new SomeUtility(), SdfIconType.Diagram3Fill);

        // Automatically add thumbnails to the menu
        tree.EnumerateTree().AddThumbnailIcons();

        // Add all assets of type Crop to the "Crop Database" menu item. This will turn "Crop Database" into a foldout menu item.
        tree.AddAllAssetsAtPath("Crop Database", "Assets/", typeof(Crop), true, true)
            // This will enumerate through all the crops we just added, and get the ItemSprite from each crop,
            // and use that as the icon for the crop in the menu
            .AddIcons<Crop>(x => x.Produce ? x.Produce.ItemSprite : null);

        // Add all assets of type Item to the "Item Database" menu item. This will turn "Item Database" into a foldout menu item.
        tree.AddAllAssetsAtPath("Item Database", "Assets/", typeof(Item), true, true)
            .AddIcons<Item>(x => x.ItemSprite);

        return tree;
    }
}
There is a lot more you can do with OdinMenuEditorWindow, such as adding custom menu items, handling selection changes, and more. For more information, check out the Odin documentation on OdinMenuEditorWindow, OdinMenuTree and OdinMenuItem.