
Getting the most out of Odin Validator
Tutorial
intermediate
+10XP
30m
(16)
Unity Technologies
Odin Validator is a powerful tool that can help you validate all your data in the Unity Editor, so you can catch errors before they become problems. It can validate attributes and data structures, detect common Unity issues like missing references or invalid values with built-in validators, and allow custom validator creation for unique project needs. It not only identifies issues but also offers solutions, streamlining development and enhancing project quality.
In this section, you’ll learn how to start a project scan, extend with custom rules, automate validation processes, and perform quick validation of specific items. We’ll also explore the built-in validation rules, and go through some of the most useful validation attributes Odin has to offer.
1. The Odin Validator window and Scene view widget
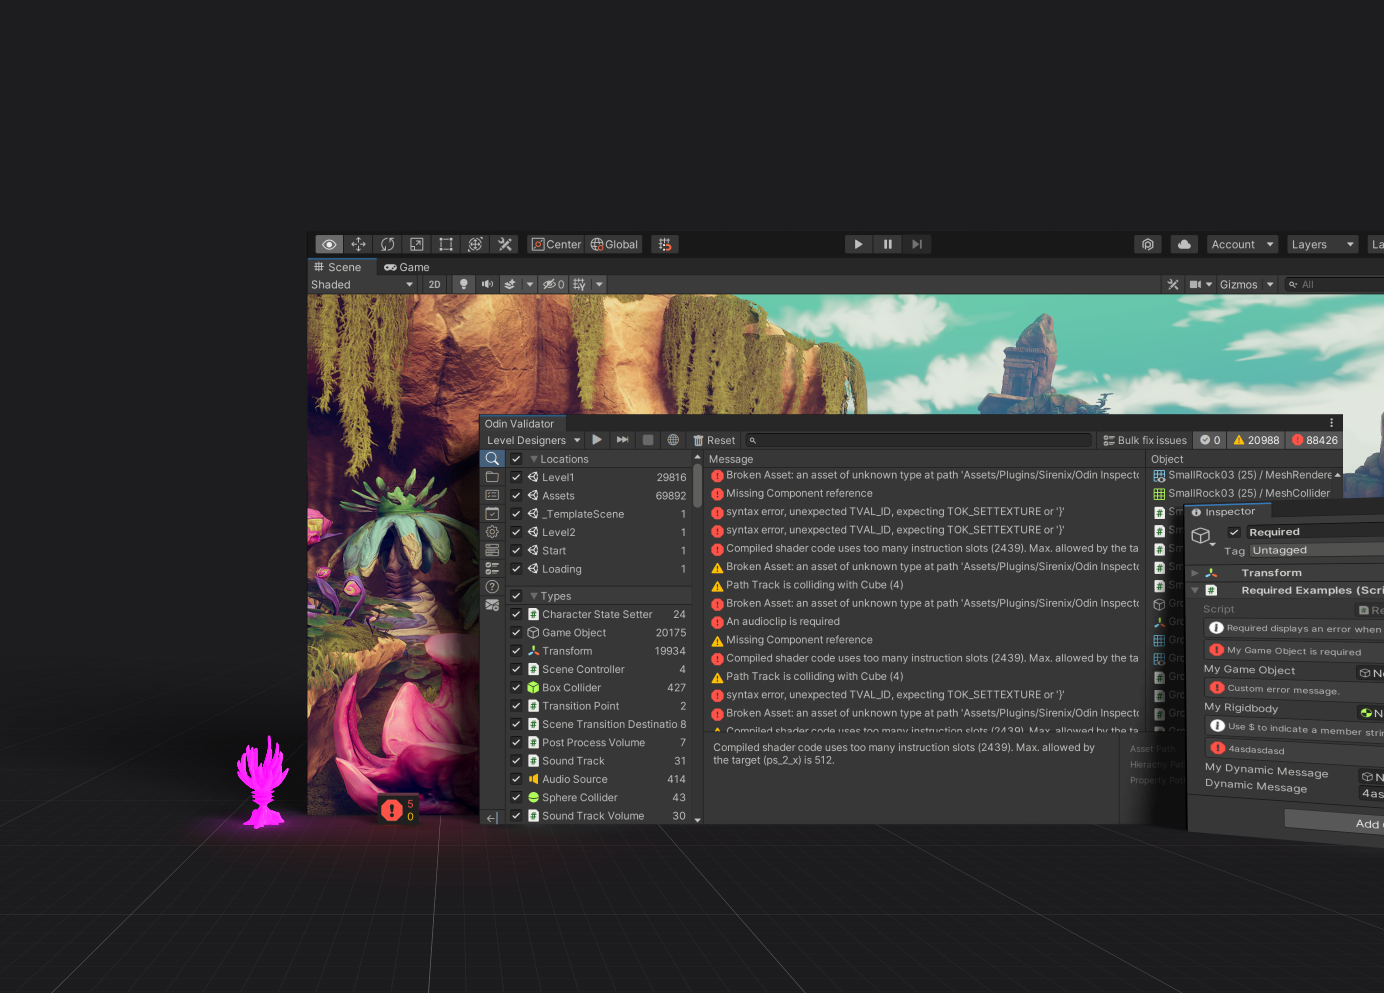
If Odin Validator is installed in your Unity project, you’ll see a widget in the bottom left of your Scene view displaying the current number of issues detected. This widget serves as a direct link to the Odin Validator window. Start by clicking on this widget to open the Odin Validator window.
You can also open the Odin Validator window manually by navigating to Tools > Odin Inspector > Validator. This window is the central location for all your project’s validation needs. Spend some time exploring the different buttons and features; each includes tooltips that provide additional information when you hover over them with your mouse.
2. Useful Validation attributes and how they work
Before we start scanning our project, let’s take a look at some of the most useful validation attributes that Odin has to offer, and then implement some of them in your project. These attributes can help you catch common issues in your project, such as missing references, invalid values, and more.
The goal now is to start introducing some validation attributes to your project. Here is a list common validation attributes that you can use to get started:
- Required: This attribute ensures that a field is not null or empty.
- RequiredIn: Same as above, but it lets you dictate when the field is required. For example, should the rule only apply for prefabs or scene objects?
- ValidateInput: This attribute validates the input of a field using a custom method.
- SceneObjectsOnly: This attribute ensures that a field only accepts scene objects.
- ChildGameObjectsOnly: This attribute ensures that a field only accepts child game objects.
- AssetsOnly: This attribute ensures that a field only accepts assets. (Useful when you want to reference a prefab for example)
- DisallowModificationsIn: This attribute ensures that a field cannot be modified in certain contexts. For example, you may want to ensure that a field is only allowed to be modified in prefabs, but not in scene objects.
If you do not have any use-cases in mind or you are unsure where to start, I recommend starting with the RequiredAttribute as that is by far the most common attribute used in Unity projects. It will help designers on how to use your scripts, and with the Validator you can scan your project to see if you have any missing references. If you work with prefabs a lot, you might also want to consider the RequiredIn attribute which lets you specify under which conditions a field is required. Here is an example you can use to get started. Create a couple of instances of it, and leave some errors around for the Validator to find.
Here’s an example:
public class Crop : ScriptableObject, IDatabaseEntry
{
    public string Key => UniqueID;

    [ValidateInput("IsValidId")]
    public string UniqueID = "";

    [Required] // Ensure that we don't get null elements.
    public TileBase[] GrowthStagesTiles;

    [Required]
    public Product Produce;

    [MinValue(0.1f)]
    public float GrowthTime = 1.0f;

    public int NumberOfHarvest = 1;

    [MinValue(1)]
    public int StageAfterHarvest = 1;

    [MinValue(1)]
    public int ProductPerHarvest = 1;
    public float DryDeathTimer = 30.0f;

    [Required]
    [AssetsOnly]
    public VisualEffect HarvestEffect;

    public int GetGrowthStage(float growRatio)
    {
        return Mathf.FloorToInt(growRatio * (GrowthStagesTiles.Length-1));
    }

    // Validate the Unique ID
    private bool IsValidId(string id, ref string errorMessage)
    {
        if (string.IsNullOrWhiteSpace(id))
        {
            errorMessage = "Unique ID cannot be empty!";
            return false;
        }

        if (CropDatabase.Instance.GetFromID(id) == null)
        {
            errorMessage = "Unique ID does not exist in the database!";
            return false;
        }

        return true;
    }
}3. Start your first project scan
You may notice that the validator window has already found all of the issues you just added, and that the scene view widget has updated to show the number of issues found.
But let’s start a full scan of the project regardless to see if we have any other issues.
You may notice that the validator has two buttons that start a scan. As the tool-tips will also say; the hollow play button is a scan that will occur in the background. This means that you can let it run in the background while working. While it is validating in the background the scene widget will show a spinning icon. This scan will not open any scenes that may be part of your profile.
The filled play button will not run in the background, but it will open scenes to validate them, and restore your scene setup when done.
Validation scans can take some time, depending on the size of your project. It can range anything from a few seconds to an hour. If your project is a couple of gigabytes in size, with some large scenes. You can expect the scan to take 1-4 minutes.
4. Navigating and resolving issues
After the scan is complete, you’ll see a list of issues in the Odin Validator window. You can click on an issue to see more details, the details panel can display additional information about the issue, as well
Double-clicking on an issue will highlight the asset in either the project view or the hierarchy view. If the issues appear grayed out, this means that the issues are from a scene that is not currently open. Double-clicking on a grayed-out issue will open the scene and find the game-object with the issue.
To resolve an issue, you can either fix it directly in the Odin Validator window if a fix for it is present, or you navigate to the asset in the project view or hierarchy view and fix it there. Once you’ve resolved an issue, the issue should display a green checkmark, indicating that it has been resolved.
5. Exploring built-in validation rules in Odin Validator
Odin Validator comes with numerous built-in validation rules that address common issues encountered in Unity projects. These rules check for missing references, broken layers, and many other potential and common problems in Unity. You can explore these rules in the Odin Validator window by selecting the Validation Rules tab.
You can also create your own custom rules by selecting the Add (+) button:
You can learn more about creating custom rules here: Creating Custom Rules.