Lesson 2.1 - Arranging the Editor Layout to Suit Your Needs
Tutorial
Beginner
+10XP
10 mins
806
Unity Technologies

To begin this lesson, we’ll show you how to arrange Unity’s Editor windows to make it easier for you to rapidly prototype your pre-vis Scene. Unity’s real-time rendering lends itself to rapid iteration from set creation all the way through to lighting, cameras, and effects, which you’ll learn more about throughout this course.
1. Lesson Overview
2. Arrange your Layout and Save
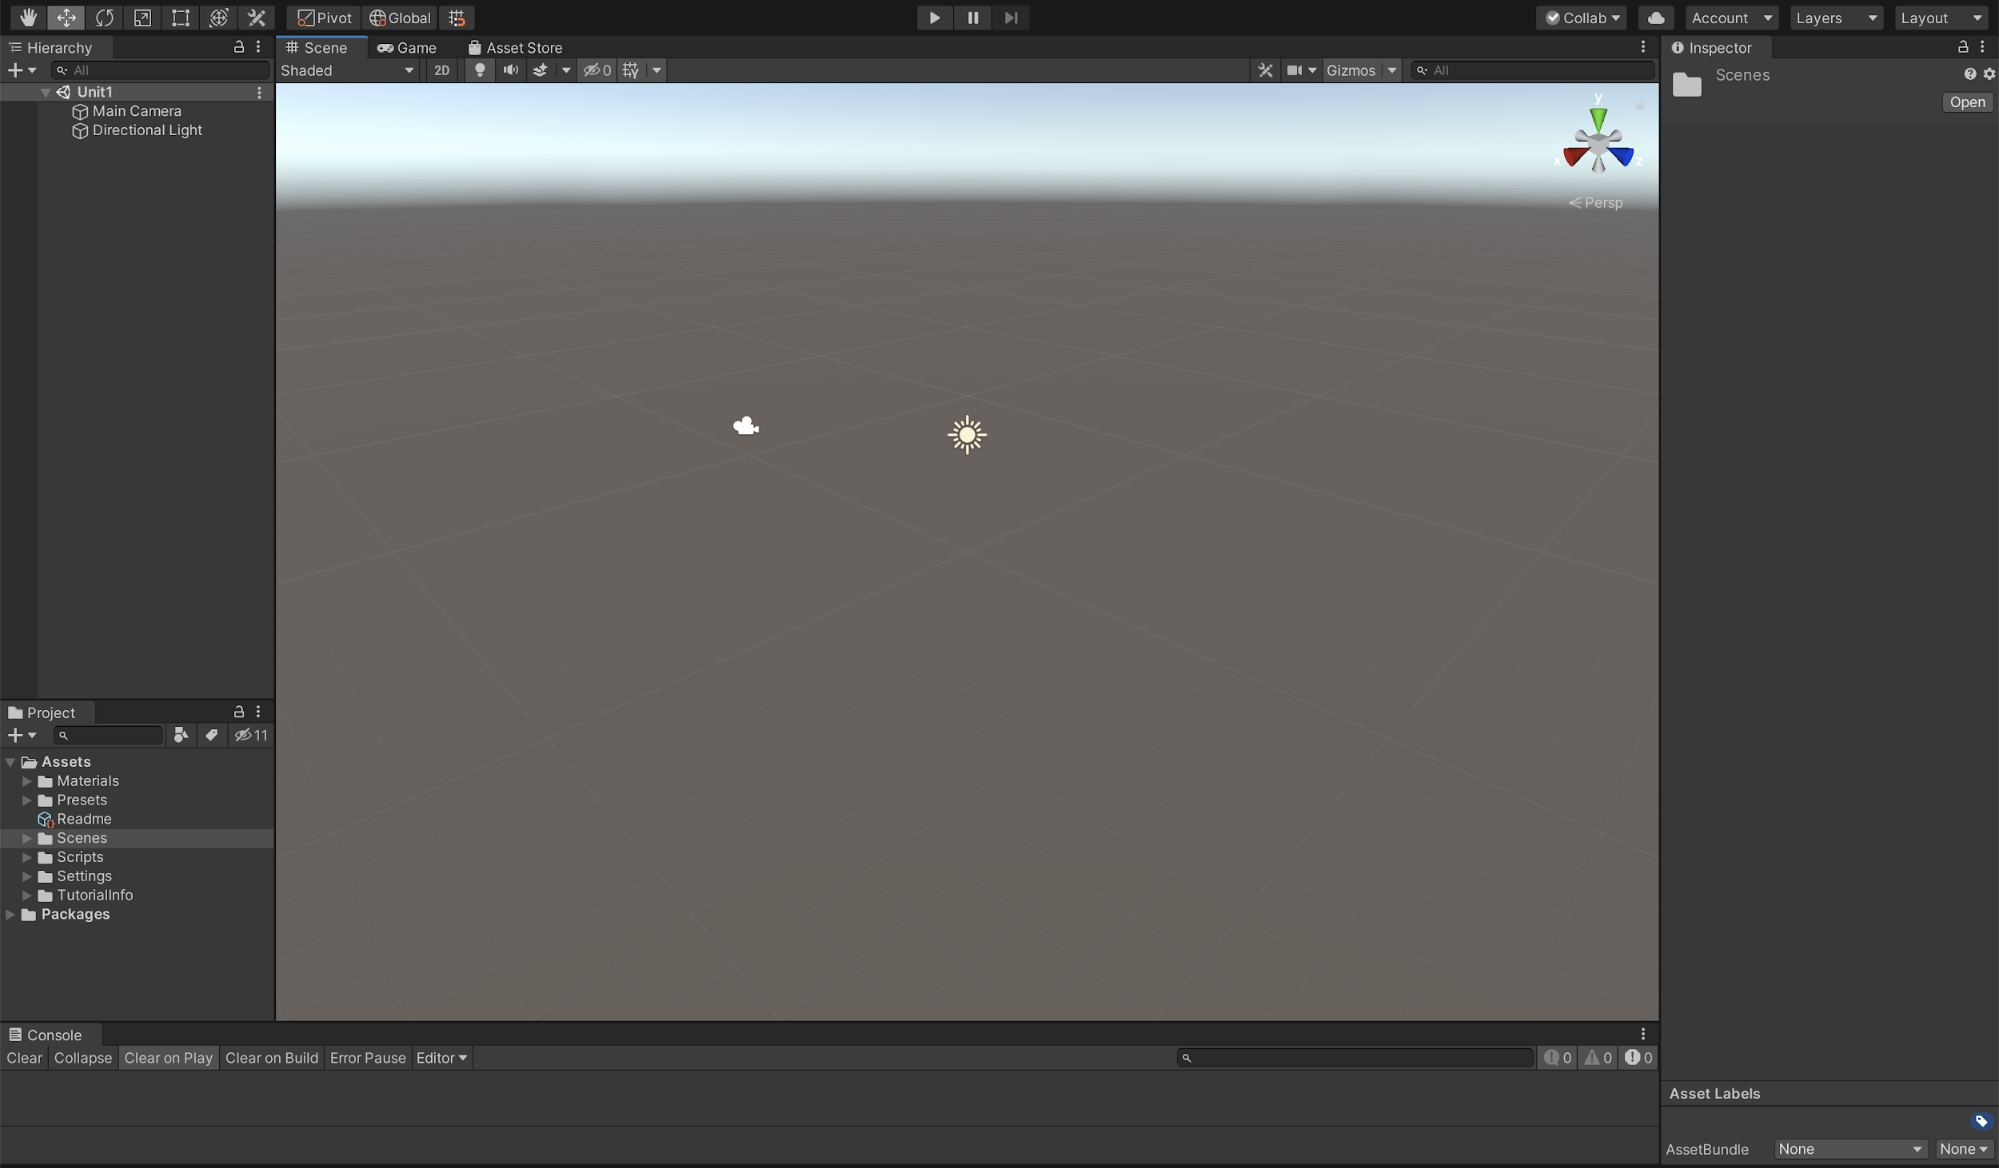
Unity’s interface consists of multiple tabbed windows that can be grouped, docked, and rearranged to suit your needs. The way these interface elements are configured are called Layouts. Our goal is to modify our interface so that the Scene view is the largest window in the Editor, then save our changes into a new Layout so it can be referred to later (Figure 01). Please note that this lesson serves as guidance for how to configure your Layout, but your Layout might differ slightly from ours based on your monitor configuration and screen resolution. Also, your Unity interface may be a lighter color gray than ours depending on what version of Unity you are using.

We can adjust the placement of our windows in a series of short steps. Docking — the process of stacking windows — allows us to switch between windows by clicking their tabs. It’s convenient for accessing multiple windows while making the most efficient use of screen space. Let’s try it.
1. To begin, you need to open the “Unit1_StarterFiles” that you started in Unit 1. Once you’ve opened the project you need to open the Scene we named “Unit 1”.
2. Go to Window > Layouts > select Default.
3. Left-click and drag the Project window tab underneath the Hierarchy tab in the upper-left corner of the interface.
4. Unity will visualize how this window will appear placed next to the Hierarchy window. We don't want to have two windows side-by-side. Instead, position the Project window so that its tab is underneath the Hierarchy tab. Release the left mouse button to dock the Project window in place.
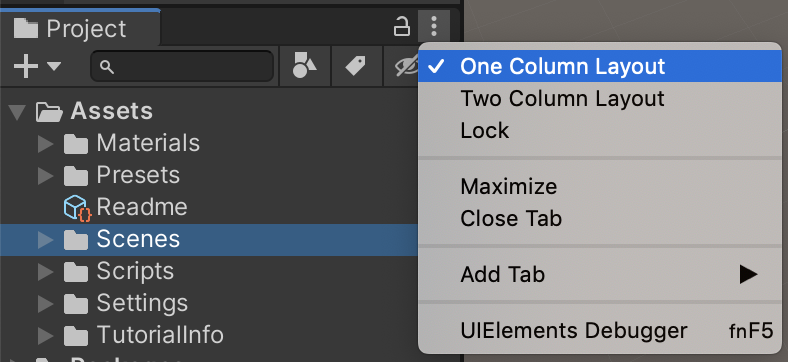
5. In the Project window, click the Context button (with the three vertical dots) in the upper-right corner. Then change the window setting from Two Column Layout to One Column Layout (Figure 02).

Now that our windows are in the right place, we can adjust their size.
6. Left-click and drag the edge of the docked Hierarchy and Project windows as far to the left as possible.
7. Do the same for the Inspector window located on the right side of the screen, but this time drag it as far to the right as possible.
8. Last, click and drag the edge of the Console window, then shrink it down as much as possible.
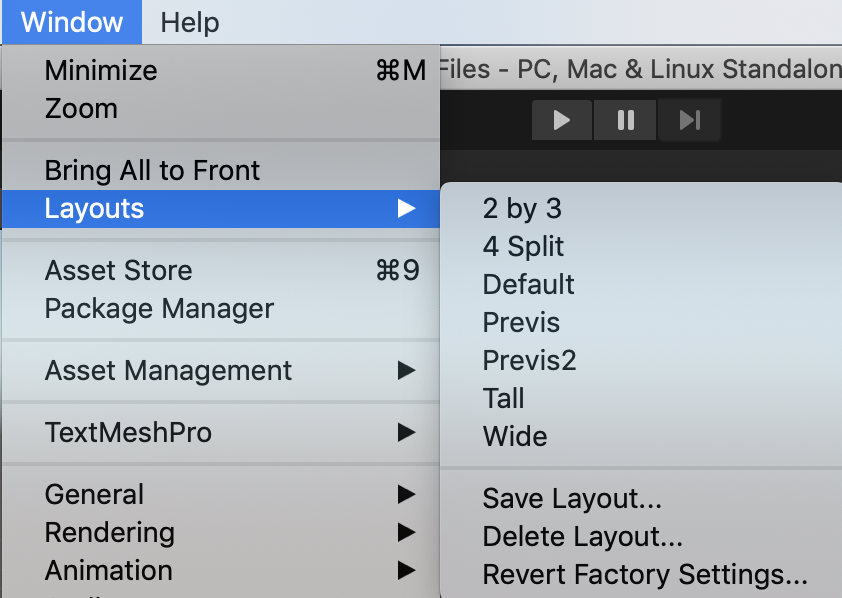
9. Once the layout is to your liking, navigate to Window > Layouts > Save Layout to save your Layout. When prompted, give your Layout a name (such as "Previs") and click Save (Figure 03).

Now, whenever we want to use this interface Layout again, we can load it by navigating to the upper-right corner (next to the Layers drop-down) and selecting the Layout we just created.
3. Recap
Learning how to arrange your layout will allow you to work faster and more comfortably in Unity. It's good practice to adjust, save, and switch between your layouts depending on the work you will be doing. In the next lesson, we'll explore how to create primitive objects in Unity.