
Customizing BIM Display
Tutorial
intermediate
+10XP
20m
(7)
Unity Technologies
In this tutorial, we will explore how you can customize the Reflect Viewer filtering system. Specifically, we’ll explore how the filtering system manages Materials that are applied when the system is activated. The filtering system uses two Materials: a highlight Material that is applied when an element is selected in a Scene and a transparent Material that is applied to the Scene’s unselected objects.
Resources
1. Exploring the Highlighting System
Typically, when Reflect Viewer’s highlighting system is activated and an element is selected, the selected object is highlighted while the rest of the project elements become transparent (Figure 01). To achieve this, Reflect Viewer assigns a transparent material (1) to all unselected objects and a highlight material to the selected object (2).
You can customize the Materials that are used in the highlighting system.
1. Select the Metadata Canvas in the Project hierarchy under Reflect > Canvas (Figure 02).
2. In the Inspector, select the Transparent Material slot (Figure 03). This is where the Transparent material is assigned.
The highlight Material can be found in the Inspector as well. In the Hierarchy, navigate to Reflect > Canvas > Metadata Canvas > MenuTemplate > MenuItemTemplate.
Once you navigate to that element and click on it, you will find the Selected Material slot in the Inspector (Figure 04).
2. Changing the Materials
We’ll now create a new Material and apply it to the Transparent Material and Selected Material slots.
1. Create a folder under your project Assets folder and call it Materials (Figure 05).
2. Inside this folder, create a Material called Outline_new (Figure 06) and choose the color and/or effect you’d like applied to the highlighted object. In the example below, a Standard Shader is used with an orange color (Figure 07).
3. Create a second Material and call it Transparent_red (Figure 08).
4. Change the Albedo color to red, or any color you prefer (Figure 09).
5. In the Scene Hierarchy, navigate to Reflect > Canvas > Metadata Canvas.
6. With the element selected, in the Inspector locate the Transparent Material slot (Figure 10).
7. Drag Transparent_red into the Transparent Material slot to replace the existing Material (Figure 11).
8. In the Scene Hierarchy, navigate to Reflect > Canvas > Metadata Canvas > MenuTemplate > MenuItemTemplate (Figure 12).
9. Locate the Selected Material slot in the Inspector (Figure 13).
10. Drag Outline_new into the Selected Material slot (Figure 14).
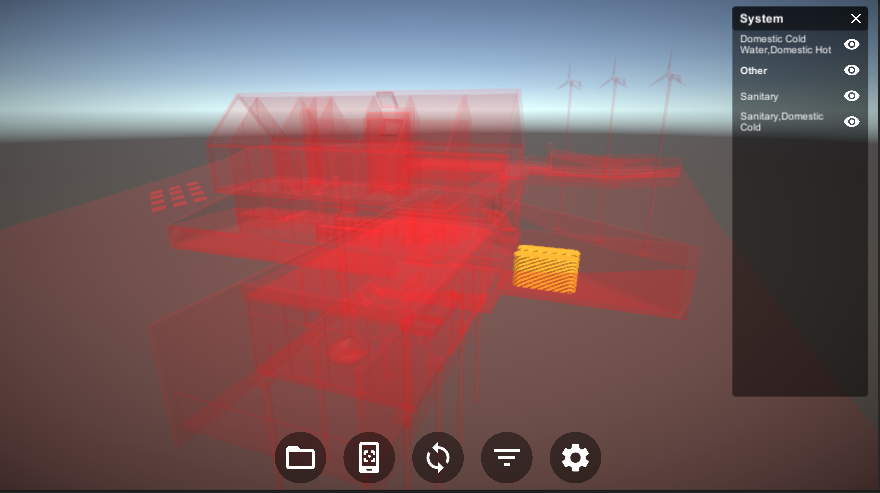
11. Run the Viewer and select any item in the Filter list. You should now see the new Materials applied (Figure 15).
3. Next Steps
This tutorial showed you how to change Materials when using the filtering options in the Reflect Viewer. Understanding this process will allow you to further customize your projects and explore how the Viewer Prefab fits together.