
Set up a scene with plane detection
Tutorial
Beginner
+10XP
45 mins
88
Unity Technologies
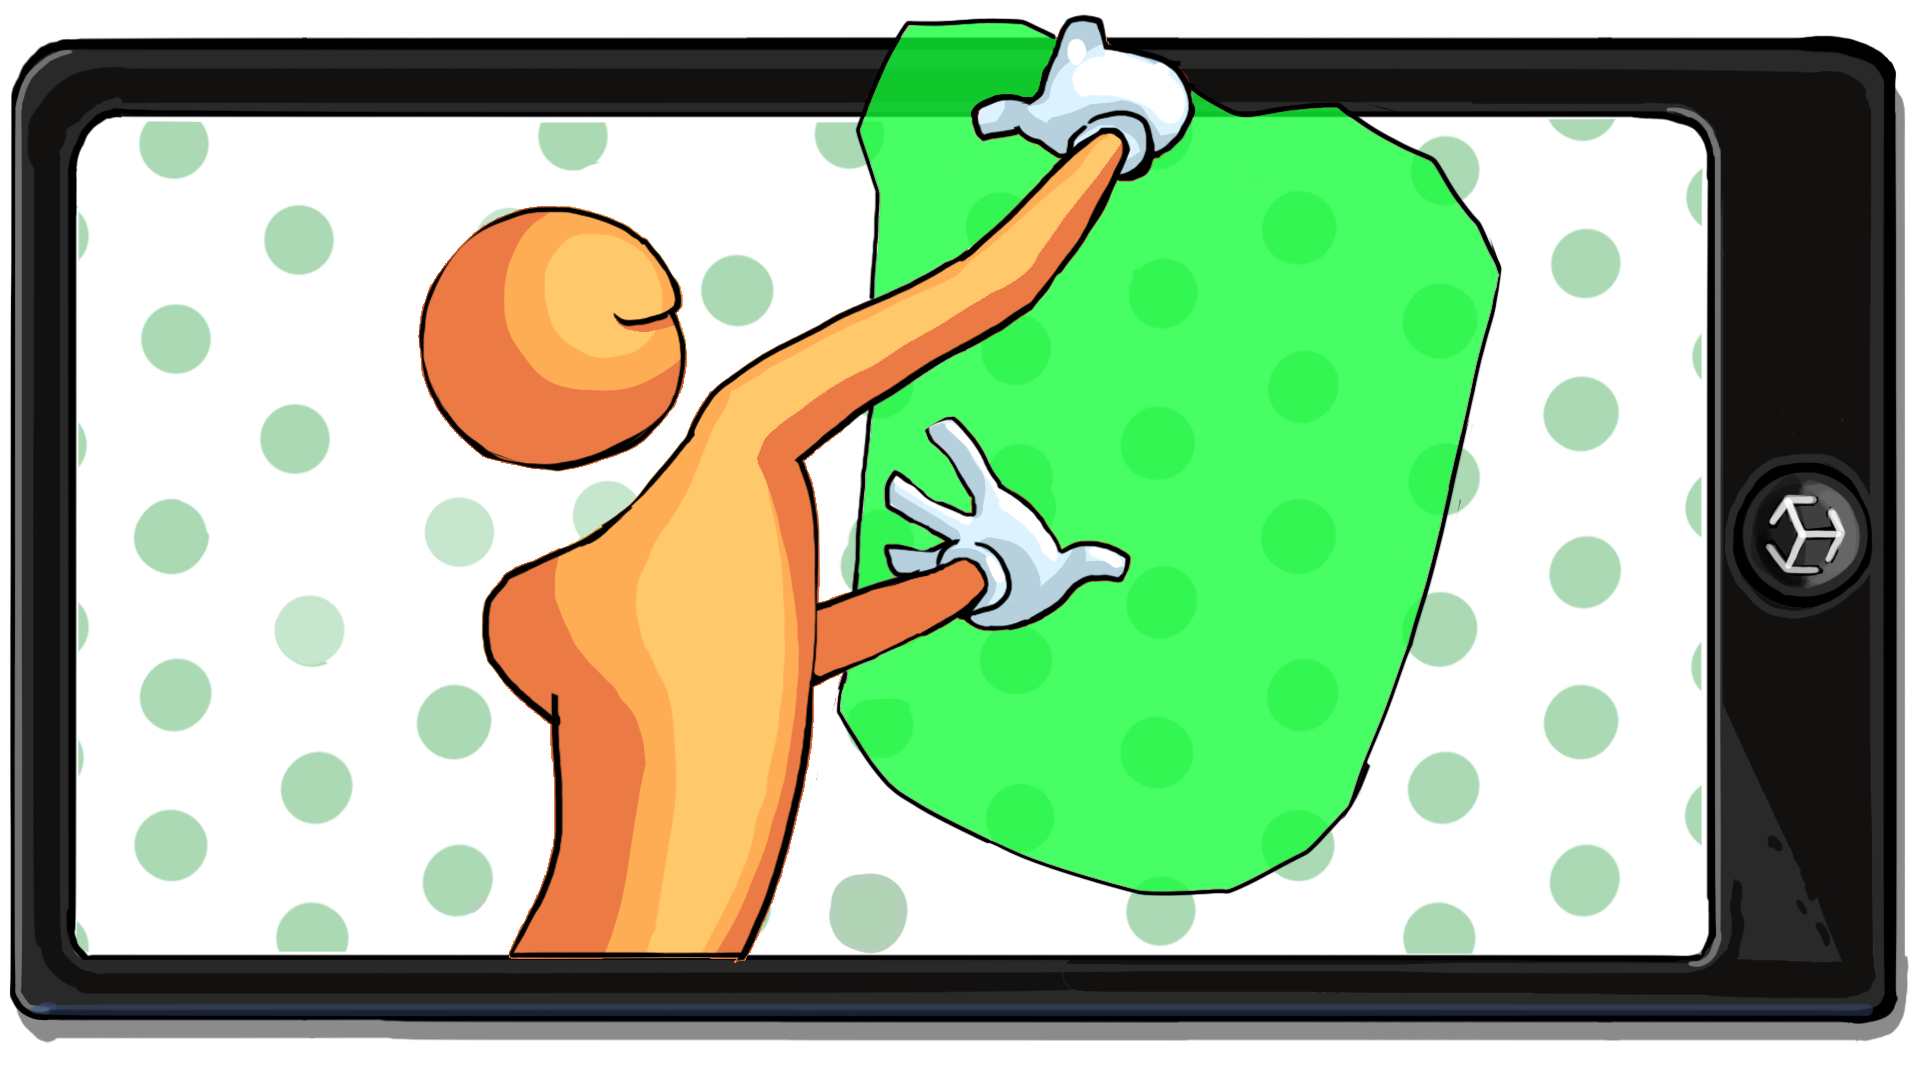
In this project, you’ll create an AR app that makes use of plane detection technology.
You can use plane detection to build an approximate understanding of your surrounding physical environment in AR: the floor, the walls, and any large flat surface, like tables or couches.
Plane detection is extremely useful in AR applications. Users are often asked to place objects on real surfaces in their environment, which helps those objects feel like they are really there.
In this first tutorial, you will set up a new scene in your Unity project. Then you will configure your scene to detect planes in your environment.
1. Overview
In this project, you’ll create an AR app that makes use of plane detection technology. Both ARKit (for iOS devices) and ARCore (for Android devices) have the ability to detect flat surfaces — or planes — in your physical environment. This includes horizontal planes like the floor or a table, and vertical planes like the walls.
In your app, the user will be able to tap on a vertical plane (most likely a wall) or a horizontal plane (a table or the floor) in order to place a portal onto it. This portal will be a window into a virtual 3D environment that the user can peer into and explore.
In this first tutorial, you will set up a new scene in the Unity project you created for your marker project. Then you will configure your scene to detect planes in your environment. By the end of this first tutorial, your project will look like the example below.
2. Why is plane detection useful?
You can use plane detection to build an approximate understanding of your surrounding physical environment in AR: the floor, the walls, and any large flat surface, like tables or couches.
Plane detection is extremely useful in AR applications. Users are often asked to place objects on real surfaces in their environment, which helps those objects feel like they are really there.
Explore the following examples of plane detection in use:
- In Jurassic World: Alive, users can view dinosaurs on the street around them.
- In Angry Birds AR: Isle of Pigs, users can place their game area on any flat surface that is large enough to fit it.
- In the Wayfair AR app, users can place and visualize virtual furniture in their physical rooms.
Why make a portal?
A portal is an ideal use case for AR technology, as it is not an experience that could be replicated on a computer screen or in VR. The user might want to generate one of these portals on their living room floor, their work desk, or on the exterior wall of a building – and can do so as long as they have their mobile device with them.
As you set up your project in this tutorial, take some time to think about portals from popular culture that could inspire the portal that you’re going to create. If you’re not sure where to begin, use the following examples to get you started:
- The wardrobe in The Chronicles of Narnia
- The TARDIS from Dr. Who
- The portals in the Portal video game series
- The portals created by Dr. Strange in the Avengers movies
3. Import the AR portal assets
Now that you have an understanding of what plane detection is and what it can be used for, you’re ready to get started on your own plane detection project.
Follow these instructions to import the portal assets:
1. If you don’t already have the Unity project open from your AR Marker app, open it now.
2. Download and unzip the AR Portal assets.
3. In Unity, go to the main menu and select Assets > Import Package > Custom package.
4. Navigate to the location of the unzipped folder, select the ARPortalAssets.unitypackage file, and then select Open.
5. In the Import Unity Package window, check that all the assets are selected and then select Import.
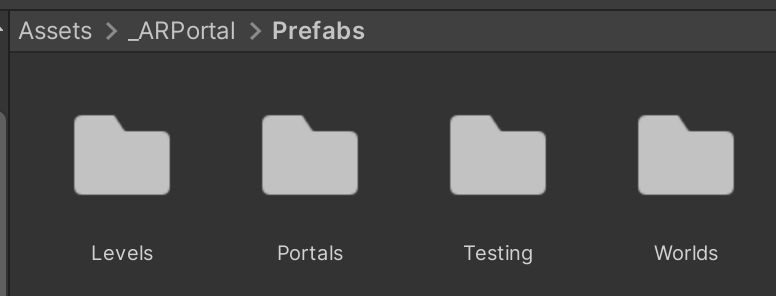
6. In Unity, go to the Project window and navigate to Assets > _ARPortal > Prefabs. Take a little time to explore the assets that you have just imported before you continue.
4. Select your portal theme
The package you imported contains three distinct asset sets, which are drawn from existing Unity learning content. You will select one of these themed environments to be what your app’s users will see inside the portal.
John Lemon
The John Lemon assets come from the John Lemon's Haunted Jaunt: 3D Beginner project. The 3D Beginner project features the interior of a cartoonish haunted mansion filled with silly ghosts, fun portraits, and the lovable, timid main character, John Lemon.
The street
The street assets come from the vertical slice for the Practical Game Accessibility course. The assets create a fantastical outdoor street scene, leading towards a library.
The witch’s hut
The witch’s hut assets come from the VR Beginner: Escape Room project. The VR Beginner project features the interior of an eclectic witch’s hut, which includes a wide range of intriguing magical objects.
Explore the portal environment options
Follow these instructions to browse and choose between the three environment options:
1. In the Project folder, go to Assets > _ARPortal > Source Files > Sample Scenes.
2. Open each of the three scenes and explore them in the Scene view.
3. Decide which of the three sets of environment assets you would like to use for your portal.
Note: You can also import custom assets for your portal environment, but we would recommend waiting to try that until after you have successfully implemented the portal functionality with the assets that we’ve provided.
5. Create a new scene
Now that you have selected a set of assets, follow these instructions to create a new scene:
1. Select File > New Scene to create a new scene from the AR template.
2. Select File > Save As, then save the scene as “AR_Portal” in Assets > _ARPortal > Scenes.
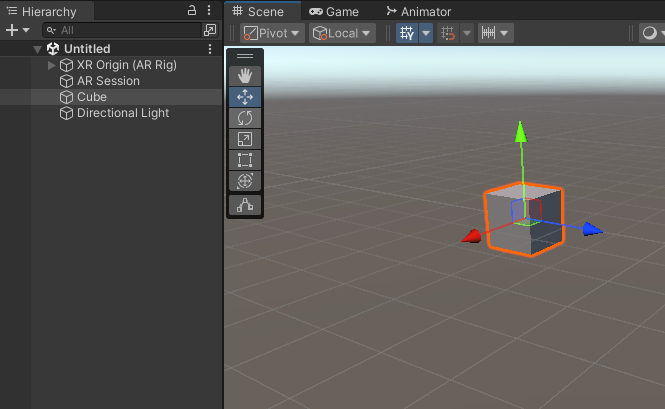
3. In the Hierarchy, select the Cube GameObject and delete it. This is only included for testing purposes.
6. Set up a Default Plane with a new material
AR Foundation provides a Default Plane GameObject that is used to display planes detected in the user’s physical environment.
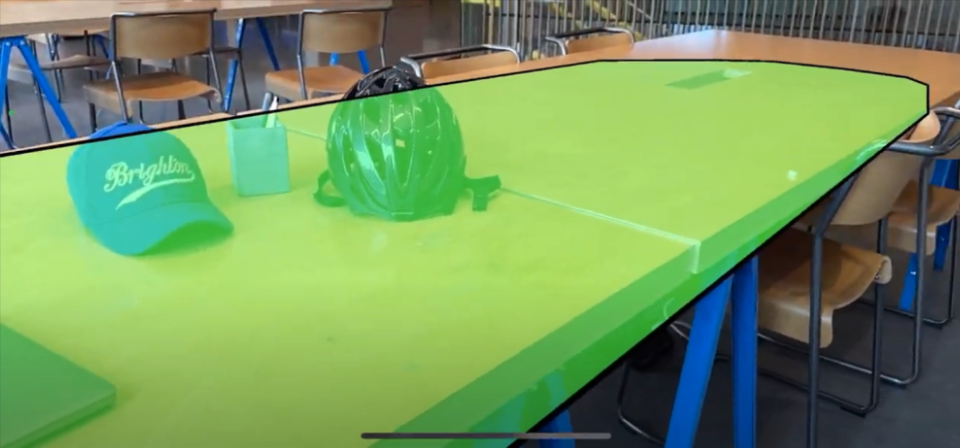
First you need to create a new AR Default Plane prefab, which will be instantiated in the scene each time a plane is detected.
Follow these instructions to create the prefab and customize its material color:
1. In the Hierarchy window, right-click and select XR > AR Default Plane.
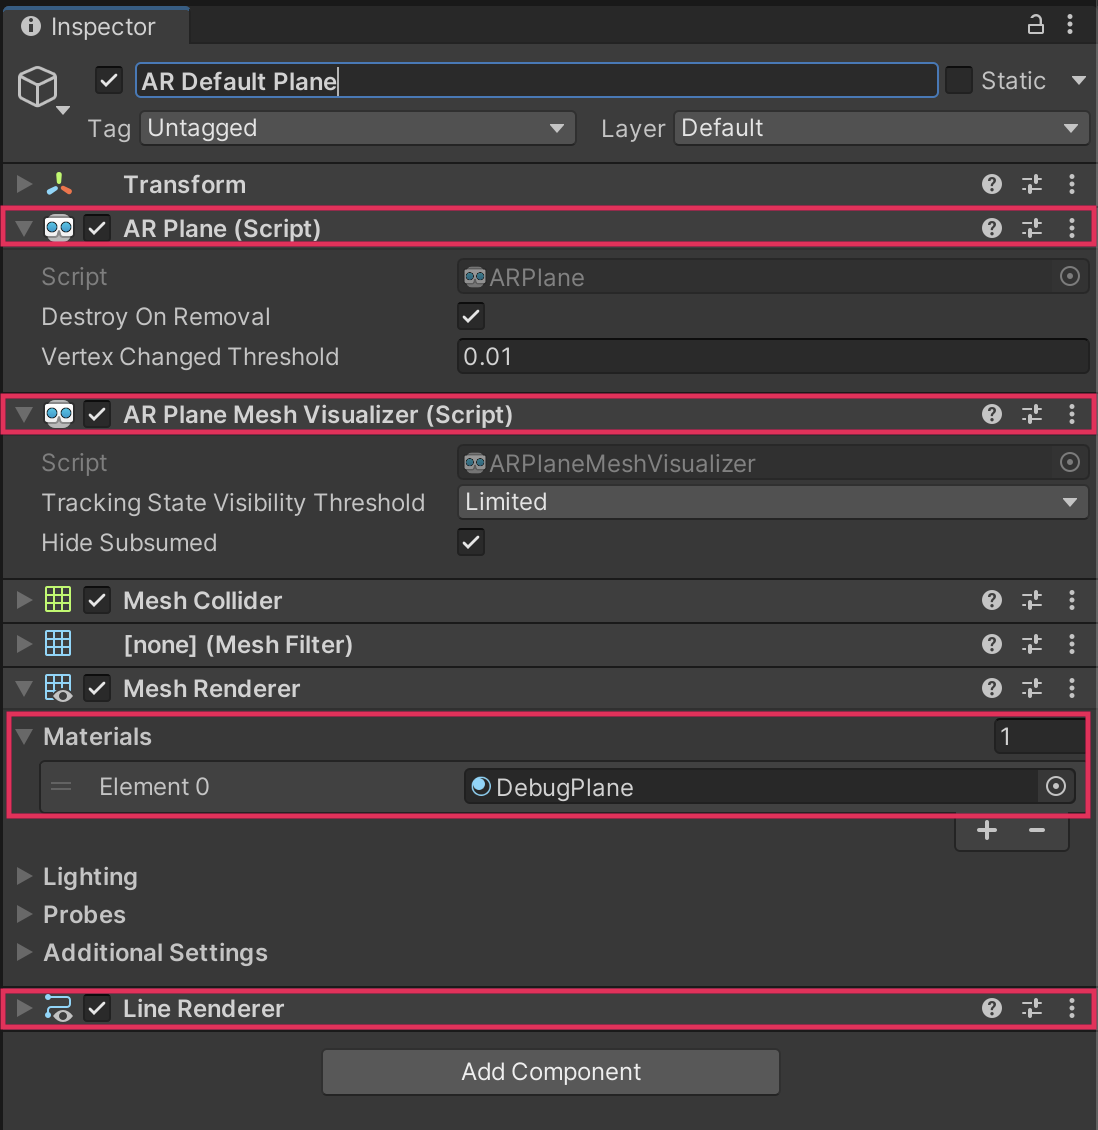
2. Select the new AR Default Plane GameObject and examine the following components in the Inspector:
- The AR Plane (Script) component represents a plane detected by an AR device, which can be instantiated when a flat surface is detected.
- The AR Plane Mesh Visualizer (Script) component handles the display of the material and outline of a detected AR plane.
- The Mesh Renderer component has a DebugPlane material assigned to it.
- The Line Renderer component handles the appearance of the plane’s border outline.
3. In the Mesh Renderer component, expand the Materials section.
4. Select the Element 0 object picker (𝇇) and choose one of these three alternative materials: Plane_Green, Plane_Blue, or Plane_Red. The material that you select will be the color that detected planes will be highlighted.
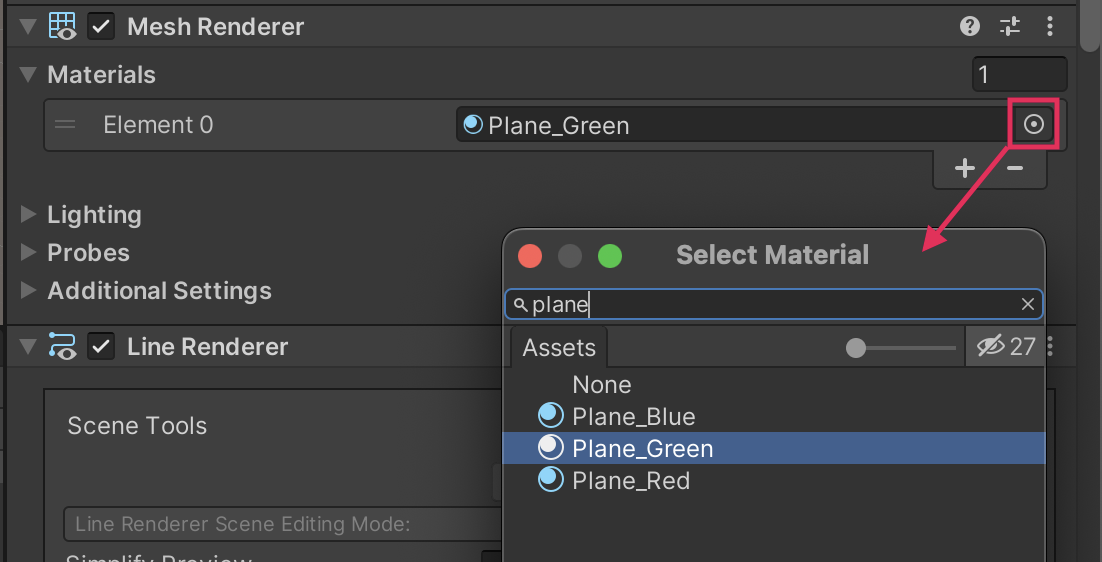
Important: The default DebugPlane material does not work. If you skip the instruction above, your planes will not be displayed.
5. In the Project window, navigate to Assets > _ARPortal > Prefabs.
6. Click and drag the AR Default Plane GameObject from the Hierarchy window into the Prefabs folder in the Project window. The GameObject icon and name should now be displayed in light blue in the Hierarchy window.
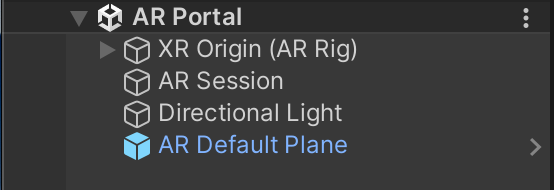
7. Delete the AR Default Plane GameObject from the Hierarchy. AR Foundation will generate an AR Default Plane GameObject from the prefab that you have just created when a plane is detected.
7. Configure the AR Plane Manager
Next, you need to specify which GameObject you want to display over a plane when it’s detected by the app. You’ll do this by configuring the AR Plane Manager located on the XR Origin (AR Rig). The configuration process for the AR Plane Manager is the exact same process you used for the AR Face Manager in previous projects.
Important: There are two different versions of the XR Origin GameObject; one for Windows and one for macOS. If the version you’re using already has any of the components we mention below, you don't need to add a new one, and can continue to the next step.
To set up the AR Plane Manager component, follow these instructions:
1. In the Hierarchy window, select the XR Origin (AR Rig) GameObject.
2. In the Inspector window, add the AR Plane Manager component.
This component is in charge of creating GameObjects for the planes detected in the environment.
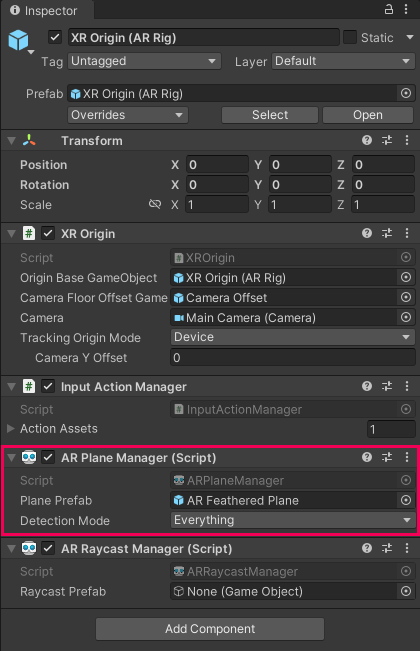
3. In the AR Plane Manager component, locate the Plane Prefab property.
4. Click and drag the AR Default Plane prefab from the Project window (in Assets > _ARPortal > Prefabs) and assign it to the Plane Prefab property.
5. In the AR Plane Manager component, set the Detection Mode property to either Vertical or Horizontal planes.
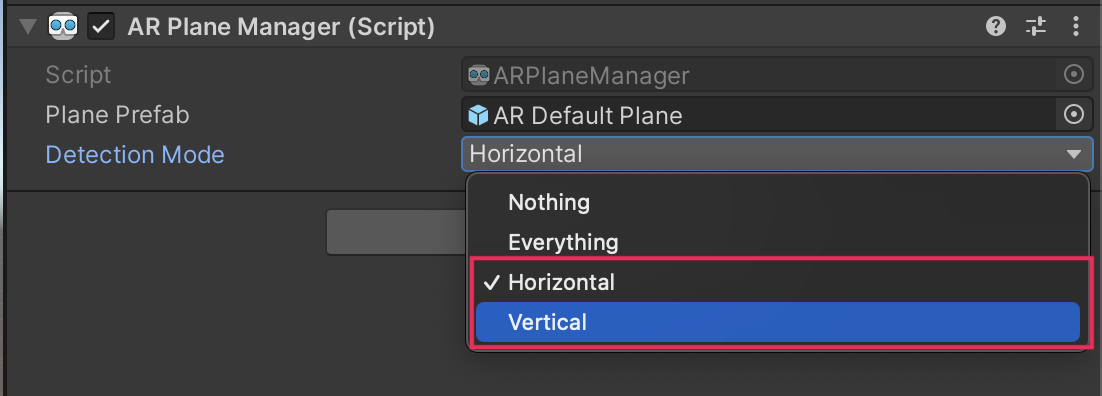
If you want your portal to appear on the wall like a window, select Vertical. If you want your portal to appear on the floor or a table as if you’re peering into the scene from above, select Horizontal.
8. Build and test
It’s time to test your project! Just like in previous tutorials, you can test the plane manager in the simulated environment in Play mode. As soon as you begin to move the camera with the right mouse button, the plane will appear on whichever surface type you selected. This is helpful for in-Editor testing; however, it’s important that you test your plane directly on your device as well.
The video below demonstrates how the app should function on your device.
To test the project in its current state, follow these instructions to build to your device:
1. In the Hierarchy window, check that the AR Default Plane GameObject has been deleted. Remember, your app will instantiate the prefab when a plane is detected.
2. Save the scene.
3. Open the Build Settings window (File > Build Settings).
4. Select Add Open Scenes to add the current scene to the build. Deselect any previous scenes to make sure that they are not included in your new build.
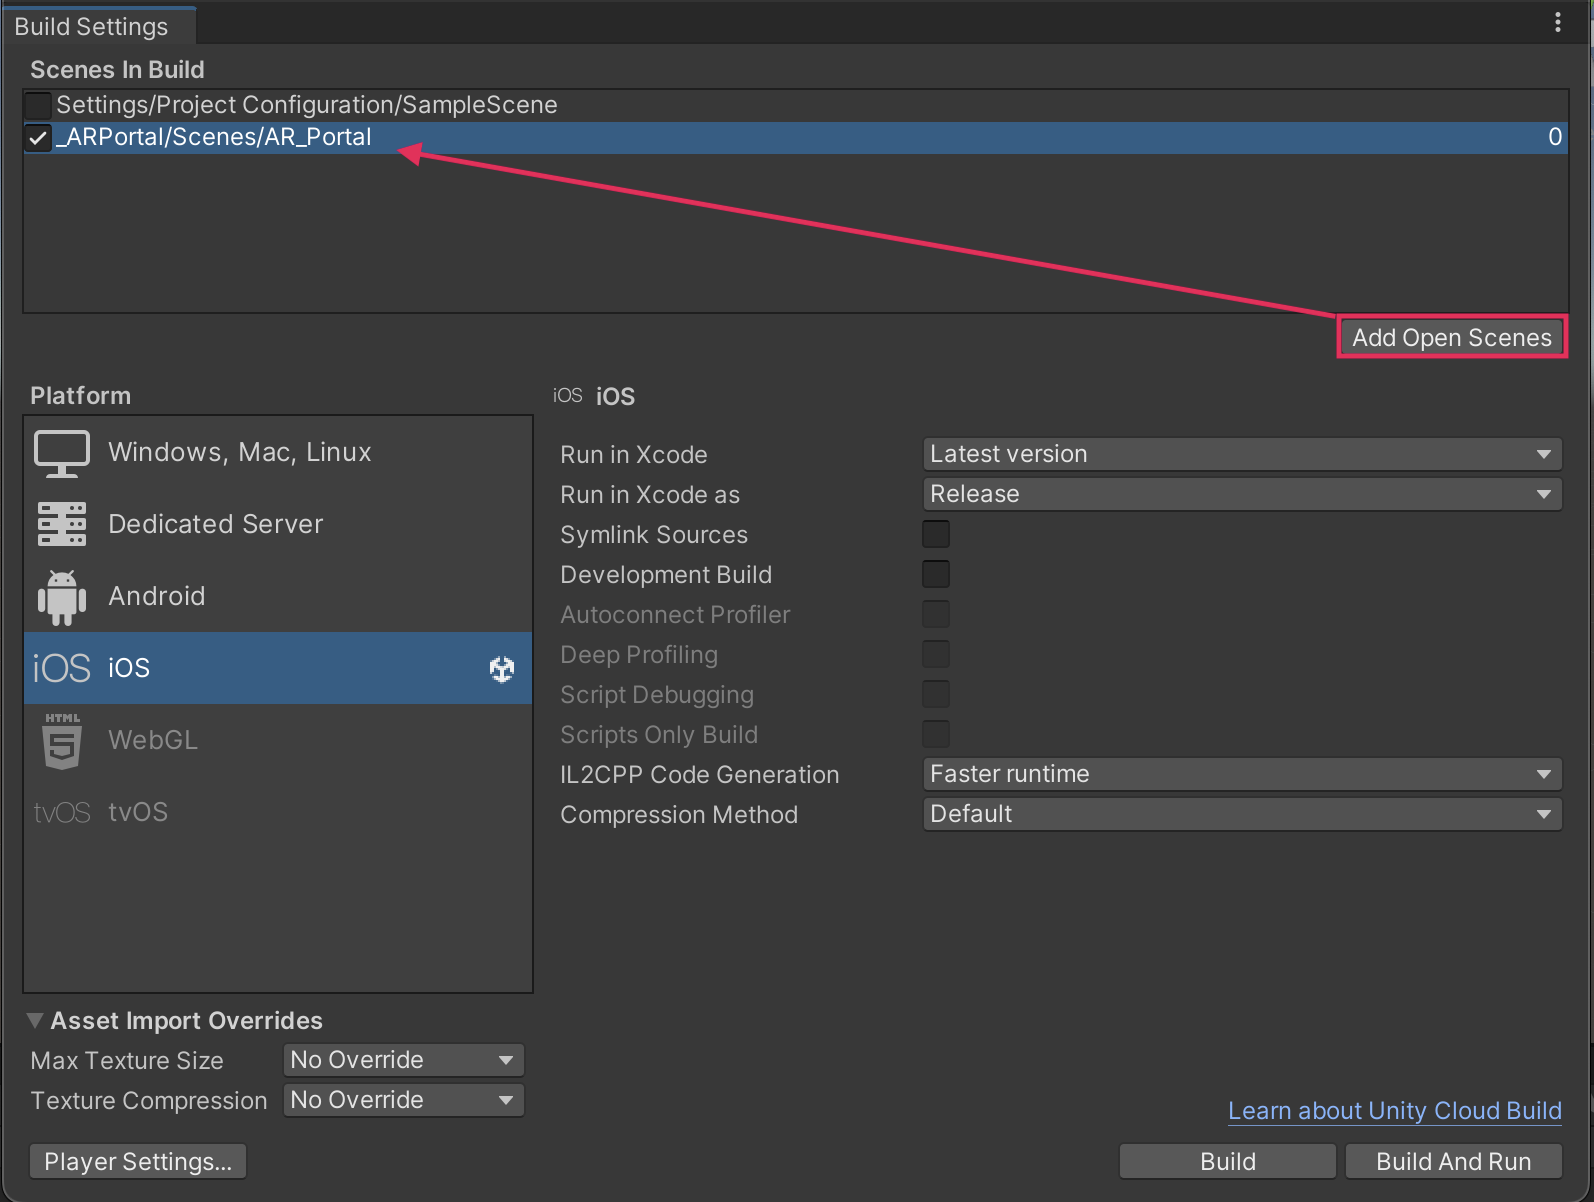
5. Make sure that your device is connected to your computer, and then select Build and Run to build the app on your device.
Note: For a reminder of how to build to your device, you can review the process for Android or iOS.
6. The application will open automatically on your device. Point the camera slowly around the scene until a vertical or horizontal plane is detected.
Note: It can be difficult to detect planes in certain environments, such as a room with very plain white walls. If you have any trouble, try temporarily switching the Detection Mode in the AR Plane Manager to detect both vertical and horizontal planes.
9. More things to try
If you want to further develop your skills, explore new concepts, or improve your project, check out some of the optional activities below. Each one is tagged as either Easy, Medium, or Difficult, so you can choose the level of challenge.
These activities are entirely optional, so if you’re not interested, no problem – just skip this step.
We do recommend attempting at least one of them in order to get the most out of this learning experience. Good luck!
Easy: Experiment with plane detection modes
You may have chosen a vertical or horizontal portal because you prefer that design. However, it is helpful to understand how your device’s plane detection works for both horizontal and vertical surfaces. In the AR Plane Manager component, temporarily set the Detection Mode property to Everything and see what kinds of surfaces are detected.
Medium: Edit the AR Default Plane material
In the assets for this project, you were provided with simple materials for the AR Default Plane, like Plane_Green, Plane_Red, and Plane_Blue. You can use any of those three options, or you could make your own new material and use that instead. There is also a Line Renderer component on the AR Default Plane that controls the appearance of the plane’s outline – you can edit that too!
Difficult: Experiment with point clouds
Feature points are notable features in the environment that the device can track between frames, such as a knot in a wooden table. A set of multiple feature points is called a point cloud. Simple point clouds can be used for simple tasks like spawning a virtual object in the environment. More complex, detailed point clouds can be used for advanced tasks like mapping or modeling an environment.
You need the AR Point Cloud Manager component and an AR Default Point Cloud prefab to implement point clouds in your app. This is a very similar process to the one you followed when setting up an AR Plane Manager and AR Face Manager.
Note: You may want to temporarily disable the AR Plane Manager component in order to see the point cloud clearly.

10. Next steps
In this tutorial you selected a set of assets for your portal and created a basic plane detection application — great job! In the next tutorial, you will get started on the portal placement functionality by detecting a user’s touch in your app.