Implement account linking and authorization
Tutorial
·
intermediate
·
+10XP
·
20 mins
·
Unity Technologies

In this tutorial, you’ll learn how to implement the OAuth2 authentication flow and handle player authorization.
1. Set up the Discord Social SDK Authentication in Unity
Account linking is the foundation of a Discord Social SDK integration, allowing players to connect their Discord accounts to your game. When the OAuth2 flow is started the player will be able to authorize your game through their Discord client or the browser. You’ll use your Discord Application ID to start the OAuth2 flow in the Discord Social SDK.
To configure the Discord Social SDK in your Unity project, follow these instructions:
1. In the Unity Editor, in the Project window, open the Assets folder.
2. Right-click and select Create > MonoBehavior Script, and name it “DiscordManager”.
Note: Depending on your Unity version, the path to create a MonoBehaviour script might be Create > C# Script or some other variation.
3. Open the DiscordManager script and add the following lines of code:
using UnityEngine;
using UnityEngine.UI;
using Discord.Sdk;

public class DiscordManager : MonoBehaviour
{
    [SerializeField]
    private ulong applicationId;

    private Client client;
    private string codeVerifier;

    void Awake()
    {
        client = new Client();
    }

    private void OnDestroy()
    {
        client.Disconnect();
    }
}
The Client class is the main entry point for the Discord SDK. The Client is used to authenticate with Discord, update Rich Presence, get a player’s relationships for the friends list, and has callbacks to subscribe to for messages, player updates, logging, and more.
4. Add the following functions:
private void OnLog(string message, LoggingSeverity severity)
{
    Debug.Log($"Log: {severity} - {message}");
}

private void OnStatusChanged(Client.Status status, Client.Error error, int errorCode)
{
    Debug.Log($"Status changed: {status}");

    if (error != Client.Error.None)
    {
        Debug.LogError($"Error: {error}, code: {errorCode}");
    }
}
5. Add the following lines of code to the end of the Awake() function:
client.AddLogCallback(OnLog, LoggingSeverity.Error);
client.SetStatusChangedCallback(OnStatusChanged);
client.AddLogCallback() adds a callback function to be invoked for each new log message generated by the Discord Social SDK. OnLog() passes that logging to the Unity console for any errors that might happen while using the Discord Social SDK.
client.SetStatusChangedCallback() sets a callback function to be invoked whenever the Social SDKs status changes. OnStatusChanged() will log the current status of the Social SDK to the Unity console as it authenticates the player. This function will be used later to activate Rich Presence and the friends list once it receives a status of Client.Status.Ready.
With logging and a callback in place to handle status changes in the Client we will now get feedback from the authentication process as it happens. The next step is to start the OAuth flow which the player will see in their Discord client or the browser when playing your game.
6. Add the following function to the end of the DiscordManager class which starts the OAuth2 flow:
public void StartOAuthFlow()
{
    var authorizationVerifier = client.CreateAuthorizationCodeVerifier();
    codeVerifier = authorizationVerifier.Verifier();

    var args = new AuthorizationArgs();
    args.SetClientId(applicationId);
    args.SetScopes(Client.GetDefaultCommunicationScopes());
    args.SetCodeChallenge(authorizationVerifier.Challenge());
    client.Authorize(args, OnAuthorizeResult);
}
The client.Authorize() call is what opens either the Discord desktop application (if running) or a browser window for player authorization. Once the player authorizes the game through the Discord Application, OnAuthorizeResult() is called. If the player doesn’t authorize the application, the resulting error will be printed to the Debug log.
Client.GetDefaultCommunicationScopes() Returns the default set of OAuth2 scopes that should be used with the Discord SDK when making use of the full SDK capabilities, including communications-related features (e.g. user DMs, lobbies, voice chat).
When the OAuth flow completes it returns with an authentication token which will be used to authorize the player, connecting the Client to Discord.
7. Add the following functions to the end of the DiscordManager class to use the authentication token and complete the connection:
private void OnAuthorizeResult(ClientResult result, string code, string redirectUri)
{
    if (!result.Successful())
    {
        Debug.Log($"Authorization result: [{result.Error()}]");
        return;
    }
    GetTokenFromCode(code, redirectUri);
}

private void GetTokenFromCode(string code, string redirectUri)
{
    client.GetToken(applicationId, code, codeVerifier, redirectUri, OnGetToken);
}

private void OnGetToken(ClientResult result, string token, string refreshToken, AuthorizationTokenType tokenType, int expiresIn, string scope)
{
    if (token == null || token == string.Empty)
    {
        Debug.Log("Failed to retrieve token");
    }
    else
    {
        client.UpdateToken(AuthorizationTokenType.Bearer, token, OnUpdateToken);
    }
}

private void OnUpdateToken(ClientResult result)
{
    if (result.Successful())
    {
        client.Connect();
    }
    else
    {
        Debug.LogError($"Failed to update token: {result.Error()}");
    }
}
No need to worry about converting the authorization code to a usable token - that's all handled in the GetTokenFromCode() section by client.GetToken(). Once you have the token, you simply give it to the Discord Social SDK using client.UpdateToken(), and the SDK handles all the storage and management internally.
After the SDK stores the token, client.Connect() establishes the account link. That’s all the code needed to handle the authentication and account linking process. The DiscordManager script needs to be added to the scene along with a Button to get the process started.
9. In the Hierarchy window, create an empty GameObject called “DiscordManager” and attach the DiscordManager script to it
10. Select the DiscordManager GameObject and paste the Application ID into the Application ID space on the DiscordManager script
You can find your Application ID in the General Information section of the application you created in the Discord Developer Portal. For more information, check out Discord’s Where can I find my Application/Team/Server ID? documentation.
11. Right-click in the Hierarchy window and select UI > Button - TextMeshPro.
This will create a button in your scene. The TMP Importer dialog will open asking you to import Text Mesh Pro.
12. Select Import TMP Essentials and then close the dialog.
13. Name the new Button “Connect to Discord”. Use the foldout (triangle) to expand the button in the Hierarchy window and select the Text (TMP) GameObject. In the Inspector window, in the Text component, enter “Connect to Discord”.
14. Select the Add (+) button in the OnClick() section of the Button Component on the Button GameObject.
15. Drag the DiscordManager GameObject into the empty space created and select DiscordManager > StartOAuthFlow() as the function to trigger when this button is clicked.

2. Run the project
To run the project and check that you’re connected Unity to Discord through the Discord Social SDK, follow these instructions:
1. Press the Play button to enter Play mode.
Note: On macOS you might get the following error: “"libdiscord_partner_sdk.dylib" Not Opened because Apple couldn't verify it.” To rectify this, open System Settings > Privacy & Security and scroll down to the Security section where you’ll see “"libdiscord_partner_sdk.dylib" was blocked to protect your Mac”. Select Open Anyway and enter Play mode again. Now when you get the dialog, select Open Anyway and you'll be able to run the sample project with the Social SDK successfully.
Note: If the Discord Social SDK package hasn’t been added to the sample project you’ll see the following error: “The type or namespace name 'Discord', 'Client', etc... could not be found (are you missing a using directive or an assembly reference?)” To avoid this, make sure you follow all the steps in sections 1.2 and 1.3 so that the SDK is properly imported into your Unity project.
2. Select the Connect to Discord button in the UI.
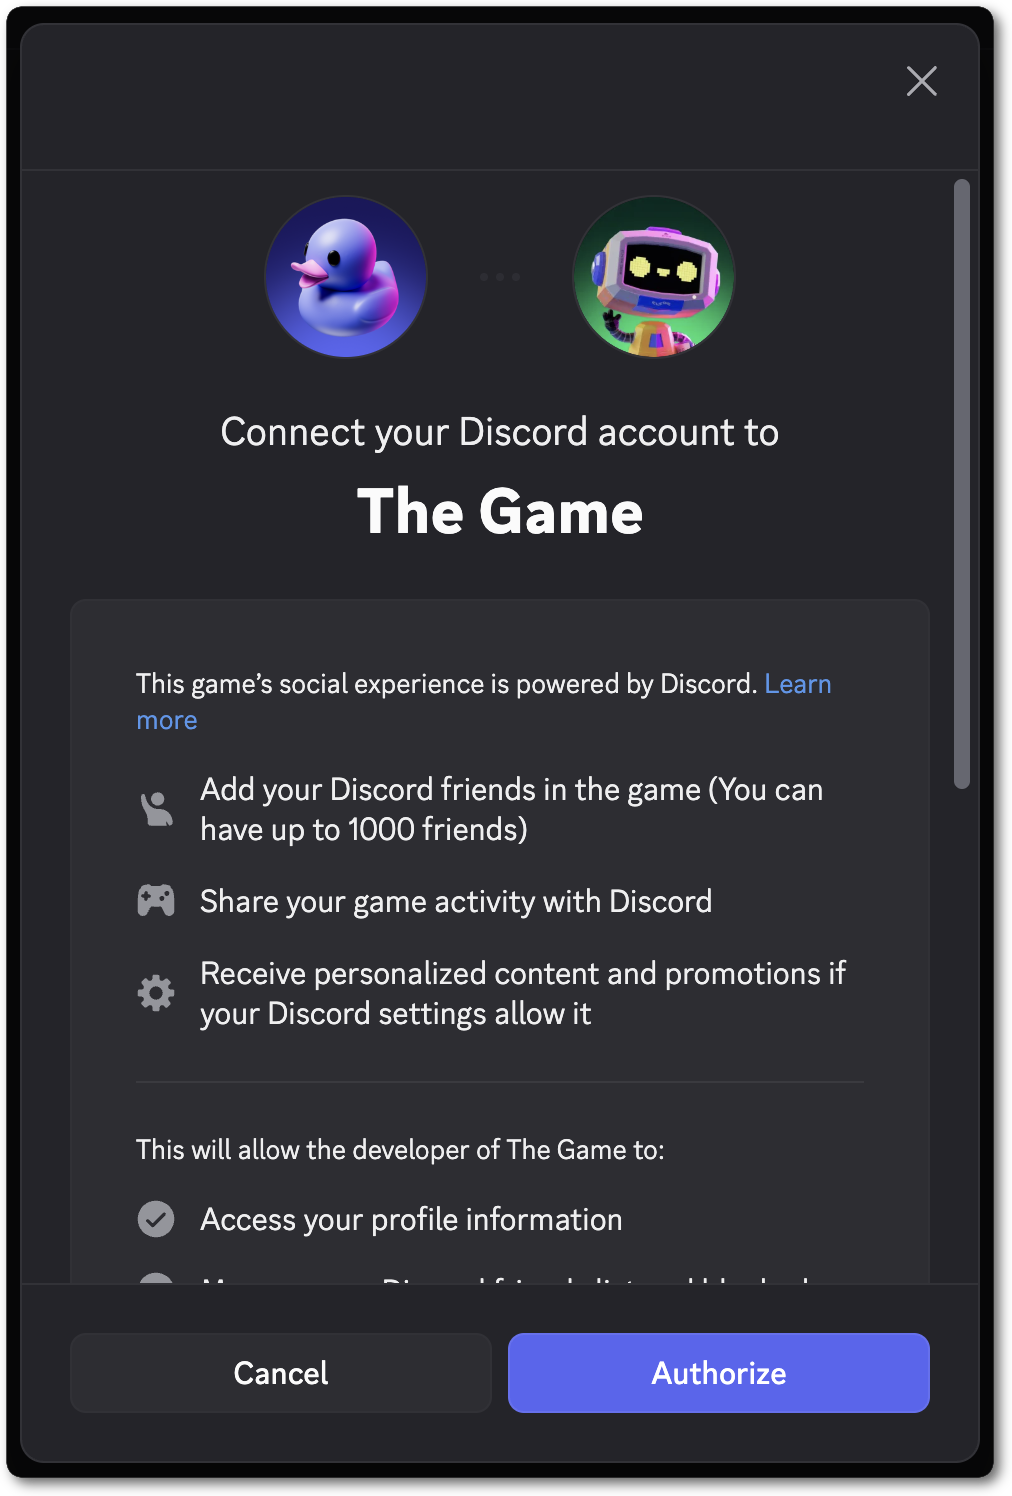
This will open the Discord desktop application (if you have it installed) or Discord.com in your browser.

If nothing happens when you select the Connect to Discord button, make sure you have a DiscordManager GameObject in your scene and that it has your Application ID. Make sure to also check the Unity Console window for any errors.
3. Select the Authorize button.
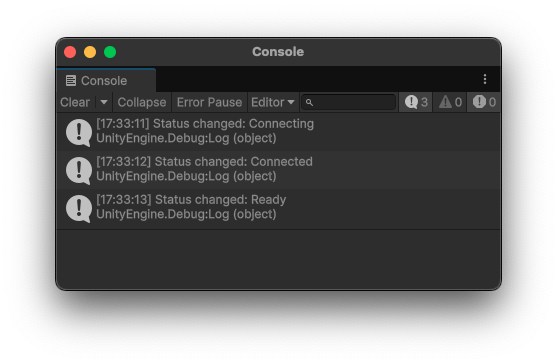
Once authorized, you’ll see a message in the Unity Console window that says “Status changed: Ready”. This means you’ve successfully connected Unity to Discord through the Discord Social SDK! You’ll see all logging from the Discord Social SDK in the Unity Console window and any errors about your setup can be found there with details on how to resolve them.

3. Check your scripts
Before moving on, take a moment to check that your script is correct.
The full DiscordManager script:
using UnityEngine;
using UnityEngine.UI;
using Discord.Sdk;

public class DiscordManager : MonoBehaviour
{
    [SerializeField]
    private ulong applicationId;

    private Client client;
    private string codeVerifier;

    void Awake()
    {
        client = new Client();
        client.AddLogCallback(OnLog, LoggingSeverity.Error);
        client.SetStatusChangedCallback(OnStatusChanged);
    }

    private void OnDestroy()
    {
        client.Disconnect();
    }

    private void OnLog(string message, LoggingSeverity severity)
    {
        Debug.Log($"Log: {severity} - {message}");
    }

    private void OnStatusChanged(Client.Status status, Client.Error error, int errorCode)
    {
        Debug.Log($"Status changed: {status}");

        if (error != Client.Error.None)
        {
            Debug.LogError($"Error: {error}, code: {errorCode}");
        }
    }

    public void StartOAuthFlow()
    {
        var authorizationVerifier = client.CreateAuthorizationCodeVerifier();
        codeVerifier = authorizationVerifier.Verifier();

        var args = new AuthorizationArgs();
        args.SetClientId(applicationId);
        args.SetScopes(Client.GetDefaultCommunicationScopes());
        args.SetCodeChallenge(authorizationVerifier.Challenge());
        client.Authorize(args, OnAuthorizeResult);
    }

    private void OnAuthorizeResult(ClientResult result, string code, string redirectUri)
    {
        if (!result.Successful())
        {
            Debug.Log($"Authorization result: [{result.Error()}]");
            return;
        }
        GetTokenFromCode(code, redirectUri);
    }

    private void GetTokenFromCode(string code, string redirectUri)
    {
        client.GetToken(applicationId, code, codeVerifier, redirectUri, OnGetToken);
    }

    private void OnGetToken(ClientResult result, string token, string refreshToken, AuthorizationTokenType tokenType, int expiresIn, string scope)
    {
        if (token == null || token == string.Empty)
        {
            Debug.Log("Failed to retrieve token");
        }
        else
        {
            client.UpdateToken(AuthorizationTokenType.Bearer, token, OnUpdateToken);
        }
    }

    private void OnUpdateToken(ClientResult result)
    {
        if (result.Successful())
        {
            client.Connect();
        }
        else
        {
            Debug.LogError($"Failed to update token: {result.Error()}");
        }
    }
}