Implementing Rich Presence
Tutorial
·
intermediate
·
+10XP
·
20 mins
·
Unity Technologies

In this tutorial, you will learn how to implement Rich Presence in your Unity project.
1. Set up Rich Presence code
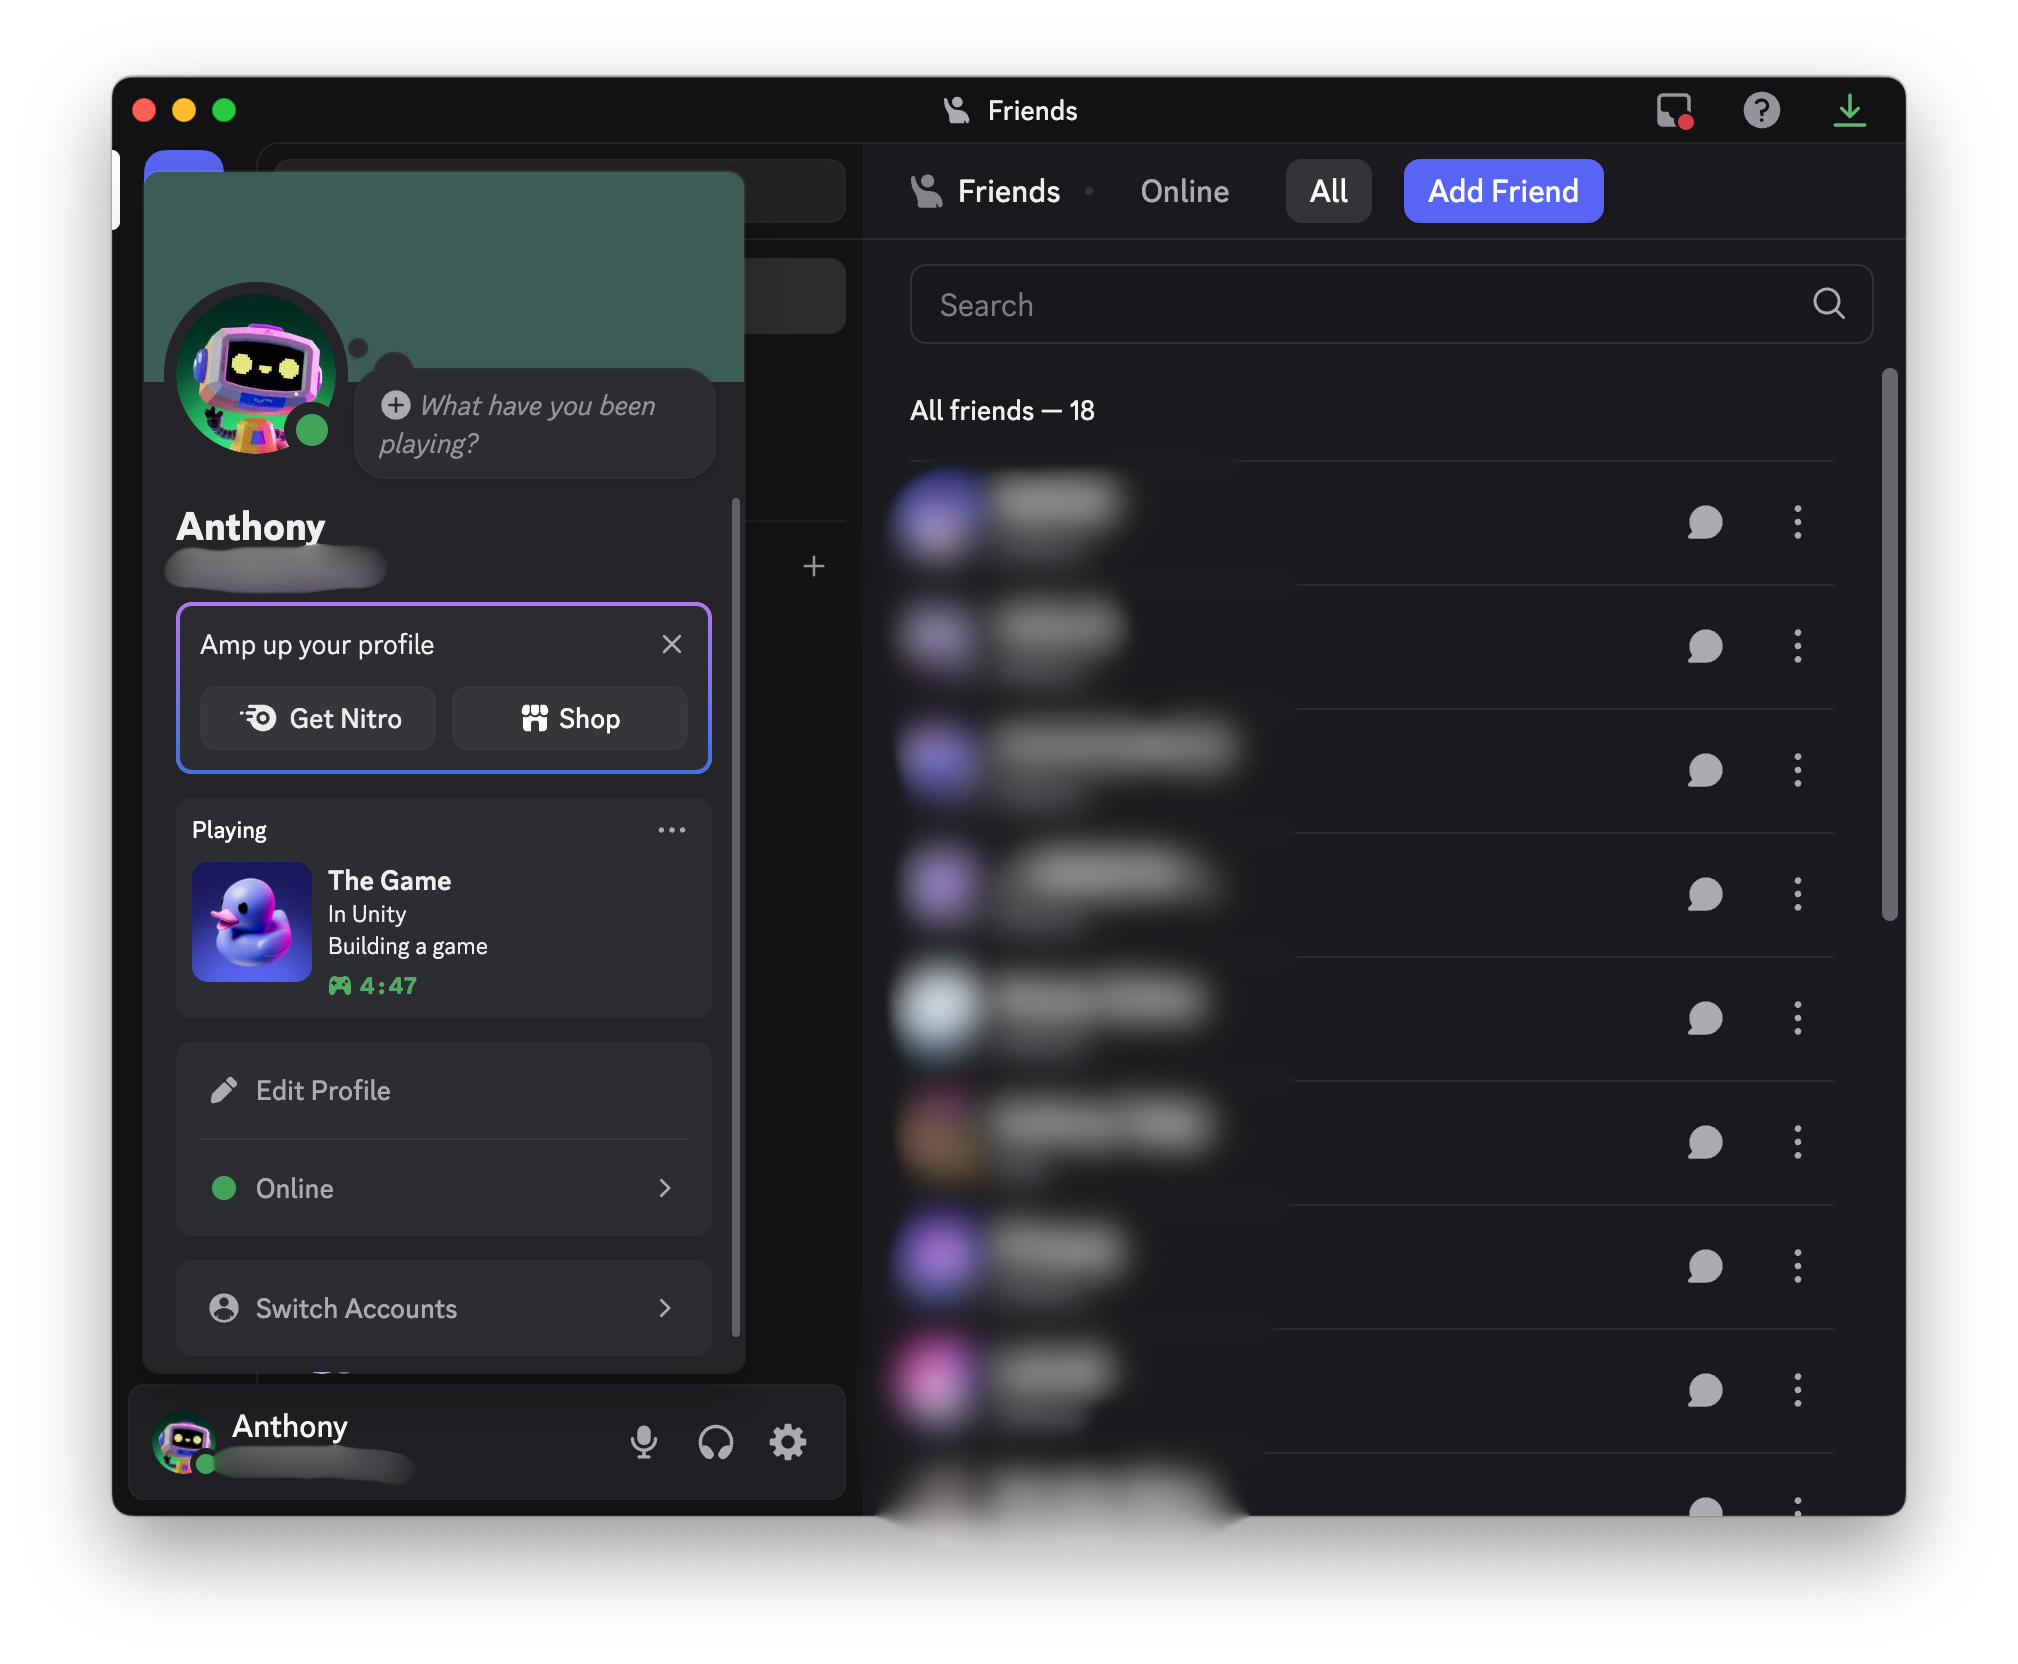
Rich Presence is Discord's way of showing what players are doing in your game directly on their profiles. Instead of just seeing "Playing Your Game", friends see rich, actionable information like "Building Castle - Medieval Village - 2:45 elapsed", and have the ability to join with one click.
To set up Rich Presence in your Unity project, follow these instructions:
1. In the Unity Editor, in the Project window, open the Assets folder.
2. Right-click and select Create > MonoBehavior Script and name it “RichPresence”.
Note: Depending on your Unity version, the path to create a MonoBehaviour script might be Create > C# Script or some other variation.
3. Open RichPresence script and add the following lines of code:
using UnityEngine;
using Discord.Sdk;

public class RichPresence : MonoBehaviour
{
    [SerializeField]
    private string details = "In Unity";

    [SerializeField]
    private string state = "Building a game";

    private ulong startTimestamp;

    void Start()
    {
        startTimestamp = (ulong)System.DateTimeOffset.UtcNow.ToUnixTimeMilliseconds();
    }

    public void UpdateRichPresence(Client client)
    {
        Activity activity = new Activity();

        activity.SetType(ActivityTypes.Playing);
        activity.SetDetails(details);
        activity.SetState(state);

        var activityTimestamp = new ActivityTimestamps();
        activityTimestamp.SetStart(startTimestamp);
        activity.SetTimestamps(activityTimestamp);

        client.UpdateRichPresence(activity, OnUpdateRichPresence);
    }

    private void OnUpdateRichPresence(ClientResult result)
    {
        if (result.Successful())
        {
            Debug.Log("Rich presence updated!");
        }
        else
        {
            Debug.LogError($"Failed to update rich presence {result.Error()}");
        }
    }
}
This code will set a player’s status in the Discord client. The Activity class is your main tool for setting Rich Presence details. It contains all the fields Discord needs to display engaging information:
- SetType: Usually ActivityTypes.Playing for games to indicate the player is actively playing.
- SetDetails: Details are the first line context that provides more specific context around the current activity ("Escort Mission", "Level 7").
- SetState: State is the second line context that should answer what state the player is in ("Building", "Exploring", “In Queue”).
- SetTimestamps: Use with ActivityTimestamps to show the elapsed time since the activity started.

Once those are set, calling client.UpdateRichPresence() will immediately send those details to the Discord Application for that player. In order to set the player’s Rich Presence we need to call client.UpdateRichPresence() once the player has authenticated and the Client has a ready status.
4. Open DiscordManager and add the following variable to the top of the class, below the applicationId:
[SerializeField]
private RichPresence richPresence;
5. At the end of the OnStatusChanged() method, add the following lines of code:
if (status == Client.Status.Ready)
{
    richPresence.UpdateRichPresence(client);
}
Now when the DiscordManager script receives Client.Status.Ready, it will call UpdateRichPresence() on the RichPresence script, which will trigger the Rich Presence update in the Discord Application. You can also call UpdateRichPresence() at any point from other scripts in the game to change the player's status as they play.
2. Set up Rich Presence in the scene
To set up Rich Presence in your scene, follow these instructions:
1. In the Hierarchy window, create an empty GameObject called “RichPresence” and attach the RichPresence script to it.
2. In the Hierarchy window, select the DiscordManager GameObject and drag the RichPresence GameObject into the Rich Presence box on the DiscordManager script.
3. Run the project
1. Press the Play button to enter Play mode.
2. Select the Connect to Discord button in the UI.
3. Select the Authorize button in the Discord Application.
4. Return to Unity and watch the Console to see authentication complete and Rich Presence get set.
5. Return to the Discord Application and open the profile section to see the player’s Rich Presence

4. More Rich Presence
These are the basics of Rich Presence, but the Discord Social SDK also supports the following features:
- Edit the game name: To edit the game name, go back to the Discord Developer Portal, select your application, then in the leftmost menu, in the General Information section, edit the text in the Name box.
- Custom assets: Upload images to your application in the Discord Developer Portal and reference them with activity.SetAssets() to show game specific artwork in the Rich Presence activity card.
- Join & Invite system: Implement Discord Social SDK’s game invites to let friends join your game directly from the activity card.
- Party information: Use ActivityParty to show group sizes and enable friend invitations.
For more information on Rich Presence, check out Discord’s Setting Rich Presence and Best Practices for Rich Presence documentation.
5. Check your scripts
Before moving on, take a moment to check that your scripts are correct.
The full RichPresence script:
using UnityEngine;
using Discord.Sdk;

public class RichPresence : MonoBehaviour
{
    [SerializeField]
    private string details = "In Unity";

    [SerializeField]
    private string state = "Building a game";

    private ulong startTimestamp;

    void Start()
    {
        startTimestamp = (ulong)System.DateTimeOffset.UtcNow.ToUnixTimeMilliseconds();
    }

    public void UpdateRichPresence(Client client)
    {
        Activity activity = new Activity();

        activity.SetType(ActivityTypes.Playing);
        activity.SetDetails(details);
        activity.SetState(state);

        var activityTimestamp = new ActivityTimestamps();
        activityTimestamp.SetStart(startTimestamp);
        activity.SetTimestamps(activityTimestamp);

        client.UpdateRichPresence(activity, OnUpdateRichPresence);
    }

    private void OnUpdateRichPresence(ClientResult result)
    {
        if (result.Successful())
        {
            Debug.Log("Rich presence updated!");
        }
        else
        {
            Debug.LogError($"Failed to update rich presence {result.Error()}");
        }
    }
}
The full DiscordManager script:
using UnityEngine;
using UnityEngine.UI;
using Discord.Sdk;

public class DiscordManager : MonoBehaviour
{
    [SerializeField]
    private ulong applicationId;
    [SerializeField]
    private RichPresence richPresence;

    private Client client;
    private string codeVerifier;

    void Awake()
    {
        client = new Client();
        client.AddLogCallback(OnLog, LoggingSeverity.Error);
        client.SetStatusChangedCallback(OnStatusChanged);
    }

    private void OnDestroy()
    {
        client.Disconnect();
    }

    private void OnLog(string message, LoggingSeverity severity)
    {
        Debug.Log($"Log: {severity} - {message}");
    }

    private void OnStatusChanged(Client.Status status, Client.Error error, int errorCode)
    {
        Debug.Log($"Status changed: {status}");

        if (error != Client.Error.None)
        {
            Debug.LogError($"Error: {error}, code: {errorCode}");
        }

        if (status == Client.Status.Ready)
        {
            richPresence.UpdateRichPresence(client);
        }
    }

    public void StartOAuthFlow()
    {
        var authorizationVerifier = client.CreateAuthorizationCodeVerifier();
        codeVerifier = authorizationVerifier.Verifier();

        var args = new AuthorizationArgs();
        args.SetClientId(applicationId);
        args.SetScopes(Client.GetDefaultCommunicationScopes());
        args.SetCodeChallenge(authorizationVerifier.Challenge());
        client.Authorize(args, OnAuthorizeResult);
    }

    private void OnAuthorizeResult(ClientResult result, string code, string redirectUri)
    {
        if (!result.Successful())
        {
            Debug.Log($"Authorization result: [{result.Error()}]");
            return;
        }
        GetTokenFromCode(code, redirectUri);
    }

    private void GetTokenFromCode(string code, string redirectUri)
    {
        client.GetToken(applicationId, code, codeVerifier, redirectUri, OnGetToken);
    }

    private void OnGetToken(ClientResult result, string token, string refreshToken, AuthorizationTokenType tokenType, int expiresIn, string scope)
    {
        if (token == null || token == string.Empty)
        {
            Debug.Log("Failed to retrieve token");
        }
        else
        {
            client.UpdateToken(AuthorizationTokenType.Bearer, token, OnUpdateToken);
        }
    }

    private void OnUpdateToken(ClientResult result)
    {
        if (result.Successful())
        {
            client.Connect();
        }
        else
        {
            Debug.LogError($"Failed to update token: {result.Error()}");
        }
    }
}