Configure and build your basic app
Tutorial
intermediate
+10XP
30 mins
24
Unity Technologies

In this tutorial you’ll build a basic AR app that displays a model of your choice on horizontal surfaces.
1. Overview
In the previous tutorial, you created and built a sample scene that involved a Proxy: a Horizontal Plane GameObject to stand in for horizontal planes in the real world. In this tutorial, you’ll develop your understanding of Unity Mars and as you refine your basic app using the Rules workflow and Unity Mars components to add conditions for your Proxies.
2. Create a new Rule
You’ve already created a Proxy using the MARS menu option in the Hierarchy window. However, there’s a more guided approach to create and configure Proxies that’s particularly useful for creators new to Unity Mars: the Rules workflow.
The Rules workflow is designed to guide you through setting up your AR content. You can also create AR objects outside of the Rules workflow, but you’ll generally need a deeper understanding of Unity Mars concepts and objects to take this approach without guidance.
Follow these instructions to create a new Rule:
1. In the Hierarchy, delete the existing Horizontal Plane GameObject and its child Sphere. You used these for the testing scene, but you’re now going to create a new Proxy for the basic app.
2. In the main menu, go to Window > MARS > Proxy Rule Set to open the Proxy Rule Set window.
3. Select Add Rule. By default, MARS will create a rule that reads "On Every Horizontal Surface (Proxy)" and contains no content. The visualizer for the plane Proxy will appear in the Simulation view, and you should notice generic Proxy gizmos on every matched surface in the Scene view.
4. Hover your cursor to the right of the new Rule you have created. Select Add (+) when it appears, and then select Spawn Object.
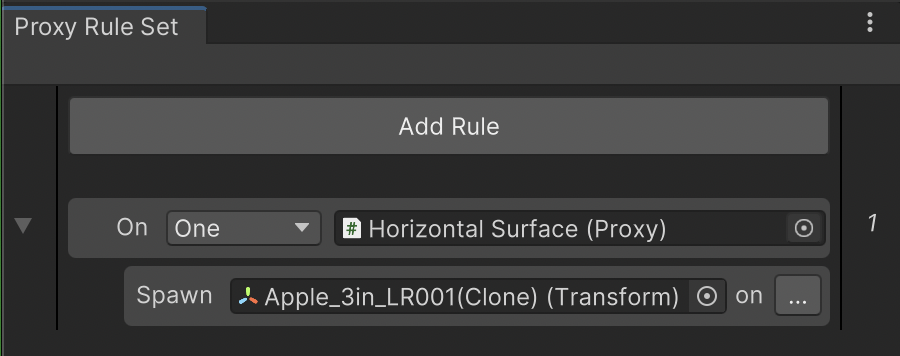
5. Choose an object to spawn on matched surfaces. When you select an object, it will be listed in an indented row beneath the Rule. For this tutorial, we’ve selected an apple.
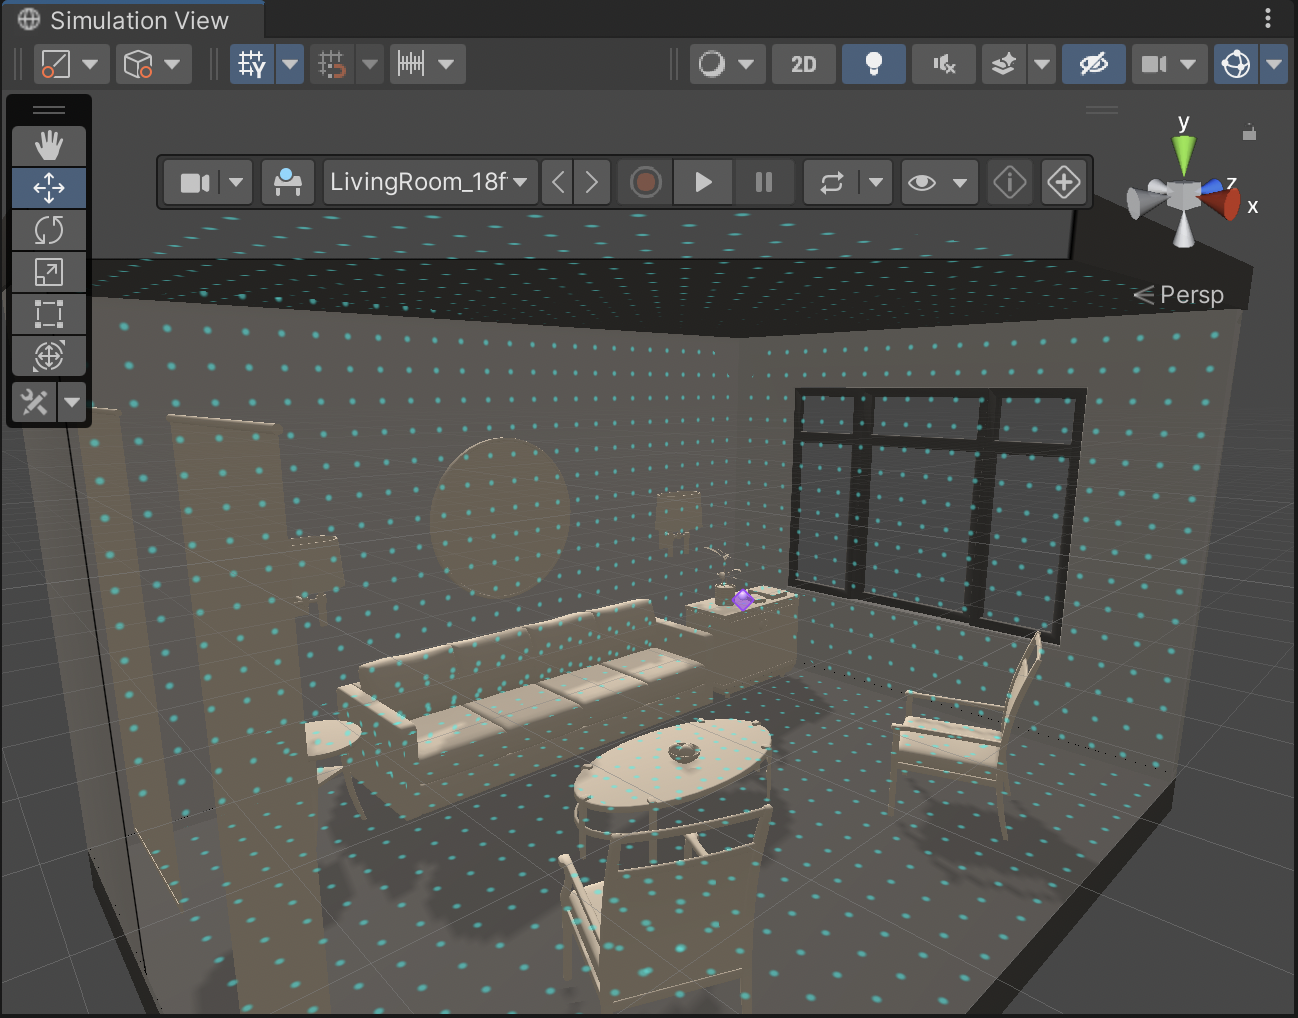
6. In the Simulation view, navigate around the scene using right-click + WASD keys. You should notice that your chosen object is displayed on every horizontal plane — on each chair, the sofa, and the coffee and side tables.

7. In the Proxy Rule Set window, change the frequency of the Rule from Every to One using the dropdown.

This will cause MARS to find and spawn only one match of your Rule, which you should see reflected in the Simulation view. In the Simulation view for our example, the apple is now only displayed on one plane: the side table next to the window.

If you want to learn more about the Rules workflow, you can review the Unity Mars documentation on Rules.
3. What are Unity Mars components?
Setting Rules isn’t the only way that you can configure Proxies. You can also use specific Unity Mars components to define, restrict and control how your digital content matches against the real world.
There are three types of Unity Mars components:
- Unity Mars Condition: You can use Condition components to define requirements that need to be met for a Proxy to match with a real-world object.
- Unity Mars Action: You can use Action components to define a reaction that happens when a Proxy’s conditions are matched or when the Mars data for the condition changes.
- Unity Mars Force: You can use Force components to express a web of flexible spring-like forces that pull, push or hold a Proxy GameObject into its final position. The forces acting on one GameObject can be combined to influence the placement of other objects.
In this tutorial, you’re going to add a Unity Mars Condition component to the Proxy that you’ve configured for your basic app.
Unity Mars Condition components
A condition is a type of component that defines a single property of a real-world object, such as that object’s size or color.
Each condition contains a trait and a method to evaluate how well a single instance of that trait's value type matches a value you specify. Think of conditions as the constraints that need to be met in the environment for Unity Mars to match and place your Proxy.
Typically, you need to attach multiple conditions to a Proxy to build a complex definition of a real-world object. You should start with more general conditions and then work down to greater levels of specificity. For example, you start by adding a plane condition, then define the size and orientation for that condition to match.
4. Add a condition to your Proxy
Follow these instructions to add a Unity Mars Condition to specify the size of horizontal plane that your chosen object will spawn on:
1. In the Proxy Rule Set window (Window > Mars > Proxy Rule Set), select your Rule. The Rule will be displayed in the Inspector.
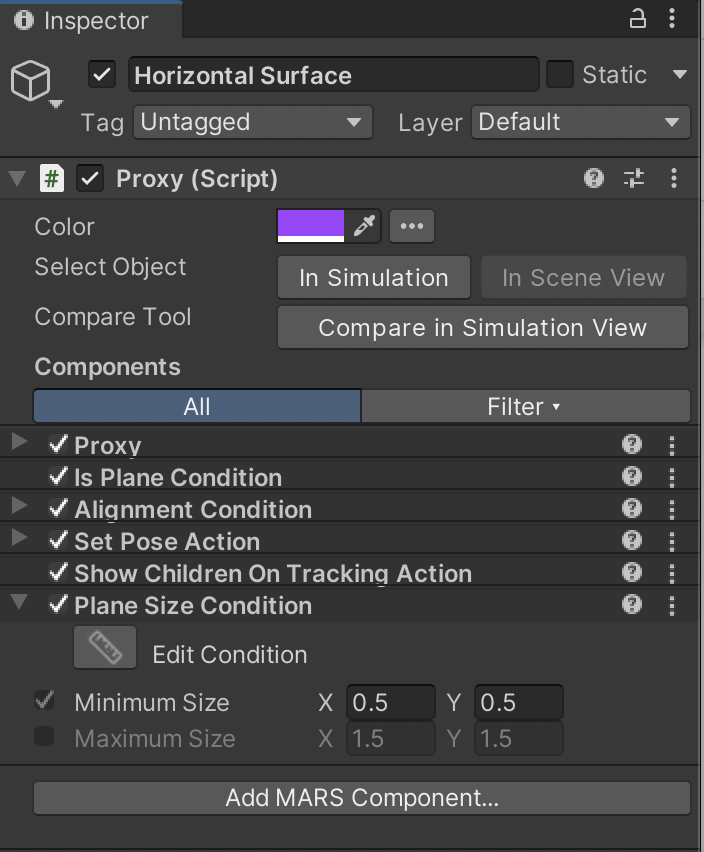
2. In the Inspector, go to the bottom of the Proxy (Script) component and select Add MARS Component… > Condition > Plane Size.
This condition ensures that your Proxy only displays when Unity Mars finds a surface of a specified size.
3. Find the Plane Size Condition at the end of the Mars component list within the Proxy (Script Inspector) component. Select the foldout arrow to expand the Mars component properties if they’re not displayed by default.

4. Set the Minimum Size X and Y values to 0.3. This will ensure that the model you have chosen can fit on the horizontal surface.
Note: There’s no maximum size restriction needed for this app, so don’t enable the Maximum Size property.
5. Check the app in Simulation view
Before you test your content on an actual device, you can use the Simulation View to iterate and check that the Proxy behaves as you expect it to.
Follow these instructions to check your app before building it:
1. Go to the Simulation View, which you have positioned below the Scene view in your custom Unity Editor layout. If you need to open it again, you can do so from the main menu (Window > MARS > Simulation View).
2. You can expand the Simulation View window to the right so that more content is displayed in the window, if this is helpful for you. This will reduce the width of the Device View window.
3. Check that the model you have selected is displayed on the table next to the window, and only in this place.
Important: If you configured your Proxy Rule Set differently, then you will find those choices reflected in the content displayed in your Simulation View window.
If you want to learn more about testing with the Simulation View, review the Unity Mars documentation.
6. Build and run your app
Now that you have everything set up and tested in the Simulation View, it's time to build the project to your AR device.
When your app runs, if Unity Mars finds a surface of at least 30x30cm it will position your chosen model on top of it.
7. Next steps
You’ve now created and built a basic AR app using Unity Mars! In the two tutorials that complete this introductory learning experience, you’ll learn more about key Unity Mars concepts as you explore and then customize an example game template.