
Customize the example game
Tutorial
intermediate
+10XP
20 mins
15
Unity Technologies
In this tutorial you’ll learn about proxy groups and data exclusivity in Unity Mars as you customize the example game.
1. Overview
In this tutorial, you’ll develop your understanding of the following key Unity Mars concepts as you customize the simple game template:
- Proxy Groups, which you can use to create more complex AR experiences using Proxies grouped by a relational condition.
- Data Exclusivity, the Unity Mars concept which controls how Proxies occupy and share data.
We’ll also provide suggestions for further customization you can make to the sample game, if you want to try more things!
2. Create a new collectible crystal
Before you get started customizing the game, you need to create a digital object to use in those customizations — you’re going to make a green variant of the blue collectible crystals.
Follow these instructions to create a prefab variant for the crystal:
1. In the Project window, search for the Crystal prefab. Alternatively, you can navigate to Assets > UnityXRContent > MARS > Templates > Platformer > Prefab.
2. Right-click the Crystal prefab and select Create > Prefab Variant. Name your new variant “Green Crystal”.
3. In the Project window, search for and select the Crystal material asset. You can also navigate to this in the folder structure.
4. In the main menu, select Edit > Duplicate. Rename the duplicate material “Green Crystal”.
5. In the Inspector, set the material’s Color and HDR Color properties to green using the color swatches and selection windows.
Tip: If you want to make something that is clearly a different shade than the original, start by selecting a dark green shade for the Base Map color and a bright green shade for the Emission Map color.
6. Navigate back to the Prefab folder in the Project window and select the Green Crystal prefab.
7. In the Inspector, find the Mesh Renderer component and select the foldout to expand it if necessary.
8. Select the Element 0 object picker (circle icon), then choose and assign the Green Crystal material.
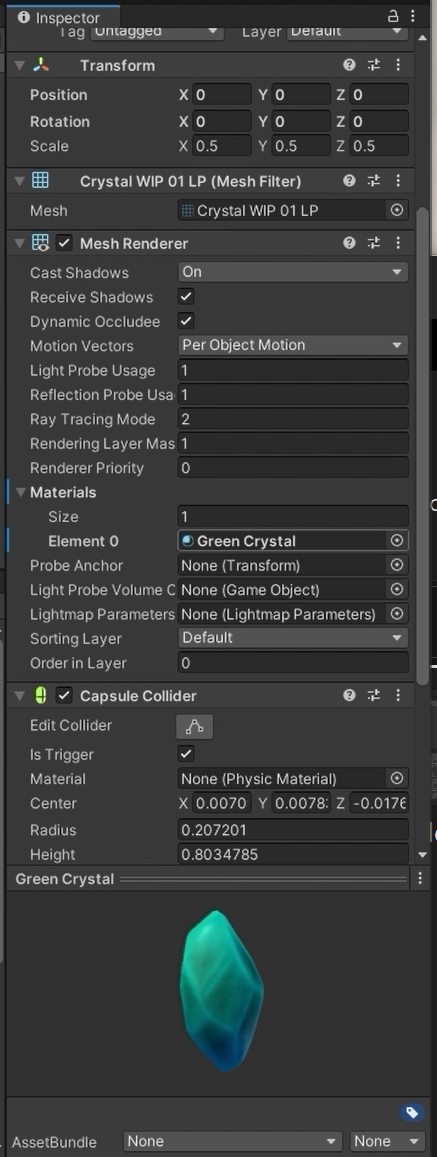
9. Remember to save your changes using Ctrl + S (Windows) or Cmd + S (macOS).
Now this prefab is ready to use to customize the game!
3. Create a new Proxy
Let’s start by creating a new Proxy for surfaces where the green crystal collectibles will be spawned:
1. In the MARS Panel, go to the Primitives section and select Proxy Object.
2. In the Inspector, find the Proxy (Script) component. Select Add MARS Component… > Condition > Alignment.
3. In the Alignment Condition MARS component, set the Alignment property to Nothing.
4. Set the Alignment property to Vertical. You should notice a gizmo aligned with a vertical plane in the Simulation View.
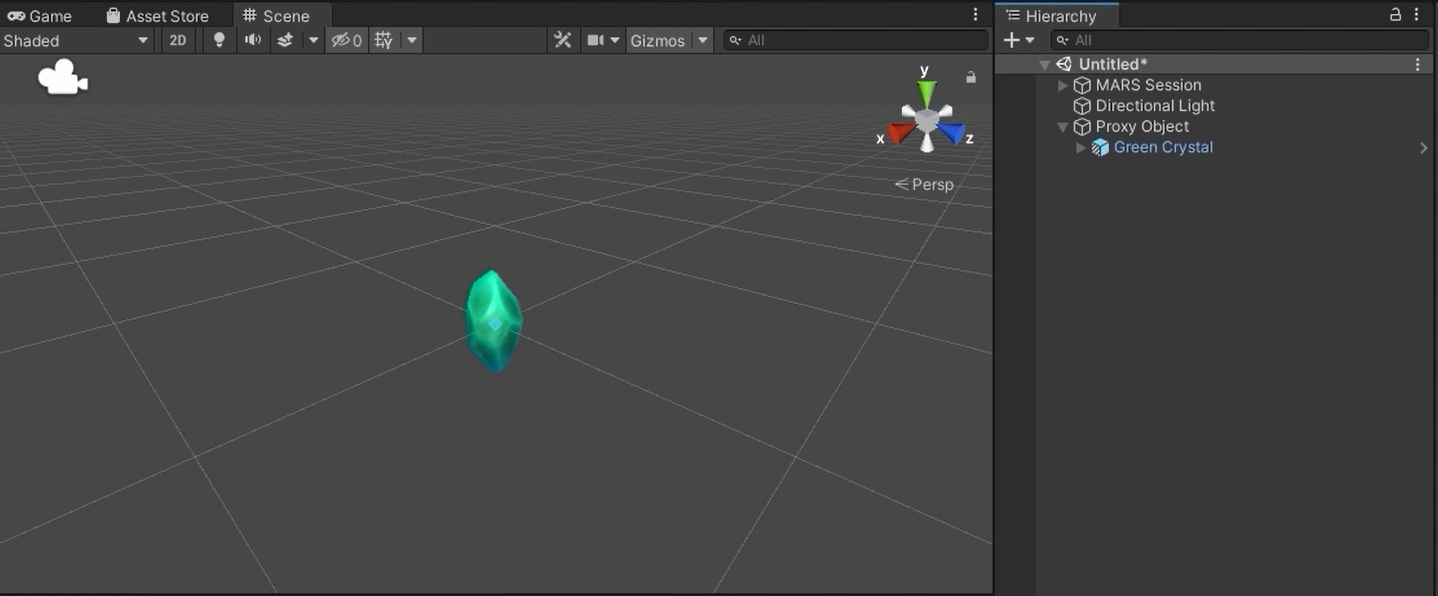
5. Drag the Green Crystal prefab from the Project window onto the Proxy Object GameObject in the Hierarchy. This will create an instance of the prefab as a child GameObject.
4. What is a Proxy Group?
You’ve already used an individual Proxy to act as a placeholder for a physical object — the Horizontal Plane that you created in the test app is a placeholder for horizontal surfaces in the real world. However, you can also organize your Proxies into Proxy Groups.
Proxy Groups are groups of Proxies that must all exist for particular functionality to work. For example, imagine an app that visualizes new kitchen fittings and equipment in a room. You could create a Proxy Group that includes two tables, a floor, and at least one wall. If any of these objects don’t exist in the real world, the entire Proxy Group will fail to match and the app won’t display any digital objects to visualize the new kitchen.
Control matching with relations
You can also add relations to a Proxy Group to make the criteria for matching the real world much stricter. Relations specify more detailed requirements for the relationship between Proxies within a Proxy Group.
For example, consider two Proxies that both require horizontal planes. You can add a Proxy Group that contains an Elevation Relation specifying that the first plane needs to be one meter or more above the second plane. Neither Proxy will match these criteria until your app detects both the two objects with horizontal planes and the distance of at least one meter between them.
5. Set up the Proxy Group
Follow these instructions to create and configure the Proxy Group so you can position the Green Crystal collectibles with more precision:
1. In the MARS Panel, go to the Primitives section and select Proxy Group.
2. In the Hierarchy, expand the Proxy Group GameObject and delete the Child 1 and Child 2 child GameObjects that were automatically created.
3. Select the Proxy Object GameObject with Green Crystal as a child. Drag Proxy Object and release it over the Proxy Group GameObject to make it a child GameObject.
4. Duplicate the Proxy Object GameObject so the Proxy Group has two child Proxies.
5. Select the Proxy Group GameObject.
6. In the Inspector, select Add MARS Component… > Relation > Distance.
7. In the Distance Relation MARS component, set the following property values:
- Set Minimum Distance to 1.
- Set Maximum Distance to 1.5.

Notice how the two green crystals are now located at least one meter apart in the Simulation view.
6. Add a character using a Proxy Object
Follow these instructions to add a character to the scene (the robot Unit-E):
1. In the MARS Panel, select Proxy Object.
2. In the Project window, locate the UnityE_IdleTest prefab (this is organized in the Prefab folder you have previously used). Drag the UnityE_IdleTest prefab to the Hierarchy and release over your new Proxy Object to create a child GameObject.
3. In the Hierarchy, select the new Proxy Object.
4. In the Inspector, find the Proxy (Script) component. In the Components section, select Filter > Conditions.
5. Select Add Condition > Alignment.
6. In the Alignment Condition MARS component, set the Alignment to Nothing to remove the default value.
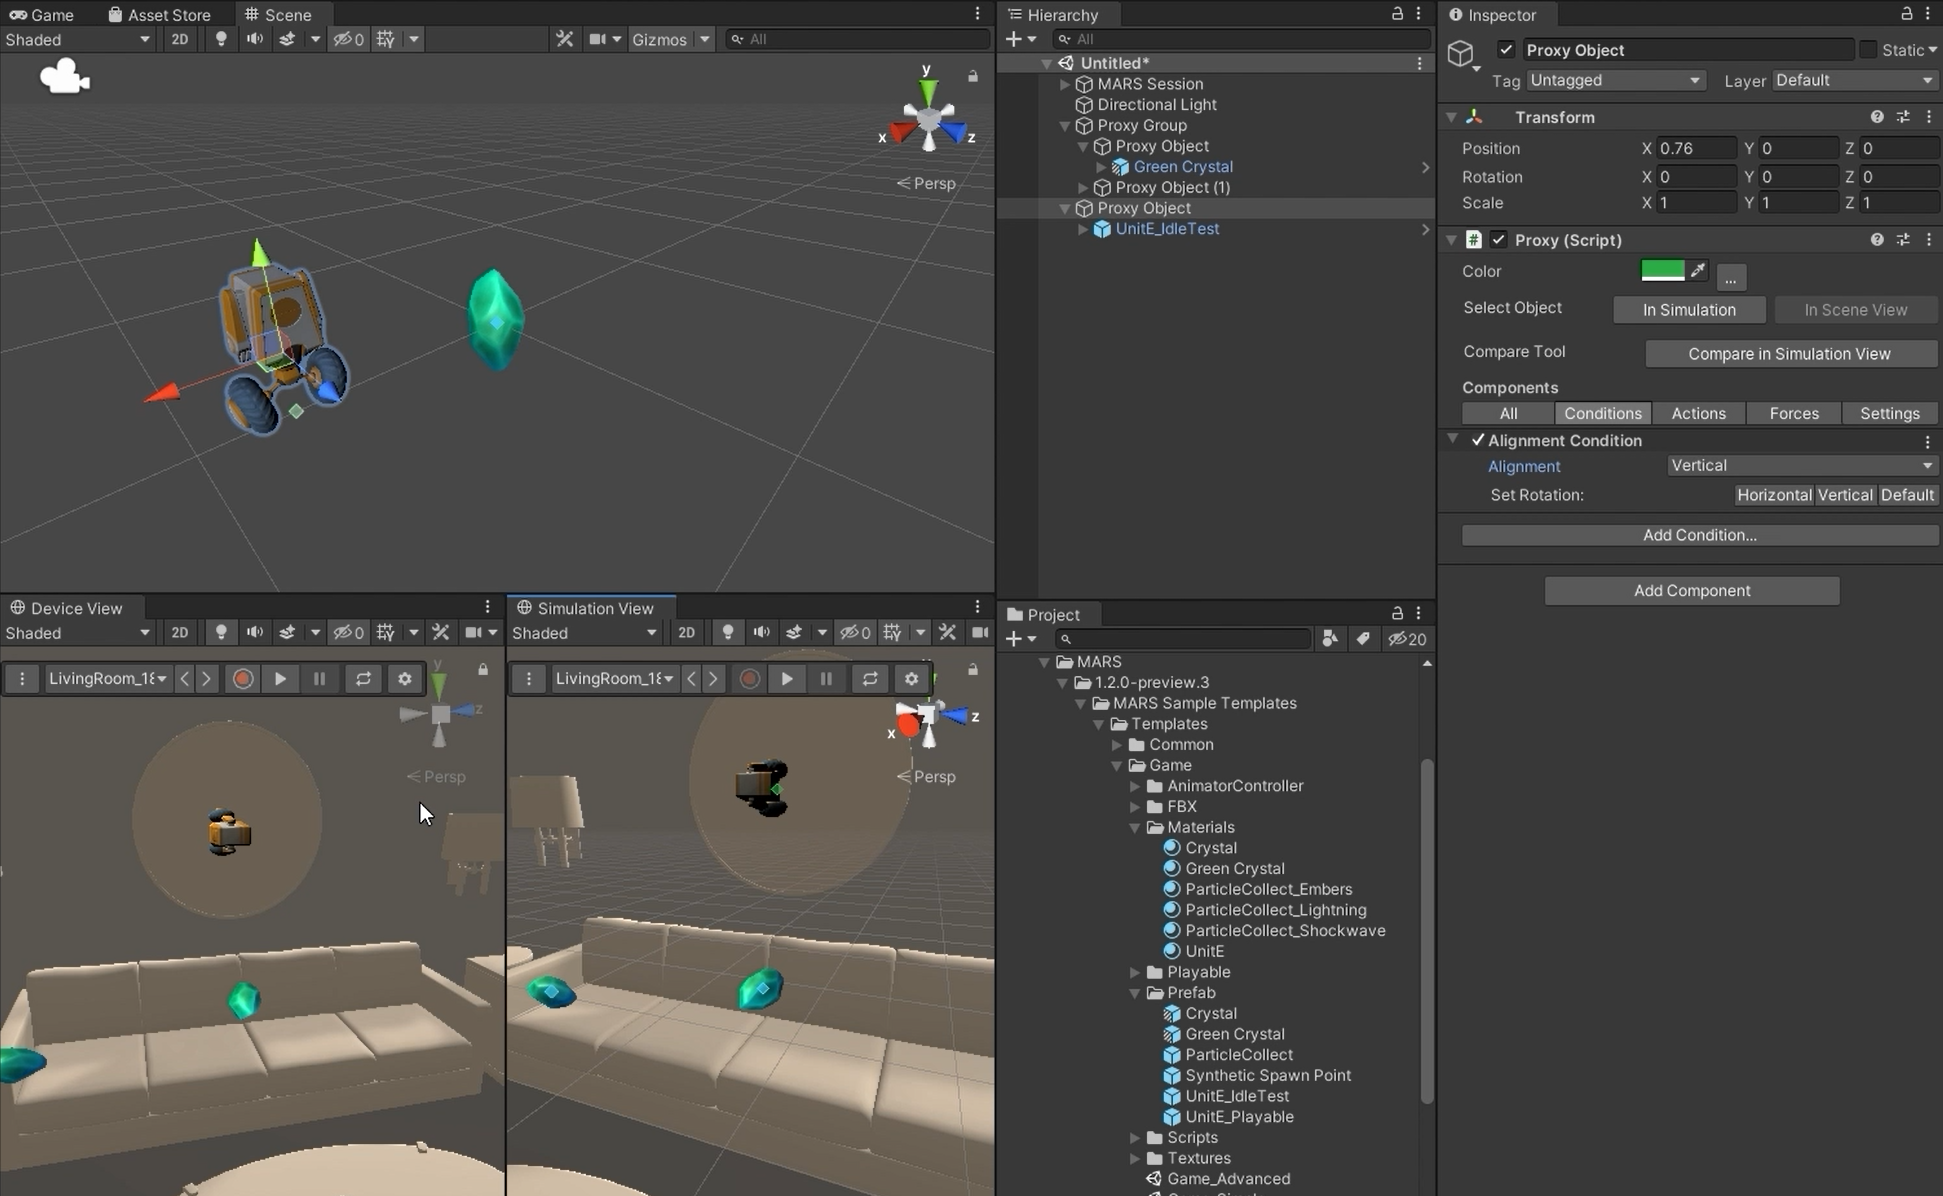
7. Set Alignment to Vertical. Now in the Simulation view Unit-E will appear on a vertical surface that is not shared by green crystals.
7. Unity Mars and data exclusivity
Data exclusivity is another key concept of Unity MARS that describes how Proxies occupy and share data. A Proxy can have one of the following three types of data exclusivity:
- Reserved exclusivity: A Proxy with Reserved exclusivity prevents other Proxies (except for Read Only Proxies) from using its data. Proxies are set to Reserved by default.
- Read Only exclusivity: A Proxy with Read Only exclusivity can use any data, whether or not another Proxy is using it.
- Shared exclusivity: A Proxy with Shared exclusivity only prevents Reserved Proxies from using its data. Other Proxies can use the data if they are set to Shared or Read Only.
Follow these instructions to explore what these different types of data exclusivity mean in practice:
1. In the Hierarchy, select the Proxy Object GameObject with Unit-E as a child.
2. In the Inspector, go to the Proxy (Script) component and select All (underneath the Components section header).
3. Find the Proxy MARS component, and expand it if necessary.
4. Change the Exclusivity to Read Only. Notice how Unit-E now occupies the same surface as one of the Green Crystal Proxies in the Simulation view. This is because Read Only exclusivity allows data (in this case surfaces) to be shared between multiple Proxy Objects.
5. Change the Exclusivity to Shared. Notice how Unit-E once again occupies a different surface from the crystal, whose Proxy data exclusivity is still Reserved.
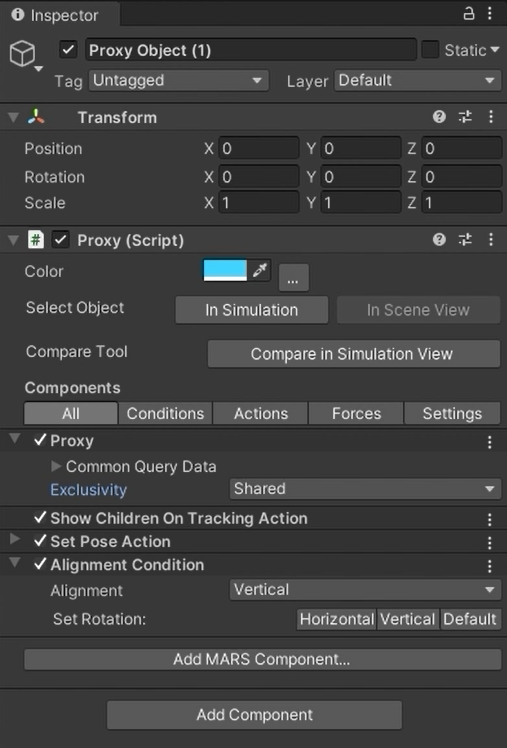
6. Select the Proxy Object GameObject for each of the green collectible crystals, and use the same process to set their Exclusivity properties to Shared. Now Unit-E and the crystal are again on the same surface in the Simulation view, because they both have Shared data exclusivity.
8. More things to try
In this tutorial, you learned about Proxies, Proxy Groups, and Data Exclusivity in the context of game content. These fundamental concepts are the critical starting point for understanding how virtual content relates to the real world when you make AR experiences.
If you’d like to practice working with Unity Mars through further customization of the game template, here are some more things that you can try. When you’ve finished customizing the game, build the project to your AR device and test it in the real world!
Replace the player character (for more experienced creators)
The Unit-E character in the game template is set up as a template for any digital avatar that can navigate the environment. You can modify it to create your own digital characters by replacing the existing asset references.
If you have experience working with player character configuration and animations in Unity, try using the character controller in the game template for your own animated character.
You will need the following animations to match the Unit-E configuration:
- Idle
- Walk
- Run
- Vertical-jump-ready (crouching down to jump)
- Vertical-jump
- Horizontal-jump-ready
- Horizontal-jump
- Jump-land
You can find the Animator Controller for Unit-E in Assets/UnityXRContent/MARS/Templates/Platformer/AnimatorController.
Note: If you’re interested in this customization challenge but have no experience working with character animations in Unity, try Creative Core: Animation first! If you’re a more intermediate user, you may also find Introduction to 3D Animation Systems a helpful resource.
9. Next steps
This tutorial completes the Get started with Unity Mars initial learning experience. You’ve created a basic AR application and customized an existing platformer game, learning about key concepts for Unity Mars along the way.
You also engaged in ongoing testing in the Simulation view, rather than needing to build your app to test every change. This is the power of Unity Mars – you can build, iterate and test in the Unity Editor and then deliver more polished experiences to AR-enabled devices.
If you’d like to learn more about Unity Mars, start with the Unity Mars documentation.