Tank health
Tutorial
Beginner
+10XP
30 mins
318
Unity Technologies

Implement a radial health slider with an added explosion effect when a tank’s health reaches zero.
1. Overview
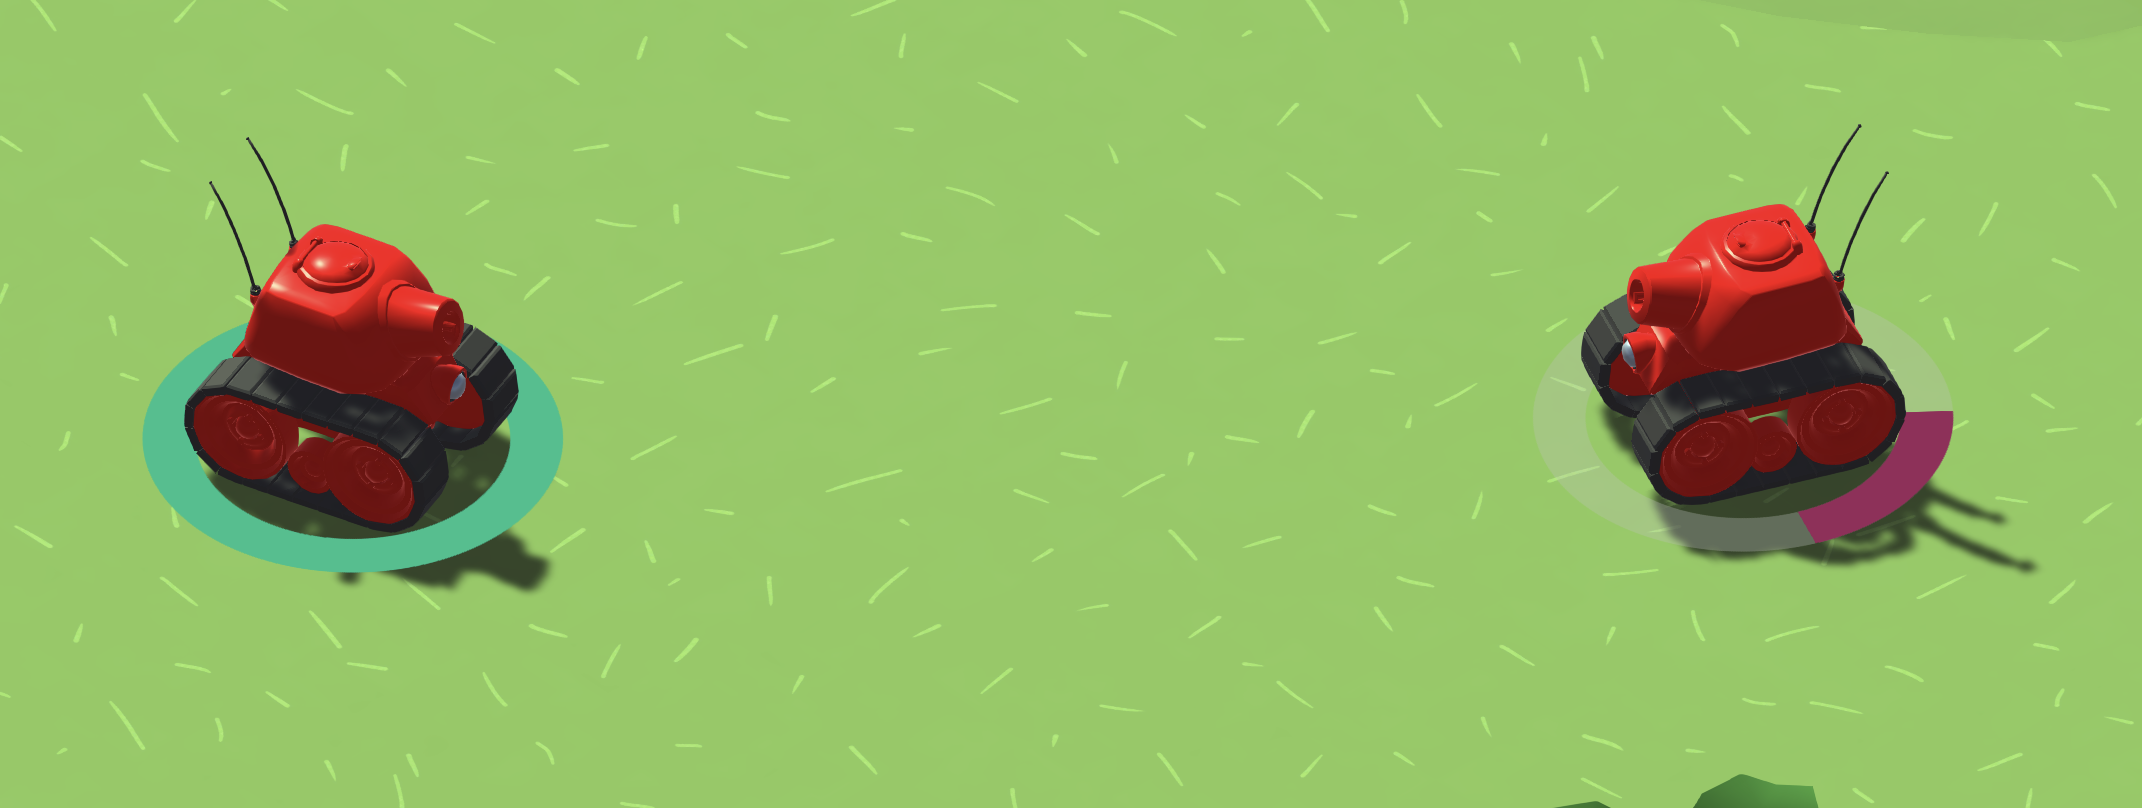
In this tutorial, you’ll create and implement a health system for the tanks, including a health slider that visually depletes as damage is taken and an explosion effect when a tank’s health reaches zero.
As you watch the video demo above, notice the following features:
- The tank health bar appears as a green circle around the tank.
- When the tank takes damage, the green portion gradually disappears until it’s fully depleted.
- Before disappearing, the health bar changes colors to indicate critical health.
- When health reaches zero, the tank explodes and is removed from play.
2. Add the Health Slider prefab
In this step, you'll add a Health Slider prefab to your tank prefab. The Health Slider prefab is a radial UI element that visually represents the tank’s health, filling and depleting in a circular motion as the tank gains health and takes damage.
Since you already took the time to configure the Aim Slider GameObject in the last tutorial, and the process would be very similar and repetitive, we have provided this UI element as a complete pre-configured prefab, ready to apply to the tank.
1. Enter prefab editing mode for the Tank prefab
- Double-click the Tank prefab in the Project window (_Tanks > Prefabs > Tanks).
2. Add the Health Slider GameObject to the Tank prefab
- In the Project window, open to the _Tanks > Prefabs > UI folders.
- Click and drag the HealthSlider prefab onto the Canvas GameObject in the Hierarchy window.
- Ensure the HealthSlider GameObject is a child GameObject of the Canvas GameObject, on the same level as the Aim Slider GameObject.
3. Inspect the HealthSlider prefab
- In the Hierarchy window, use the foldout (triangle) to expand the HealthSlider GameObject and view its child GameObjects.
- Take note of how the HealthSlider GameObject is structured compared with the AimSlider GameObject:
- It fills in a radial 360-degree pattern rather than moving vertically from bottom to top.
- It has a Background child GameObject, which is visible beneath the colored Fill Area GameObject.
You should now see a semi-transparent circle appearing beneath both of your tanks in the Game view.
3. Clean up tank’s Inspector window
As you continue adding functionality to the Tank prefab, the Inspector window can become cluttered, making it harder to navigate. In this step, you’ll collapse and rearrange components to make the Inspector window more organized and easy to use. While organization of components is personal preference, a cleaner Inspector window layout helps streamline your workflows.
1. Collapse unnecessary components
- Select the name of each component to collapse it.
2. Rearrange components for better organization
- Move script components to the bottom, as they are frequently modified.
- Group related components together:
- Rigidbody components and Collider components (to keep physics-related components together).
- Audio Source components (to keep sound-related components together).
- If dragging components is difficult, use the More (⋮) menu on each component and select Move Up or Move Down.
Note: The Transform component always remains at the top, as it is required for all GameObjects in Unity.
The Tank GameObject now has a more readable and usable list of components in the Inspector window.
4. Set up the TankHealth script
To manage the tank’s health and destruction, you need to add and configure the TankHealth script.
You also need to put the tanks on a specific “Players” Layer so that they respond to the physics forces of the explosion. The ShellExplosion script only applies the explosive knockback force to GameObjects on the Players layer. If the layer is not set properly, the tank will not respond to explosions.
1. Attach the TankHealth script to the Tank prefab
- Make sure you’re still in prefab editing mode for the Tank prefab.
- Locate the TankHealth script in the _Tanks > Scripts > Tank folder.
- Drag and drop the TankHealth script onto the Tank GameObject.
2. Assign the necessary references in the Inspector window
- In the Inspector window, use the foldout (triangle) to expand the TankHealth (Script) component.
- Click and drag the HealthSlider GameObject from the Hierarchy window onto the Slider property box
- Click and drag the Fill GameObject (child GameObject of the HealthSlider > FillArea GameObjects) onto the Fill Image property box.
- Open the _Tanks > Prefabs > Explosives folders and click and drag the TankExplosion prefab onto the Explosion Prefab property box.
3. Assign the Tank to the Players layer
- Open the Tank GameObject in prefab editing mode.
- In the Inspector window, open the Layer dropdown and select Players.
- Unity will prompt you to apply this change to child objects. Select Yes, change children.
4. Test the tank health in Play mode
- Enter Play mode and make one tank fire shells at the other.
- Notice how the health depletes, how the tank is knocked back from the explosion, and that there's an explosion when the tank’s health reaches zero.
The TankHealth script is now fully set up, with the correct references and layer assignment to manage health depletion, knockback, and destruction.
5. Test and fine-tune the tank’s health system
Now that the TankHealth script is set up, you can fine-tune the shell strength and health-related settings to ensure the values are suitable for the tank you’ve selected.
1. Adjust health and explosion settings
- While in Play mode, use the foldout (triangle) to expand the TankHealth script in the Inspector window.
- Edit the Starting Health property. For a bigger tank, this could be higher than the default 100, and for a smaller tank it could be lower than 100.
- While in Play mode, use the foldout (triangle) to expand the TankShooting (Script) component. Adjust the following values:
- Max Damage
- Explosion Force
- Explosion Radius
Tip: Some of the variables have helpful tooltips if you hover your mouse over the variable name.
2. Exit Play mode and set the final values
- As a reminder, you can test changes in Play mode, but any modifications made in Play mode will not be saved after exiting.
- You can try to remember or write down the values you like, or you can open the More (⋮) menu of a selected component and select Copy Component. Then, after exiting Play mode, open the More (⋮) menu of the same component and select Paste Component Values.
The tank now has a fully functional health system, complete with visual feedback, a destruction effect, and fine-tuned damage settings.
6. Optional: More things to try
Try these optional activities to challenge yourself, build your skills, and improve your project.
Each challenge is tagged as Easy, Medium, or Expert difficulty so that you know what to expect. You can do one of them, all of them, or none of them — it’s totally up to you. If you’re not interested in doing these challenges, mark this step as complete and proceed to the next tutorial.
Easy: Experiment with Full Health Color and Zero Health Color

The health bar’s colors might look better or worse depending on the environment you’ve chosen (jungle, desert, or moon). Adjusting these colors can improve the visual clarity of the health bar and help it match the aesthetic of your game world.
- Expand the Tank Health component of the Tank prefab.
- Adjust the Full Health Color and Zero Health Color properties.
- Test your changes in Play mode.
Medium: Play around with the TankExplosion prefab
The explosion effect when a tank is destroyed can be customized to be more dramatic, subtle, or stylized based on your preferences. You can modify the TankExplosion prefab by adjusting its Particle System settings.
- In the Project window, open the _Tanks > Prefabs > Explosives folders, then select the TankExplosion prefab.
Important: Duplicate the TankExplosion prefab (Ctrl+D (macOS: Cmd+D)) so you don’t lose the original effect.
- In the Inspector window, use the foldout (triangle) to expand the Particle System component.
- Adjust properties like the following:
- Start Speed
- Start Size
- Color over Lifetime
Tip: If you hover over any of the properties, a helpful tooltip will appear.
- If you want, try enabling additional Particle System modules (like Lights or Trails) to enhance the effect.
- Test the explosion by dragging it into the scene and selecting Restart from the Particles overlay in the Scene view.
7. Optional: Review the TankHealth script
This step is entirely optional, but if you’re curious to understand how the TankHealth script works, you can find it in the _Tanks > Scripts > Tank folder and open it in an integrated development environment (IDE) or text editor. The code is thoroughly commented, which helps as you read through it.
Below are a few aspects of the script that you might find particularly interesting.
1. Tank Takes Damage
This function is responsible for reducing the tank’s health when it gets hit. It also calls the OnDeath() function when health reaches zero.
public void TakeDamage (float amount)
{
    // Check if the tank is not invincible
    if (!m_IsInvincible)
    {
        // Reduce current health by the amount of damage done.
        m_CurrentHealth -= amount * (1 - m_ShieldValue);

        // Change the UI elements appropriately.
        SetHealthUI ();

        // If the current health is at or below zero and it has not yet been registered, call OnDeath.
        if (m_CurrentHealth <= 0f && !m_Dead)
        {
            OnDeath ();
        }
    }
}
2. Health UI Updates
This function updates the Health Slider UI by adjusting its value and changing its color based on how much health remains.
private void SetHealthUI ()
{
    // Set the slider's value appropriately.
    m_Slider.value = m_CurrentHealth;

    // Interpolate the color of the bar between the choosen colours based on the current percentage of the starting health.
    m_FillImage.color = Color.Lerp (m_ZeroHealthColor, m_FullHealthColor, m_CurrentHealth / m_StartingHealth);
}
3. Tank Destruction
When the tank’s health reaches zero, this function handles explosions, sound effects, and deactivating the tank.
private void OnDeath ()
{
    // Set the flag so that this function is only called once.
    m_Dead = true;

    // Move the instantiated explosion prefab to the tank's position and turn it on.
    m_ExplosionParticles.transform.position = transform.position;
    m_ExplosionParticles.gameObject.SetActive (true);

    // Play the particle system of the tank exploding.
    m_ExplosionParticles.Play ();

    // Play the tank explosion sound effect.
    m_ExplosionAudio.Play();

    // Turn the tank off.
    gameObject.SetActive (false);
}8. Next steps
You’ve added a health slider for the tanks with an explosion effect when a tank’s health reaches zero.
In the next tutorial, you’ll add an AI-controlled enemy tank with a new tank model, speed, strength, and health characteristics.