
Add a food resource
Tutorial
Beginner
+0XP
15 mins
406
Unity Technologies
Now the game can count turns, you can start introducing gameplay elements like resource management.
By the end of this tutorial, you’ll have done the following:
- Added a food resource that will spawn randomly on the game board at start and that the player character can collect.
- Used the UI Builder window to create an in game label that shows the amount of food the player currently has.
- Coded the functionality to have the food resource decrease with each turn of the game and increase every time the player character collects a food resource.
1. Overview
Now that you have a turn system, you can create game mechanics around those turns! In this tutorial, you’ll implement a food system where the units of food decrease on each turn.
2. Add a food resource
First you need to decide where you'll store the food amount currently held by the player character.. You might think that inside the TurnManager is a good candidate because this is where turns are counted. However, this isn’t the best idea because the TurnManager’s sole purpose is to handle turns, and this food is more related to the game and its gameplay. Thankfully, you already have a place that handles everything related to gameplay: the GameManager!
The problem is that right now there’s no way to know when a turn happens inside the GameManager. Getting notified when a turn happens is going to be an important function you will need many times in the game.
To address this problem, you can implement a callback system. A callback system allows any part of the code to give a method that can be called when an event happens. In this case, when a turn happens, all registered components will get notified and the given methods will be called.
Because this callback won’t have any parameters (it just needs to know if something happens or not), you can use System.Action as the type of the callback (it’s a built-in type in the C# standard library for callbacks).
Add the following to your TurnManager script after the first “{“:
public event System.Action OnTick;Note: event is a special C# keyword for callback. This means only the class in which OnTick is declared (in this case TurnManager) can trigger the event, nothing else.
Add the following inside the Tick method:
OnTick?.Invoke();Invoke is the method in System.Action that will call (“invoke”) all the callback methods that were registered to the OnTick event.
The ? is a special C# syntax used to test if OnTick is null. If it’s null, ? does nothing, but if it’s not null, ? will call the method on the right of the ?. It’s a shorthand version that does the same thing as:
if(OnTick != null)
{
   OnTick.Invoke();
}
You need to test if OnTick is null because if no other part of the code registered a callback function to OnTick, then it will be null, and trying to call Invoke on a null object will generate an error and break the game!
Now other scripts can register to that callback to get notified when a tick happens. In your GameManager, do the following:
- Add a private integer member that stores how much food you currently have (initialized at 100).
- Add a method called “OnTurnHappen” that will be called when a turn happens.
- Register the OnTurnHappen method to your TurnManager.OnTick callback.
private int m_FoodAmount = 100;
.
.
.
void Start()
{
   TurnManager = new TurnManager();
   TurnManager.OnTick += OnTurnHappen;

   BoardManager.Init();
   PlayerController.Spawn(BoardManager, new Vector2Int(1,1));
}

void OnTurnHappen()
{
   m_FoodAmount -= 1;
   Debug.Log("Current amount of food : " + m_FoodAmount);
}
TurnManager.OnTick += OnTurnHappen is how you register a method callback to the OnTick event. When OnTick has its Invoke method called, it calls the OnTurnHappen method. += is used because we add the method to all the other ones already registered (right now there is a single one, but later you’ll have more methods called when OnTick happens).
Similarly, if you ever want OnTurnHappen to stop being called when OnTick gets invoked, you can use TurnManager.OnTick -= OnTurnHappen.
Now you can press play and check the food amount being reduced in the console.
Tip: Remember to check in your changes in Unity Version Control!
3. Some UI
Now that there’s data in the game that is important to present to users (the amount of food left), now’s a good time to add some UI elements to the game.
To do this, you’ll use the UIToolkit system. Only basic use of the UI Toolkit system will be covered here, so check out the full UI Toolkit introduction and the UI Toolkit manual page for more in depth information.
To add UI elements to your game, follow these instructions:
1. Right-click in the Hierarchy window and select UI Toolkit > UI Document.
This will create a new GameObject with a UI Document component attached to it. It will also create all the default settings for the UI Toolkit in your project.
The UI toolkit works by decoupling the structure, look, and behavior of the UI in the following ways:
- The structure is given by a UXML file (that is similar to an HTML file) that defines which elements your UI is made of and their hierarchical relationship.
- The look is defined by a USS file (similar to a CSS file) that defines visual properties (colors, borders, spacing, alignment, etc.) of your UI element.
- The behavior is coded in C# by retrieving elements by their name or id and applying listeners or other behavior on them.
Right now, the UI document component expects a Visual Tree Asset as its source. A Visual Tree Asset is a UXML file that defines your UI’s structure.
2. In the Project window, right-click the Assets folder and select Create > Folder and name it “UI”.
3. Right-click the UI folder and select Create > UI Toolkit > UI Document and name it “GameUI”.
4. In the Hierarchy window, select the UIDocument GameObject, then in the Inspector window select the Source Asset picker (⊙) and select the GameUI document.
Now you’ll edit the GameUI document to add a Label that shows the amount of food left.
5. Double click the GameUI document.
This will open the UI Builder window. Double click the window name to expand the window.
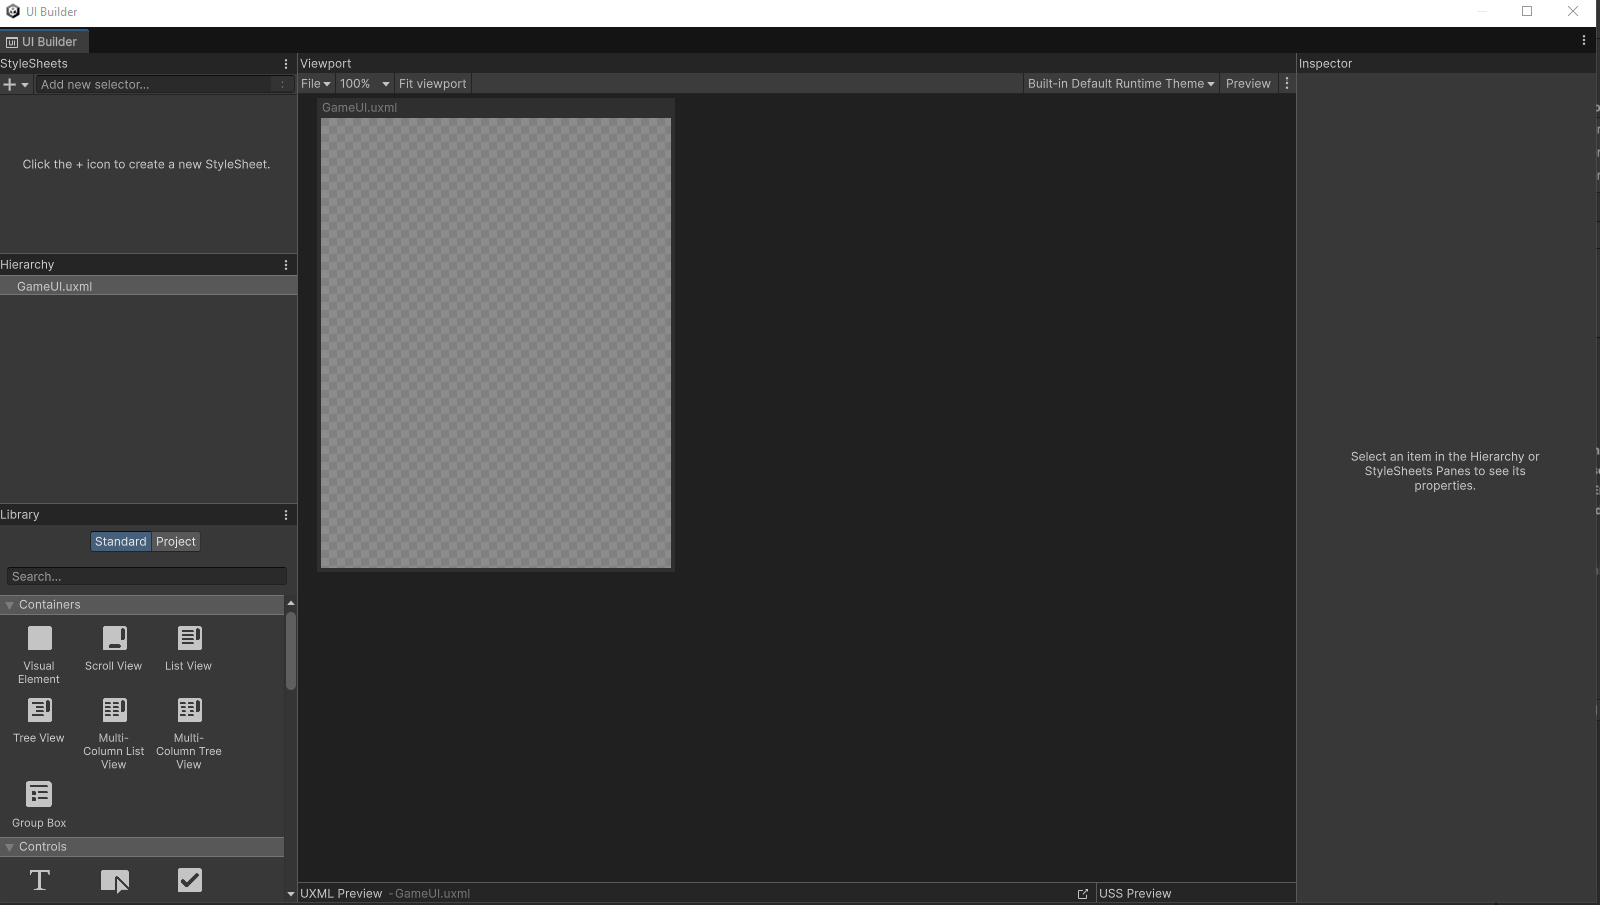
The UI Builder window is a visual tool that lets you edit UXML files (like your GameUI document) visually instead of through text.
The upper-left panel contains the Hierarchy window of your UI, which at the moment only contains the GameUI.uxml file. Below the Hierarchy window there is the Library window that contains all kinds of UI controls you can add to your UI.
The central Viewpoint window consists of the view of your UI, which is currently empty.
The rightmost window is the Inspector window, which displays all the properties of a selected UI element.
6. In the Library window, under the Controls section, drag and drop the Label element into the Viewport window.
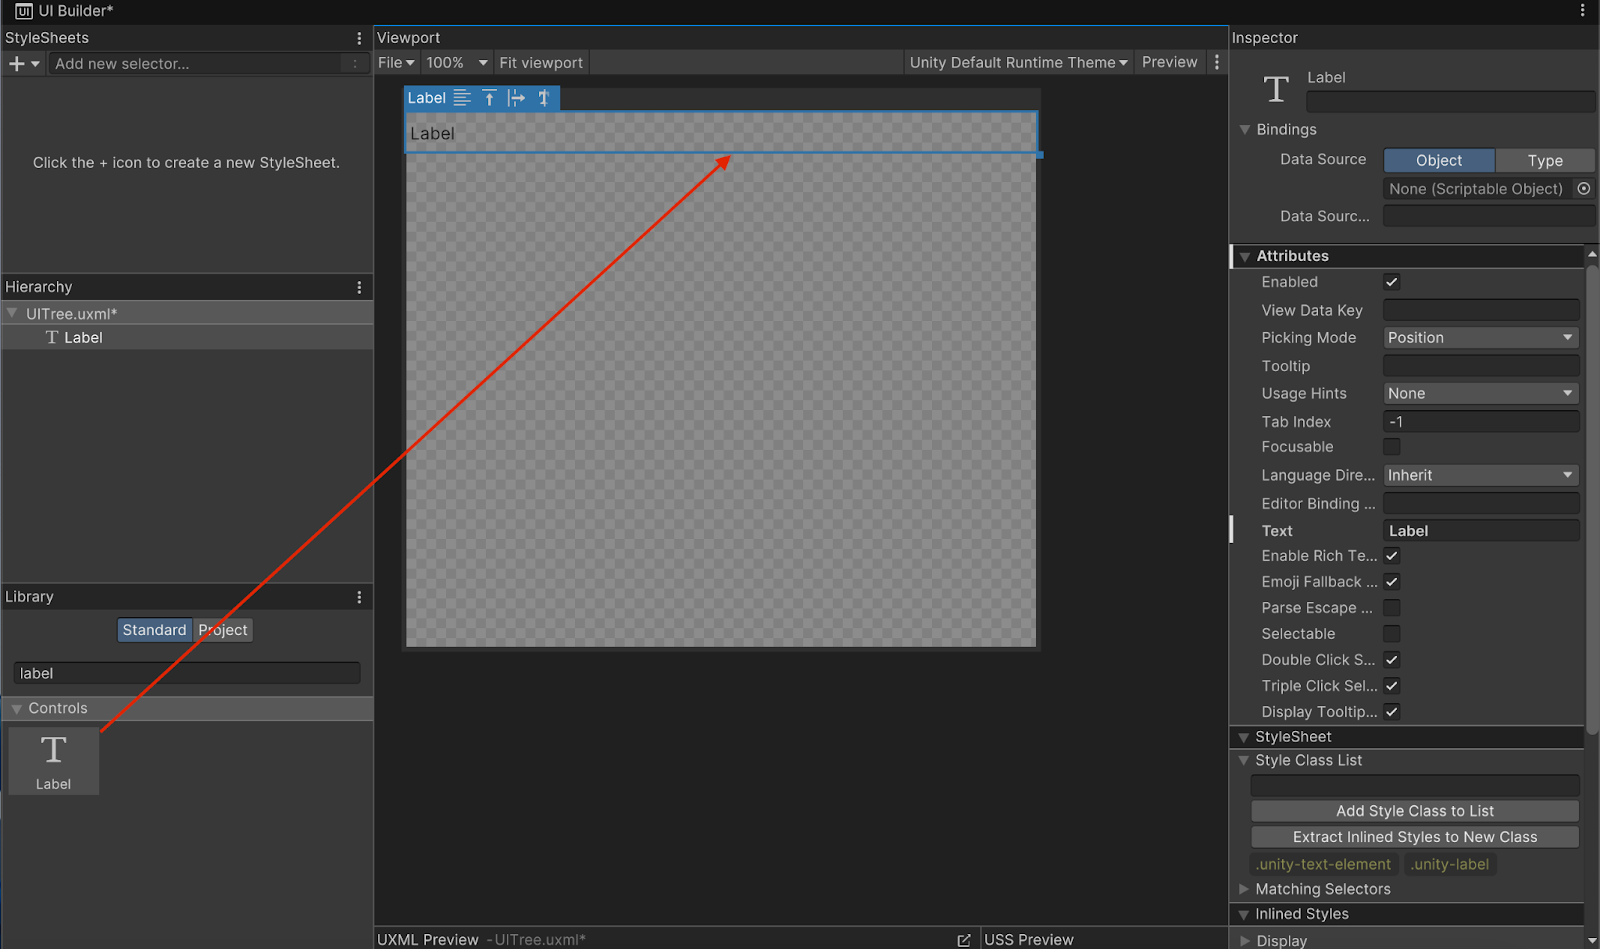
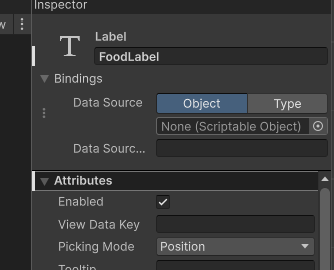
7. With Label selected in the Hierarchy window, select the Label box in the Inspector window and rename it “FoodLabel”.
Now you can change the font used so it fits the game style better. There is a font file in the assets provided, but feel free to supply your own if you have one you like.
8. With the Label selected in the Hierarchy window, in the Inspector window, use the foldout (triangle) to expand the Text section.
9. Select the Font property picker (⊙) and assign either the provided PressStart2P-Regular font or your own.
10. Select the Color property box and set the color to white (FFFFFF) so the Label will stand out on the black background.

The Label font should have changed in the Viewport window.
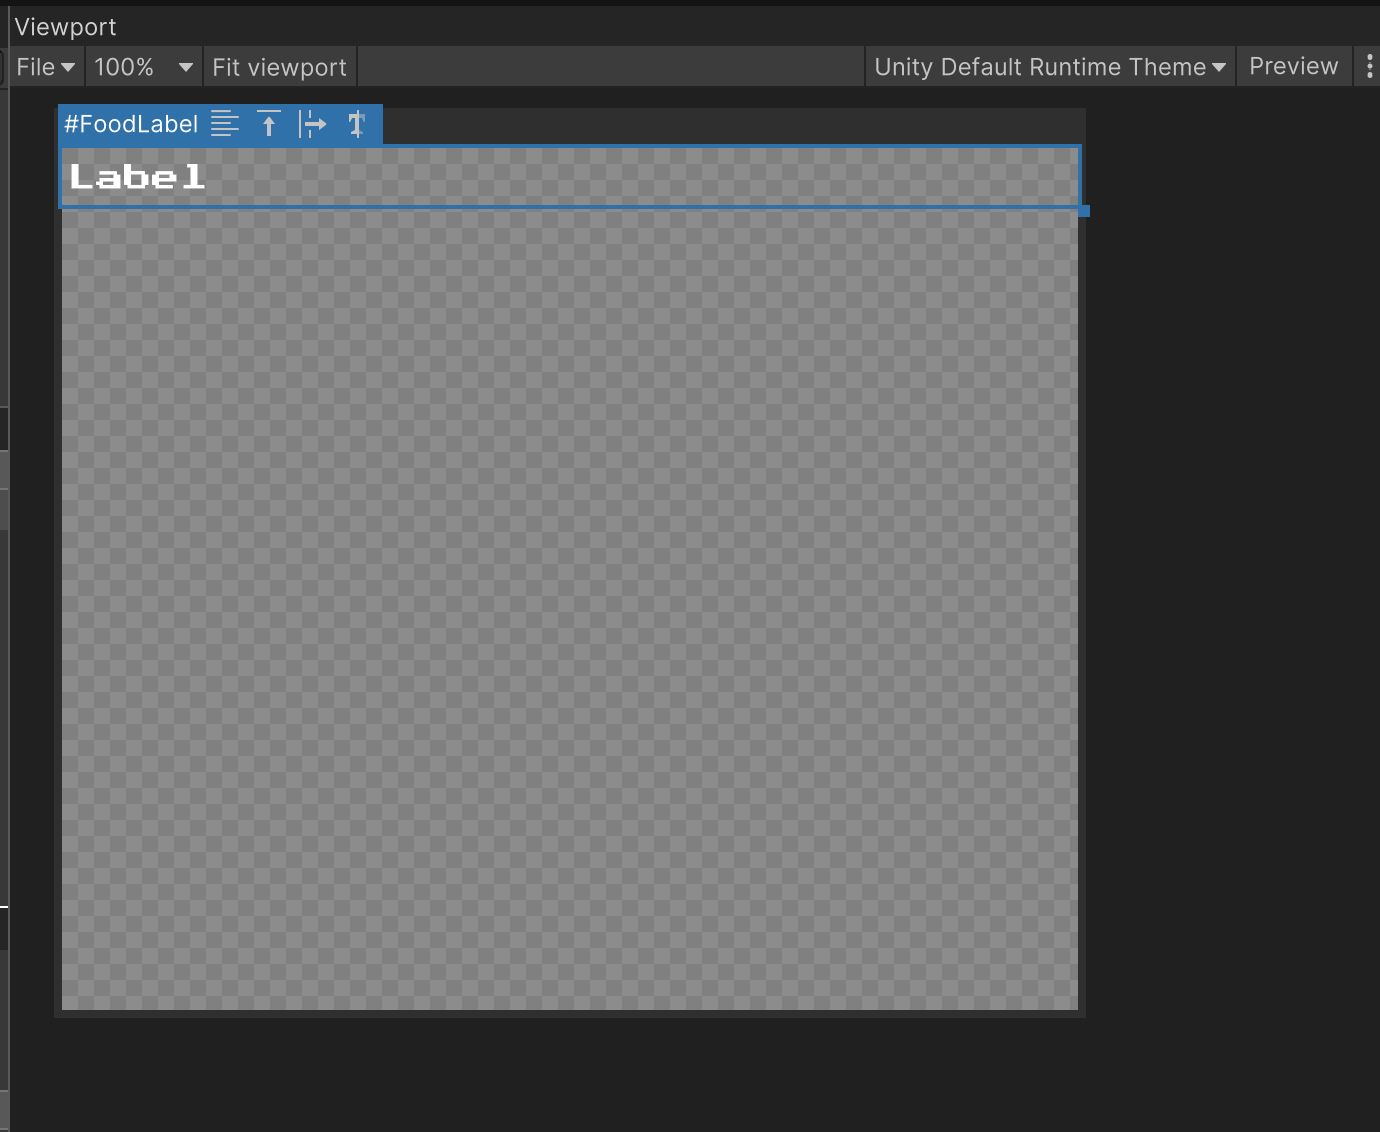
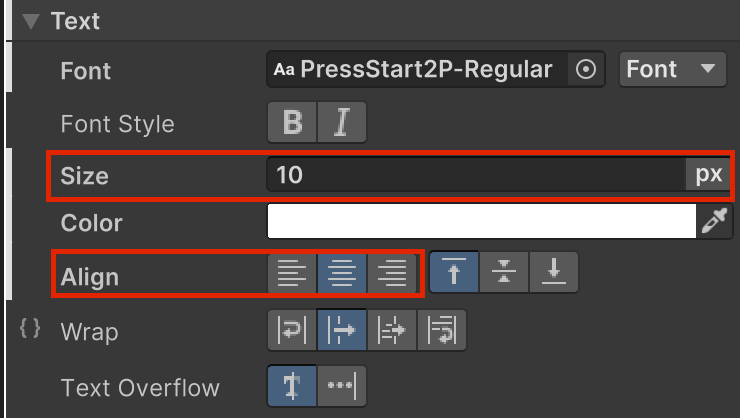
11. Change the Size property and make it bigger or smaller according to your own preferences (experiment with different sizes until you find one you like), and finally center the text using the Align property.
Finally, let’s put the label at the bottom of the screen. Right now the UI toolkit uses automatic layout. The default layout organizes consecutive elements in the Hierarchy window from top to bottom, stretching across the width of the UI document.
Instead, use manual positioning to place the Label exactly where you want.
12. Use the foldout (triangle) to expand the Position section in the Inspector window.
13. Open the Position Mode property dropdown and change the Position Mode from Relative to Absolute.
In Absolute mode, the four offsets (Top/Right/Bottom/Left) are the distance to each border of the screen.
14. Set the Bottom offset to 0.
This means the distance from the bottom of the Label to the bottom edge of the screen is 0 pixels.
You might notice that the Label is not centered anymore. Centering the text only centers it inside its blue bounding box. If you look at the preview with the Label selected, you'll see that the bounding box is just the size of the text.
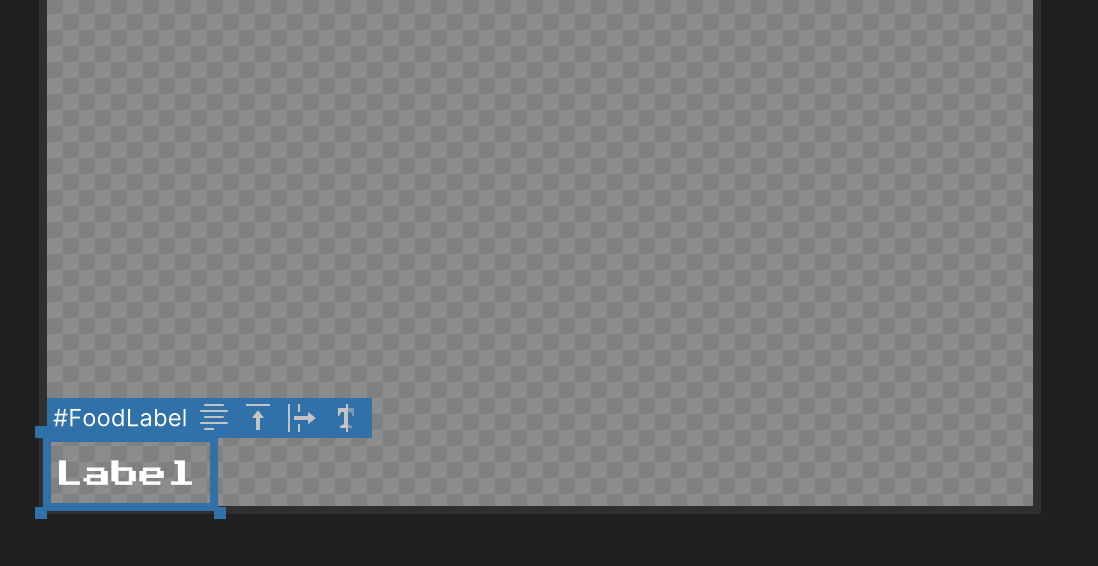
The default layout stretched it across the width for you earlier, but now you’re using Absolute positioning, the layout’sits size is based on the size of the text inside the label. To correct this, you need to force the bounding box to stretch.
15. Set both the Left and Right offsets to 0.
This will stretch distance between the left border and the left side of the screen and the distance between the right border and the right side of the to 0,

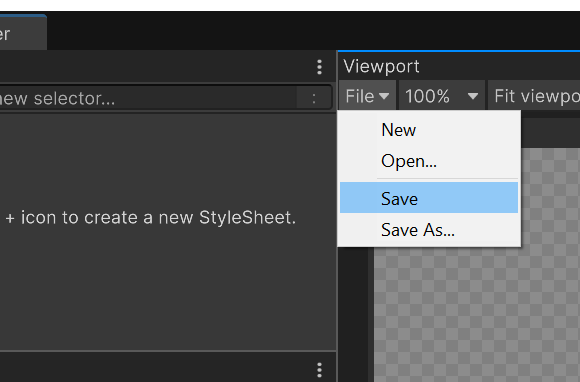
Note: Remember to save the changes to the UI document with Ctrl+S (macOS: Cmd+S) or select File > Save at the top of the UI Builder Viewport window before closing the UI Builder window.
16. In the Editor, enter Play mode to check how your changes look in game.

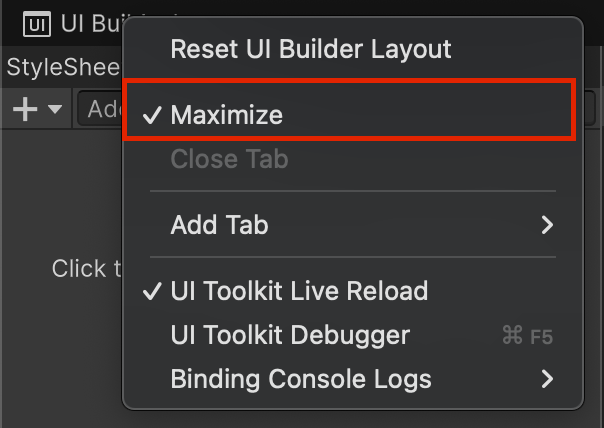
Tip: If you maximized the UI Builder window and can’t see the other windows, double click or right-click the UI Builder window name, and uncheck the maximize button to get back to your previous layout of the Editor.
4. Update the Label using code
Now that you have the label in the right place, let’s code the functionality to display the amount of food the player has on each turn.
To do this, you’ll use the GameManager:
1. Add a public variable of type UIDocument to your GameManager script. You also need to add using UnityEngine.UIElements at the top of the file to be able to use the classes related to UI Toolkit like UIDocument.
2. Create a private variable of type Label to store a reference to the Label so you can access and modify it.
You can now assign your UI Document (the component on the UIDocument GameObject, not the Game UI file) to your GameManager in the Inspector window.
You can then add the code that finds the Label inside your GameUI and update its text to the Food count in the GameManager Start method:
using UnityEngine.UIElements;

public class GameManager : MonoBehaviour
{
.
.
.
public UIDocument UIDoc;
private Label m_FoodLabel;
.
.
.
void Start()
{
    m_FoodLabel = UIDoc.rootVisualElement.Q<Label>("FoodLabel");
    m_FoodLabel.text = "Food : " + m_FoodAmount;
    ...
}
.
.
.
}
Let’s take a closer look at the lines of code above:
- UIDocument has a .rootVisualElement property that is the root (the first element) of the Hierarchy window you saw in the UIBuilder window earlier. All elements in the Hierarchy window (like the label) are child elements of that root element..
- This root (and any element of the UIToolkit) has a special method, Q, short for Query. This Q method looks for an element of the given type (for example, Label) with the given name (for example, FoodLabel) in the child elements of the element on which you call Q.
- m_FoodLabel is an additional private variable of type Label to add to your GameManager so you can store the Label and not have to look for it everytime with the Q method.
- The .text property is used to set the text of the label to display the current amount of food (for example, Food:100).
3. Save the changes to your script, drag your UIDocument into the UIDoc slot in your GameManager, and enter Play mode.
You should now have your food count at the bottom of your screen.
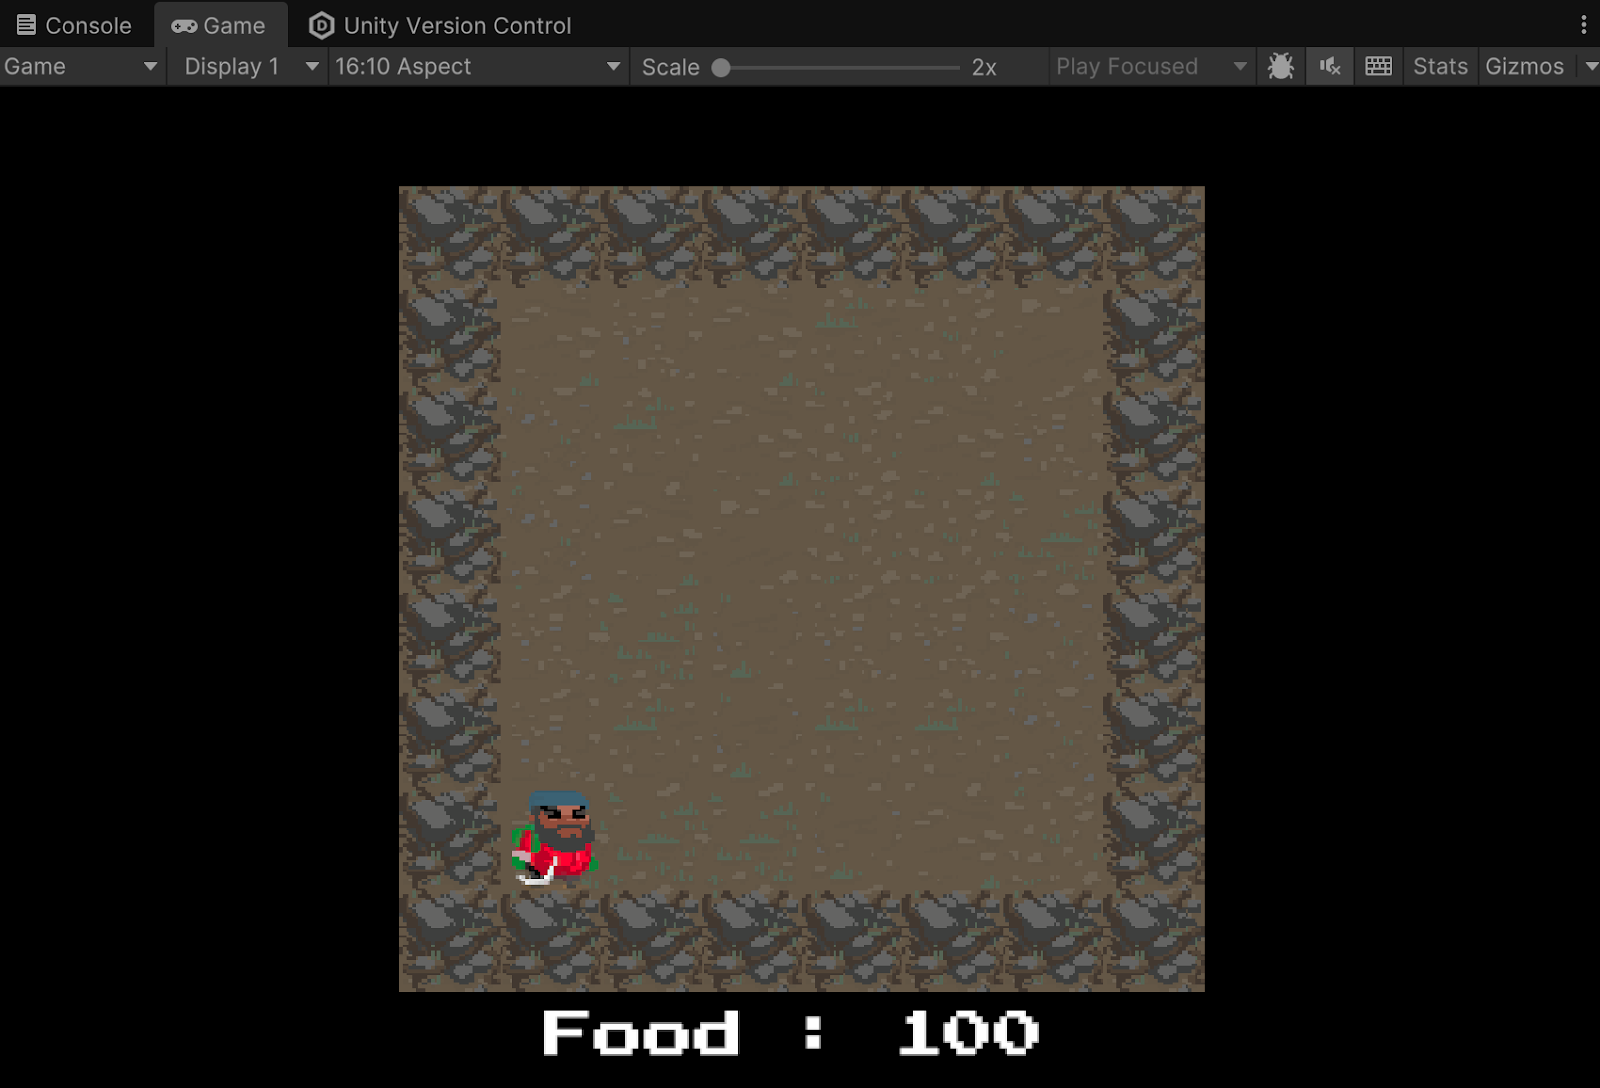
However, you’ll notice that the counter doesn’t update when the player character moves. For this, you have to replace the Debug.Log you wrote earlier in the OnTurnHappen method with the following:
void OnTurnHappen()
{
   m_FoodAmount -= 1;
   m_FoodLabel.text = "Food : " + m_FoodAmount;
}
Now, if you enter Play mode and move around, the food counter will decrease!
Tip: Remember to check in the changes into the Unity Version Control system.
5. Objects in cell and food refill
Now that the food supply decreases with every move the player character makes, the game needs a way to refill the depleting food. Let’s add a collectible object that refills 10 units of food.
For this you'll need to detect when the player enters a cell that has an object in it. In 2D Beginner: Adventure Game, collider and Rigidbody components are used to detect collisions and overlapping of objects. But in this case, because the game is turn based and happens on a grid, you don’t need to use physics.
You already have CellData for each cell in the game, and you use it to store whether the cell is passable or not. Now, you’ll add a new value to that CellData that stores whether the cell contains an object or not:
1. Open your BoardManager script and inside the CellData class add the following new variable:
public class CellData
{
   public bool Passable;
   public GameObject ContainedObject;
}
Now everytime the player character moves to a new cell, the PlayerController script can check if something is inside that cell, and if there is, you can remove that object and increase the food counter.
Then you need to create a food GameObject. There are a couple of sprites for food in the sprites we provided for this project.
2. Drag your preferred food sprite into the scene to create a new GameObject with that sprite, name it “SmallFood”, set its order in layer to something between 1 and 9.
Doing this will mean that it renders on top of the tilemap and under the player character.
3. In the Project window, right-click the Assets folder and select Create > Folder, new it “Prefabs”, then drag and drop your SmallFoodGameObject from the Hierarchy window into the new Prefabs folder.
This will create a prefab from that GameObject that you can reuse multiple times and between scenes.
4. Delete the SmallFoodGameObject from the scene.
It is not needed anymore as you will work on the prefab.
5. In BoardManager, add a public variable FoodPrefab of type GameObject, to store the prefab of the food you just created.
public GameObject FoodPrefab;6. Write a new void method named “GenerateFood”, then copy and paste the following code into that method:
void GenerateFood()
{
   int foodCount = 5;
   for (int i = 0; i < foodCount; ++i)
   {
       int randomX = Random.Range(1, Width-1);
       int randomY = Random.Range(1, Height-1);
       CellData data = m_BoardData[randomX, randomY];
       if (data.Passable && data.ContainedObject == null)
       {
           GameObject newFood = Instantiate(FoodPrefab);
           newFood.transform.position = CellToWorld(new Vector2Int(randomX, randomY));
           data.ContainedObject = newFood;
       }
   }
}
The content of the above code does the following:
- Creates an int variable that stores how many food prefabs will be created (making a variable allows you to easily change it to test different values)
- Loops this number of times:
- On each loop, a random x and y position are picked. Random.Range returns a number contained between the first parameter (included) and the second (excluded). Note that the range is 1 to size - 2 (as size -1 is excluded) because the code shouldn’t pick a cell that is an outside wall!
- It then retrieves the CellData for that cell position.
- If this cell is passable and there is no object there, it instantiates a new food prefab in that position and stores that food as the ContainedObject in that cell in its CellData.
7. Call this new method at the end of the Init method of the BoardManager, once the level has been created.
 public void Init()
    {
        m_Tilemap = GetComponentInChildren<Tilemap>();
        m_Grid = GetComponentInChildren<Grid>();

        m_BoardData = new CellData[Width, Height];

        for (int y = 0; y < Height; ++y)
        {
            for (int x = 0; x < Width; ++x)
            {
                Tile tile;
                m_BoardData[x, y] = new CellData();

                if (x == 0 || y == 0 || x == Width - 1 || y == Height - 1)
                {
                    tile = WallTiles[Random.Range(0, WallTiles.Length)];
                    m_BoardData[x, y].Passable = false;
                }
                else
                {
                    tile = GroundTiles[Random.Range(0, GroundTiles.Length)];
                    m_BoardData[x, y].Passable = true;
                }

                m_Tilemap.SetTile(new Vector3Int(x, y, 0), tile);
            }
        }

        GenerateFood();
    }
8. Save your changes to the scripts, assign your SmallFood prefab to the FoodPrefab slot on the BoardManager in the Inspector window, and then enter Play mode to check if food appears on your map.
Try running the game multiple times to see how food appears in different places each time.
You might already have spotted the following problems:
- Sometimes there are only four or fewer food prefabs on the board.
- Sometimes food appears under the player’s initial position.
This is because the position the food is placed in is picked randomly, so there’s a possibility (in our example, 7x7=49 empty cells, so a 1/49 chance) that the same cell is picked twice, and since this cell will already have a ContainedObject, a new food prefab won’t be added. There’s also a chance that the starting player cell is the one picked, or both might happen!
You can fix this manually by checking that the starting cell isn’t picked and continuing to pick random positions until you have generate five food GameObjects, but that could lead to long loading times, especially if you increase the amount of food, as the system might try to pick filled cells for a long time before finally randomly stumbling on an empty cell.
A better solution is to flip the problem on its head: instead of picking a random cell until an empty one is found, you can keep a list of all the empty cells and pick one of those randomly.
9. Add a new variable called “m_EmptyCellsList” of type List containing Vector2Int in the BoardManager script. You’ll need to add using System.Collections.Generic at the top of your file to be able to use List.
Then, every time you create an empty cell during board creation, add its coordinate to that list.
The Init function will look like this (don’t forget to initialize the list; this can be seen in the code sample just below the m_Grid initialization):
public void Init()
{
   m_Tilemap = GetComponentInChildren<Tilemap>();
   m_Grid = GetComponentInChildren<Grid>();
   //Initialize the list
   m_EmptyCellsList = new List<Vector2Int>();

   m_BoardData = new CellData[Width, Height];


   for (int y = 0; y < Height; ++y)
   {
       for(int x = 0; x < Width; ++x)
       {
           Tile tile;
           m_BoardData[x, y] = new CellData();

           if(x == 0 || y == 0 || x == Width - 1 || y == Height - 1)
           {
               tile = WallTiles[Random.Range(0, WallTiles.Length)];
               m_BoardData[x, y].Passable = false;
           }
           else
           {
               tile = GroundTiles[Random.Range(0, GroundTiles.Length)];
               m_BoardData[x, y].Passable = true;

               //this is a passable empty cell, add it to the list!
               m_EmptyCellsList.Add(new Vector2Int(x, y));
           }

           m_Tilemap.SetTile(new Vector3Int(x, y, 0), tile);
       }
   }

   //remove the starting point of the player! It's not empty, the player is there
   m_EmptyCellsList.Remove(new Vector2Int(1, 1));
   GenerateFood();
}
Now when your board is generated, m_EmtpyCellsList will contain a list of all the empty cells.
Note that we removed the cell 1,1 immediately from the list, as this is where the player character is, so it’s not an empty cell.
...
m_EmptyCellsList.Remove(new Vector2Int(1, 1));
GenerateFood();
Finally, you can replace picking a random coordinate in the GenerateFood method with an entry from the m_EmtpyCellsList list, and then remove that entry from the m_EmtpyCellsList list (because the cell is no longer empty).
This is the final version of GenerateFood using the empty cell list :
void GenerateFood()
{
   int foodCount = 5;
   for (int i = 0; i < foodCount; ++i)
   {
       int randomIndex = Random.Range(0, m_EmptyCellsList.Count);
       Vector2Int coord = m_EmptyCellsList[randomIndex];

       m_EmptyCellsList.RemoveAt(randomIndex);
       CellData data = m_BoardData[coord.x, coord.y];
       GameObject newFood = Instantiate(FoodPrefab);
       newFood.transform.position = CellToWorld(coord);
       data.ContainedObject = newFood;
   }
}
You don’t have to test if the cell is empty anymore as you are sure the cell will be empty.
Tip: Remember to check in all those changes with UVCS!
6. Challenges
Below are two challenges that, if completed, improve the current state of your game. Using everything you’ve learned so far, try and complete them on your own!
Easy: Make the amount of food random between two values
Instead of always generating five food prefabs, have your game generate a random number of food based on a range we can customize in the inspector.
Medium: Random food sprite
You can implement an array of food prefabs instead of just one, and pick one of those randomly, just like you did for the floor tiles, so the appearance of the food objects is also random.
7. Collect food
Now that you have food generated on the map, it’s time to code the functionality for the player to actually collect it.
A very basic way to do this would be to follow this structure:
- When entering a new cell, check if there is a ContainedObject in that cell’s CellData.
- If yes, increase the food counter of the player character by a certain amount.
This works, and you can even test doing it this way if you feel up for the challenge. However, this approach is very limited. For example, what if you want different food objects to give different amounts of food points, or you want to make poisoned food that makes you lose food points?
To do this, you need a way to make handling objects in a cell more generic, like a generic CellObject type that your CellData can contain and then act on that object when the player character interacts with a cell. That way you can easily write a new CellObject and the player code doesn’t have to be modified to handle every different type of object, even some you might not have thought about when designing this system.
This will be solved through C# inheritance: a base class CellObject that different objects (FoodObject, for example) can inherit from.
This base type will have a virtual method called PlayerEntered that will be called by the player code when the player character enters its cell. That way every subclass can handle what happens when the player character enters a cell (for example, food objects will destroy themselves and increase the food count by a certain amount).
To add this functionality, follow these instructions:
1. In the Project window, under the Assets folder, right -lick the Scripts folder and select Create > Scripting > MonoBehaviour Script. Name it “CellObject” and add a virtual method called “PlayerEntered”.
The PlayerEntered method will be empty in that base class because by default, cell objects do nothing when the player character enters their cell.
using UnityEngine;

public class CellObject : MonoBehaviour
{
   //Called when the player enter the cell in which that object is
   public virtual void PlayerEntered()
   {

   }
}
2. In the Project window, under the Assets folder, right-click the Scripts folder and select Create > Scripting > MonoBehaviour Script, and name it “FoodObject”.
3. Change the class the FoodObject script inherits from MonoBehaviour to CellObject. You then need to redefine the PlayerEntered method so it does a different thing than the base class one. This is called overriding the method, and uses the override keyword.
using UnityEngine;

public class FoodObject : CellObject
{
   public override void PlayerEntered()
   {
       Destroy(gameObject);

       //increase food
       Debug.Log("Food increased");
   }
}
For now, this will just destroy the FoodObject GameObject and write something in the console to show it happened. This is enough to test if the code works.
4. Replace the GameObject in CellData with a CellObject in the BoardManager script.
public class CellData
{
   public bool Passable;
   public CellObject ContainedObject;
}
This will generate a couple of errors in your console you should be able to fix.The fixes are below, but see if you can figure them out for yourself before you look at the solutions!
Here are the bug fixes:
- Change the FoodPrefab type from GameObject to FoodObject in the BoardManager script.
- In the GenerateFood method, because you now instantiate a FoodObject, change the newFood type from GameObject to FoodObject.
5. In your PlayerController script, when the player enters a new cell, if it contains an object, call PlayerEntered on it:
if(hasMoved)
{
   //check if the new position is passable, then move there if it is.
   BoardManager.CellData cellData = m_Board.GetCellData(newCellTarget);

   if(cellData != null && cellData.Passable)
   {
       GameManager.Instance.TurnManager.Tick();
       MoveTo(newCellTarget);

       if (cellData.ContainedObject != null)
       {
           cellData.ContainedObject.PlayerEntered();
       }
   }
}
Virtual methods allow you to change the behavior of a method in a subclass. In this case, CellData keeps a reference to a CellObject, but this reference can point to an object of any subclass of CellObject (in this case, FoodObject). When you call PlayerEntered, the correct overridden method will be automatically called, based on the actual type of the stored object. In this case, because ContainedObject will actually point to a FoodObject, it is its PlayerEntered method that will be called, not the empty CellObject method.
The last step before being able to test this functionality is to modify the FoodPrefab.
6. Inside the Prefabs folder, open the FoodPrefab in prefab editing mode by double clicking it.
7. Add a FoodObject component, then save and exit prefab editing mode.
Check if it's still assigned to your Food Prefab entry on your BoardManager script (because you changed its type from GameObject to FoodPrefab, it could have lost the reference)
Enter Play mode and check that when the player character moves over a Food GameObject, it disappears, and that in the console, the log about food being increased appears.
Tip: Remember to check in these new changes to UVCS!
8. Increasing the food count
So far, the console is only outputting when the player character collects a Food GameObject. However, you also need to actually modify the amount of food displayed on the label. This is stored in the GameManager, and you have access to it through the Singleton instance.
You should know everything needed to do the following:
- Create a method in the GameManager script that changes the amount of food by a given parameter and name it something like “ChangeFood”. Don’t forget to also update the label when you do so!
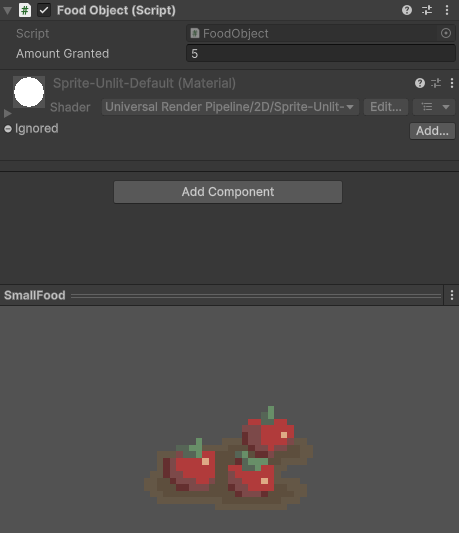
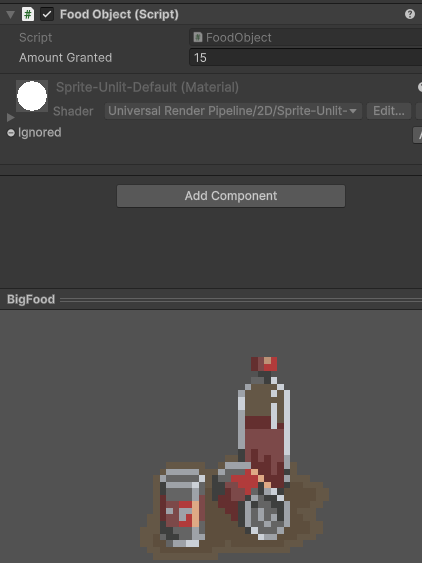
- Add a public property on your FoodObject so you can define how many food points are given by the FoodObject when collected.
- Call the new GameManager method in the PlayerEntered method on your FoodObject.
The solutions to each of these problems are below, but see if you can figure them out for yourself before you check them out!
Here are the solutions:
In GameManager
void OnTurnHappen()
{
   ChangeFood(-1);
}

public void ChangeFood(int amount)
{
   m_FoodAmount += amount;
   m_FoodLabel.text = "Food : " + m_FoodAmount;
}Note: The code decreasing food in OnTurnHappen now uses the new ChangeFood method! As discussed earlier, it’s good practice to try to consolidate code that does the same thing in a single place; that way, if you want to change a behavior (for example, testing if food reaches 0 or change the message in the label), you only have one place to modify.
FoodObject
public class FoodObject : CellObject
{
   public int AmountGranted = 10;

   public override void PlayerEntered()
   {
       Destroy(gameObject);

       //increase food
       GameManager.Instance.ChangeFood(AmountGranted);
   }
}
Now your food count should change when the player character collects food items! You can play with the amount given by changing the AmountGranted property in the Inspector window of your FoodObject prefab!
9. Challenge
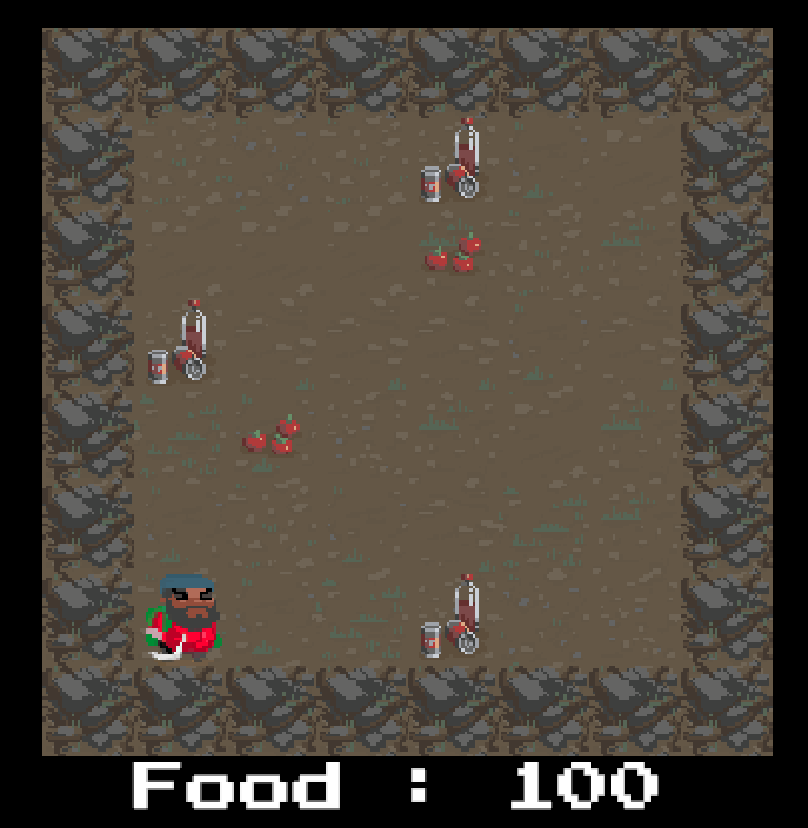
This project provides you with multiple sprites for food, with some looking like a bigger amount of food than others. Try to create multiple prefabs with the amount granted set to a different amount on each based on how big it appears it be.
You'll need to make your FoodPrefab into an array and pick a prefab randomly from that array at level creation.

10. Next steps
Your game is starting to come together! You have a game board, a controllable player character, a turn system, and a collectable resource to keep track of! In the next tutorial, you’ll increase the game’s difficulty by adding obstacles!