
Add a game board
Tutorial
Beginner
+0XP
30 mins
1027
Unity Technologies
In the previous tutorial, you laid out the key aspects of a 2D roguelike game; now it’s time to get to work!
By the end of this tutorial, you’ll have added the following:
- A basic game board that randomly generates tiles on start.
- A border for the game board that “traps” the player character in the confines of the game board.
- Use Unity Version Control to check in changes to your projects’ repository so you don’t lose any progress and can revert the state of your game to a previous one.
1. Overview
In this tutorial you’ll start working on the game itself. The first thing you’ll need to do is generate a game board through code.
2. Game board
From the list in the previous tutorial, the first task you need to complete is to create the game board. For this you'll use the tilemap feature of Unity.
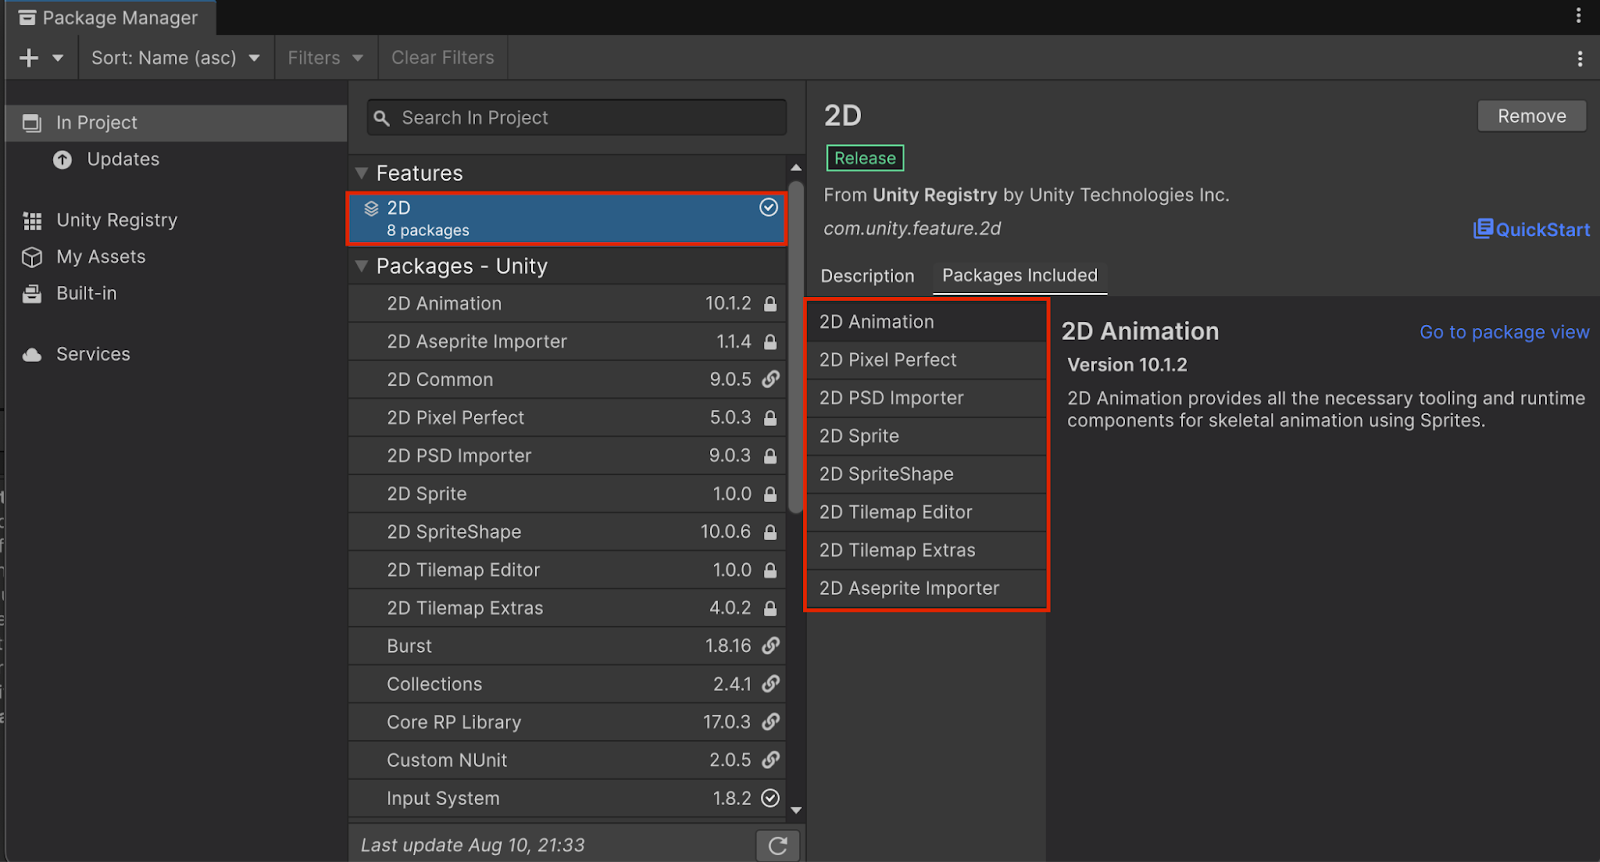
First, you need to verify that you have all the packages you need. Because you created this project using the 2D URP template, all the necessary packages should already be all installed. To make sure, open the Package Manager (Window > Package Manager), select the In Project tab, and check that all the packages for the 2D features are installed. If that’s not the case, select the Unity Registry tab, enter “2D” in the Search Unity Registry box, select the 2D package, and select Install in the upper-right corner.
Now you can start creating your first scene:
1. The provided project should already contain a Scenes folder, but if it doesn’t, in the Project window, right-click the Assets folder and select Create > Folder and name it “Scenes”.
2. Right-click the Scenes folder and select Create > Scene > Scene to create a new empty scene, and name it “Main”.
3. Double click Main scene to open it. In the Hierarchy window, select the Main Camera GameObject, then in the Inspector window, under the Camera section, ensure that the Projection property is set to Orthographic and the Size property is set to 5.

4. Under the Environment section of the Camera settings, ensure the Background Type property is set to Solid Color and set the Background Color property to black (000000).

Now that the camera is properly set up, you can start creating the board.
5. Right-click in the Hierarchy window and select 2D Object > Tilemap > Rectangular.
For a reminder on how tilemaps work, check out the Create a basic 2D gameplay environment tutorial or the Tilemaps page of the manual.
In 2D Beginner: Adventure Game, the tilemap was painted manually in the Editor because the map was previously designed and fixed. In this case however, the game is procedural, so the tilemap will be created by code because it needs to be different every time the game is played.
As a reminder, tilemaps are made out of tiles, which are special assets. Even though you won’t paint your tilemap by hand, you’ll create a Tile Palette to easily create your tiles and keep them stored.
6. In the Project window, right-click the Assets folder and select Create > Folder to create a new folder, then name it “Tiles”. Right-click the Tiles folder and select Create > 2D > Tile Palette > Rectangular and name the new asset “GamePalette”.
7. From the main menu, select Window > 2D > Tile Palette.
This opens the Tile Palette window.
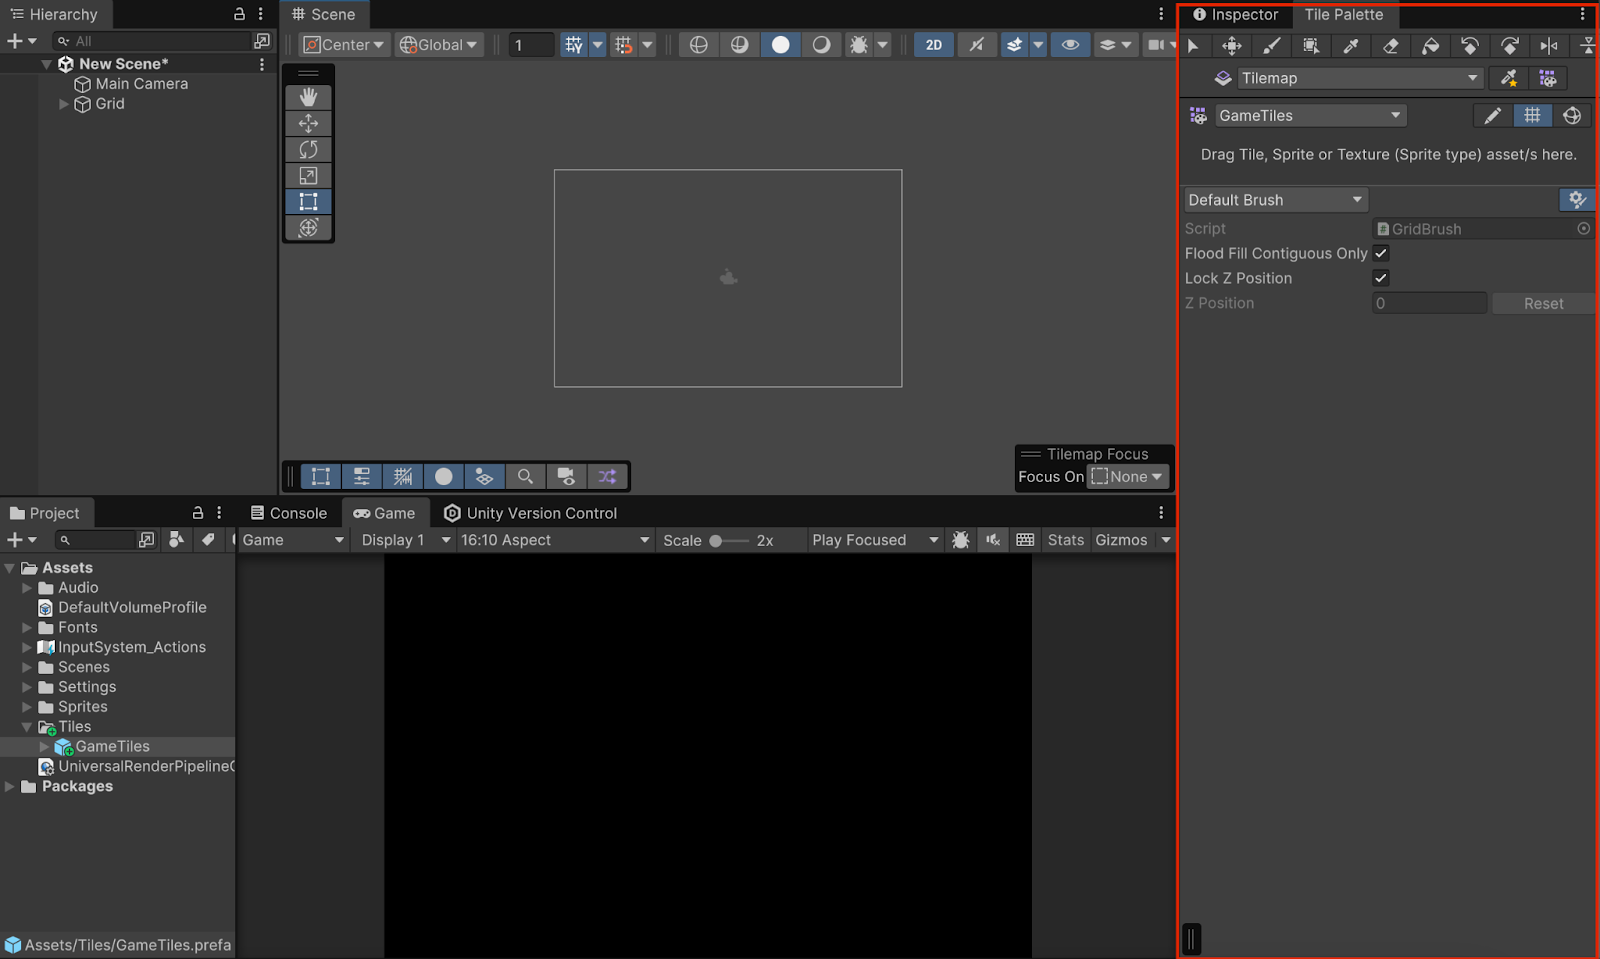
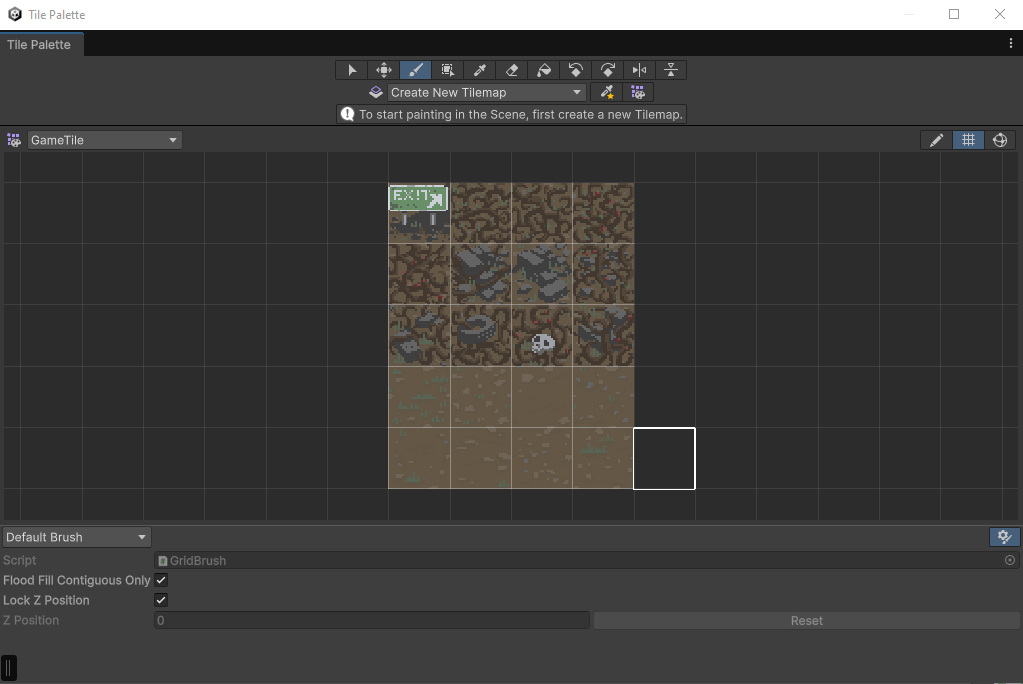
8. In the Project window, select Assets > Roguelike2D > TutorialAssets > Sprites. Choose whichever Sprite Sheet you want, use the foldout (triangle) to expand it, and select and drop all the ground tiles into the center of the Tile Palette window.
The Editor will ask you to select a folder where you want the new tiles to be saved; select the Tiles folder you just created.
3. Check in changes to the repository
If you take a look into your Project window, the Tiles folder and the new tiles in it should now display a small green plus sign (+) next to them.
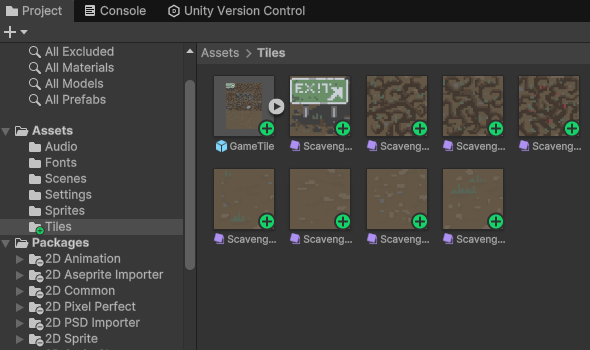
This is the Unity Version Control system letting you know that these are files you’ve added locally to your project but haven’t added yet to the repository; that is, the remote storage that saves the states of your projects.
A good practice is to regularly check in changes you make to your project into the repository to safeguard against loss and the breakage of your project.
To check in a change to the repository, follow these instructions:
1. Make sure everything is saved in your project! Use File > Save or Ctrl+S (macOS: Cmd+S) to save the scene and make sure all the latest changes you made are written to disk.
2. Open the Unity Version Control window (either by selecting Window > Unity Version Control from the main or by selecting the Unity Version Control tab).
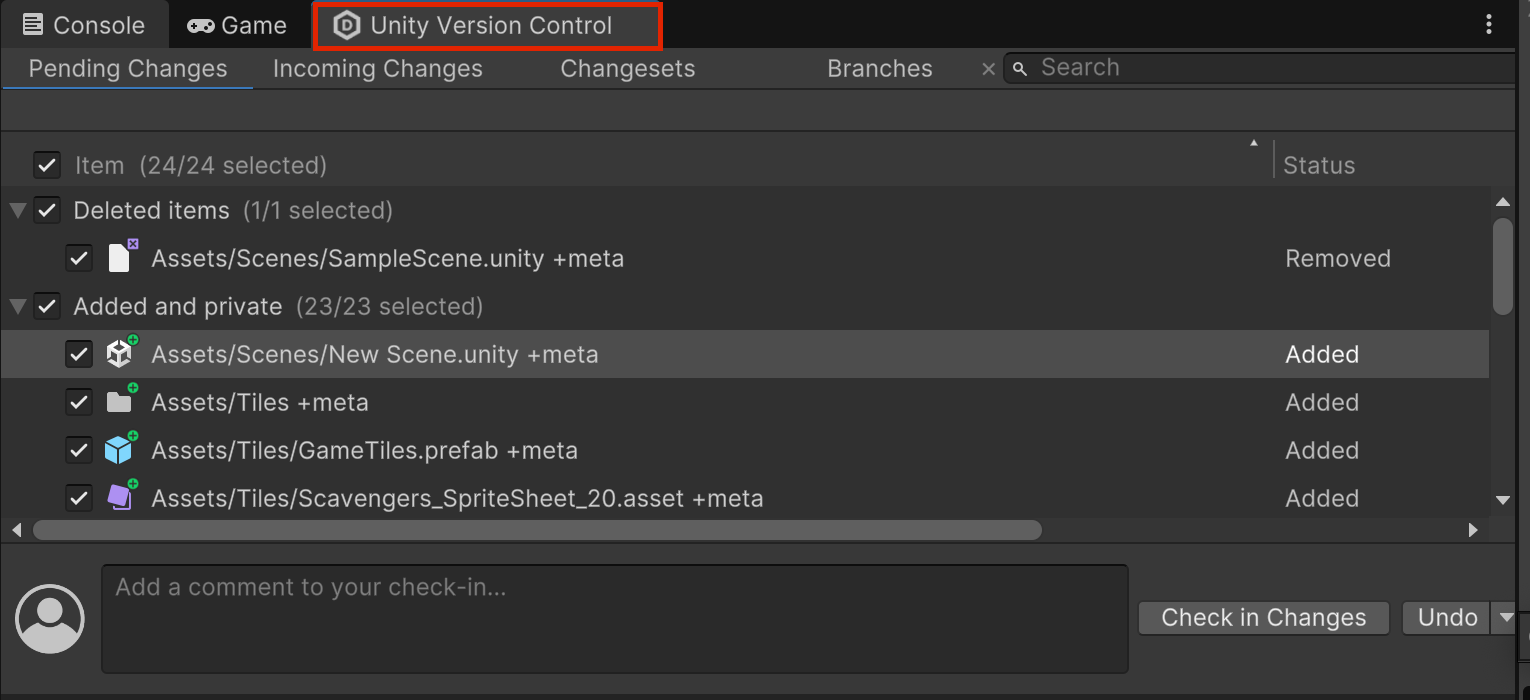
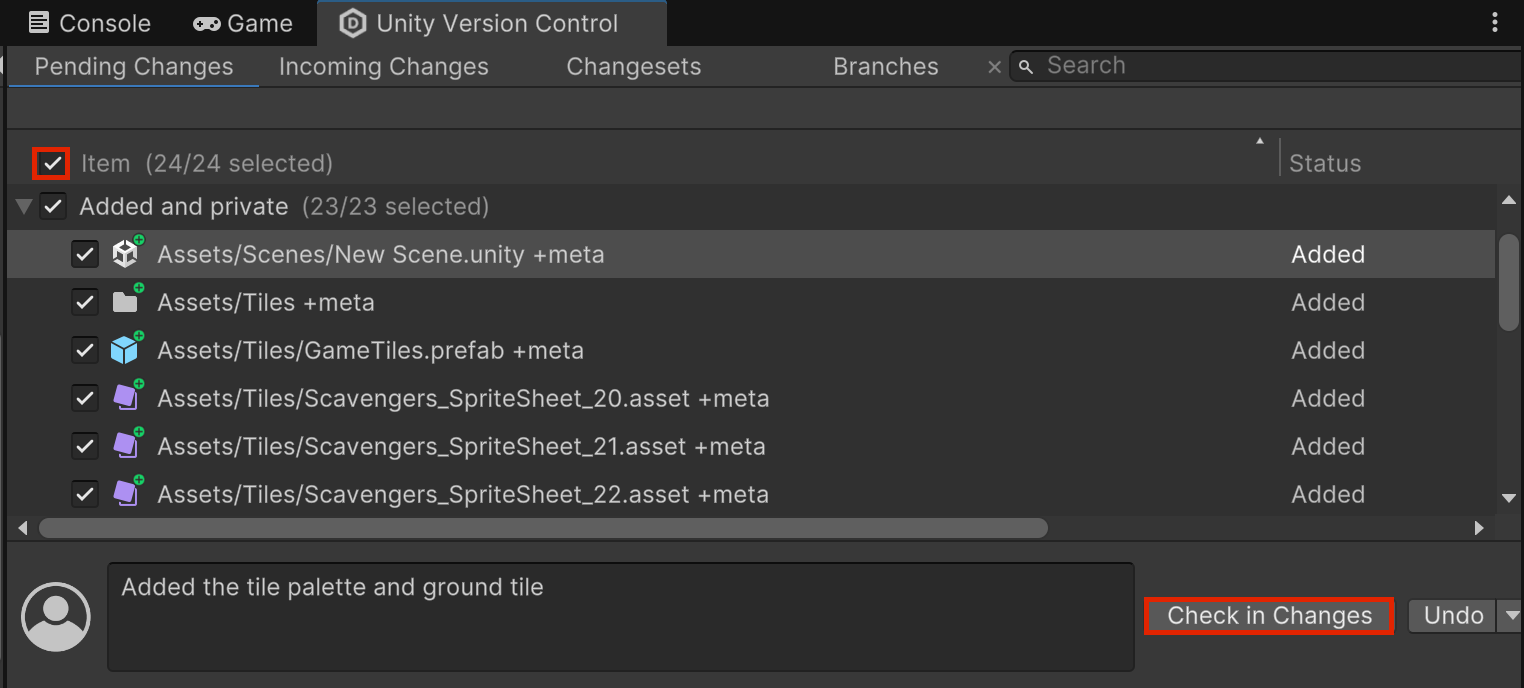
3. Make sure all files are selected, enter a check in message (something like “Added the tile palette and ground tiles”) and select Check in changes.
If you select the Changesets tab at the top of the Version Control window, you'll be presented with a list of all the changes you checked in, with the message you entered and a list of the files (added/modified/deleted) that were checked in.
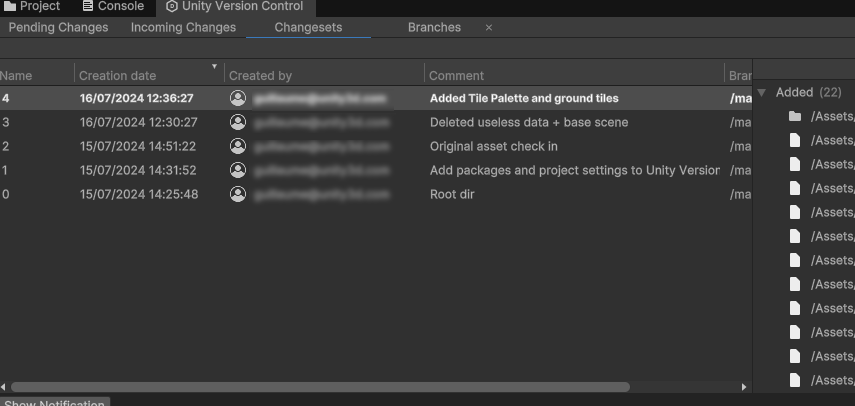
Note: Some of those early check-ins were made automatically by the Unity Version Control system.
From here you can right-click on any changeset and select Switch workspace to this changeset to return your project to the state it was at the time of that check in. If you want a more in depth exploration of the UVCS solution, check out this tutorial.
4. Scripting a tilemap
Now that you have your ground tiles, let’s write the code that creates the board where the game will happen on each level:
1. In the Hierarchy window, rename the Grid GameObject “BoardManager”.
2. In the Project window, right-click the Assets folder and select Create > Folder and name it “Scripts”.
3. Right-click the Scripts folder and select Create > Scripting > MonoBehaviour Script, name it “BoardManager”, and add it as a component of the BoardManager GameObject.
4. Double-click the new BoardManager script to open it in your code editor.
You’ll need to create the following three variables that you can set in the Editor:
- The width (in number of tiles) of our level.
- The height (in number of tiles) of our level.
- An array of tiles that are going to be used for the board.
First, in the Start method, you need to get the Tilemap component from the child GameObjects of the GameObject the script is on (the Tilemap GameObejct is a child GameObject of the BoardManager GameObject) and store it in a private member variable for easy access later. Then the code needs to go over all the tiles in the Tilemap component and randomly select a ground tile.
You can try writing that code by yourself. The method to set a tile from a tilemap is SetTile, which takes as first parameter a Vector3 Int with the coordinates of the tile (so (0,0,0) is the first cell, (1,0,0) the one on its right, (0,-1, 0) the one below etc. z is always 0 in this case as you work in 2D) and the second parameter is the actual tile to be set at that position.
Note: Don’t forget to add the using UnityEngine.Tilemaps namespace at the beginning of your file so you can have access to the Tilemap and Tile classes.
Here is the solution:
using UnityEngine;
using UnityEngine.Tilemaps;

public class BoardManager : MonoBehaviour
{
   private Tilemap m_Tilemap;

   public int Width;
   public int Height;
   public Tile[] GroundTiles;

   // Start is called before the first frame update
   void Start()
   {
       m_Tilemap = GetComponentInChildren<Tilemap>();

       for (int y = 0; y < Height; ++y)
       {
           for(int x = 0; x < Width; ++x)
           {
               int tileNumber = Random.Range(0, GroundTiles.Length);
               m_Tilemap.SetTile(new Vector3Int(x, y, 0), GroundTiles[tileNumber]);
           }
       }
   }

}
5. After completing your script, make sure to save it to compile the changes so they are visible in the Editor.
6. Select the BoardManager GameObject. In the Inspector window, set the width and height variables of the Board Manager script component to 8.
7. Use the foldout (triangle) to expand the Ground Tiles section, then select the Add (+) button. Use the picker (⊙) and select a tile for the ground. Try to add a couple of different tiles.
8. In the Game view toolbar, select the Play button to enter Play mode.
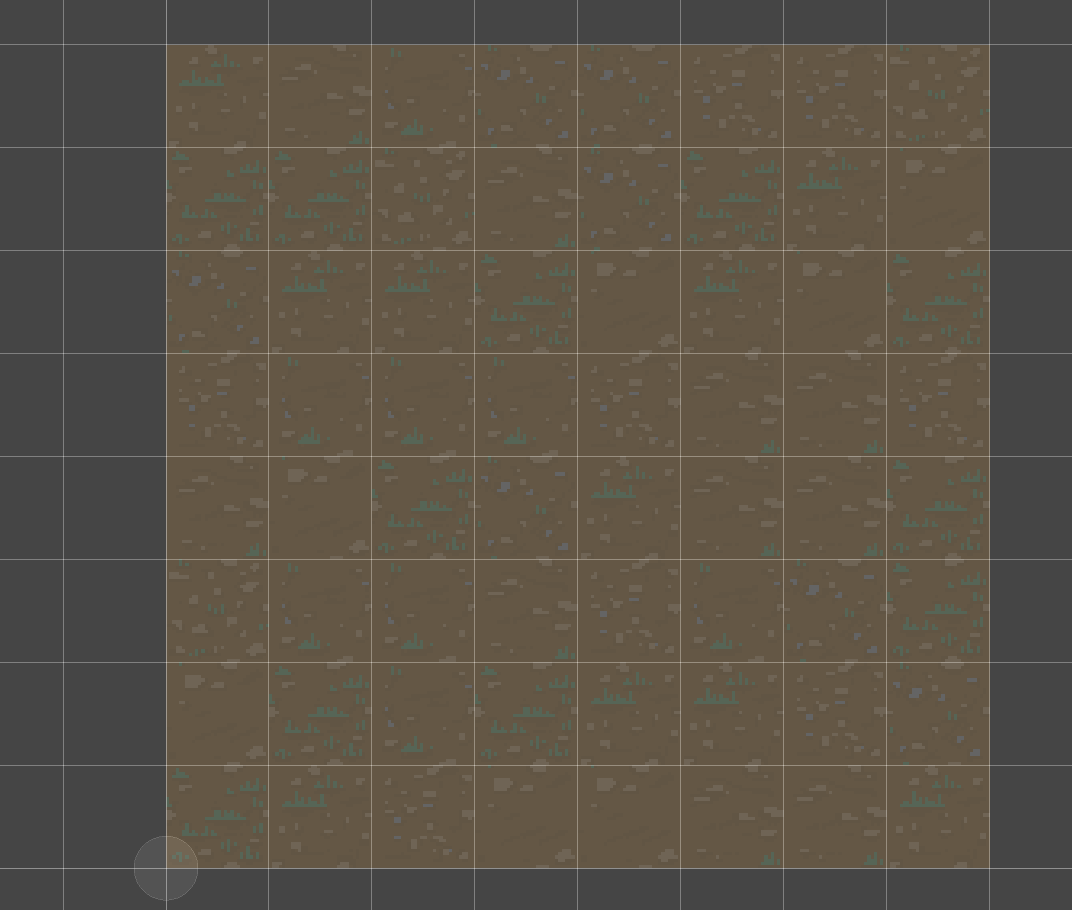
You can now see the game board in both the Scene view and the Game view!
Note that the Game view will only show part of the board, but you will fix the camera later!
5. Add a border to the board
You can try adding different sprites on the border cells of the game board to wall it off. To do this, you'll need to add new variables to your BoardManager script:
- A new public array to store all the “wall” tiles that can be used for a blocking cell (you'll need to create those tiles from sprites, just like you did for the ground tiles).
- Set those tiles to any cell that is located on border positions of our board (0 or max size in both directions)
Here is the new updated script:
using UnityEngine;
using UnityEngine.Tilemaps;


public class BoardManager : MonoBehaviour
{
   private Tilemap m_Tilemap;


   public int Width;
   public int Height;
   public Tile[] GroundTiles;
   public Tile[] WallTiles;


   // Start is called before the first frame update
   void Start()
   {
       m_Tilemap = GetComponentInChildren<Tilemap>();


       for (int y = 0; y < Height; ++y)
       {
           for(int x = 0; x < Width; ++x)
           {
               Tile tile;

               if(x == 0 || y == 0 || x == Width - 1 || y == Height - 1)
               {
                   tile = WallTiles[Random.Range(0, WallTiles.Length)];
               }
               else
               {
                   tile = GroundTiles[Random.Range(0, GroundTiles.Length)];
               }

               m_Tilemap.SetTile(new Vector3Int(x, y, 0), tile);
           }
       }
   }
}
Note that we reworked the tile setting code compared to the previous solution: we now pick the random number directly in the array indexing.
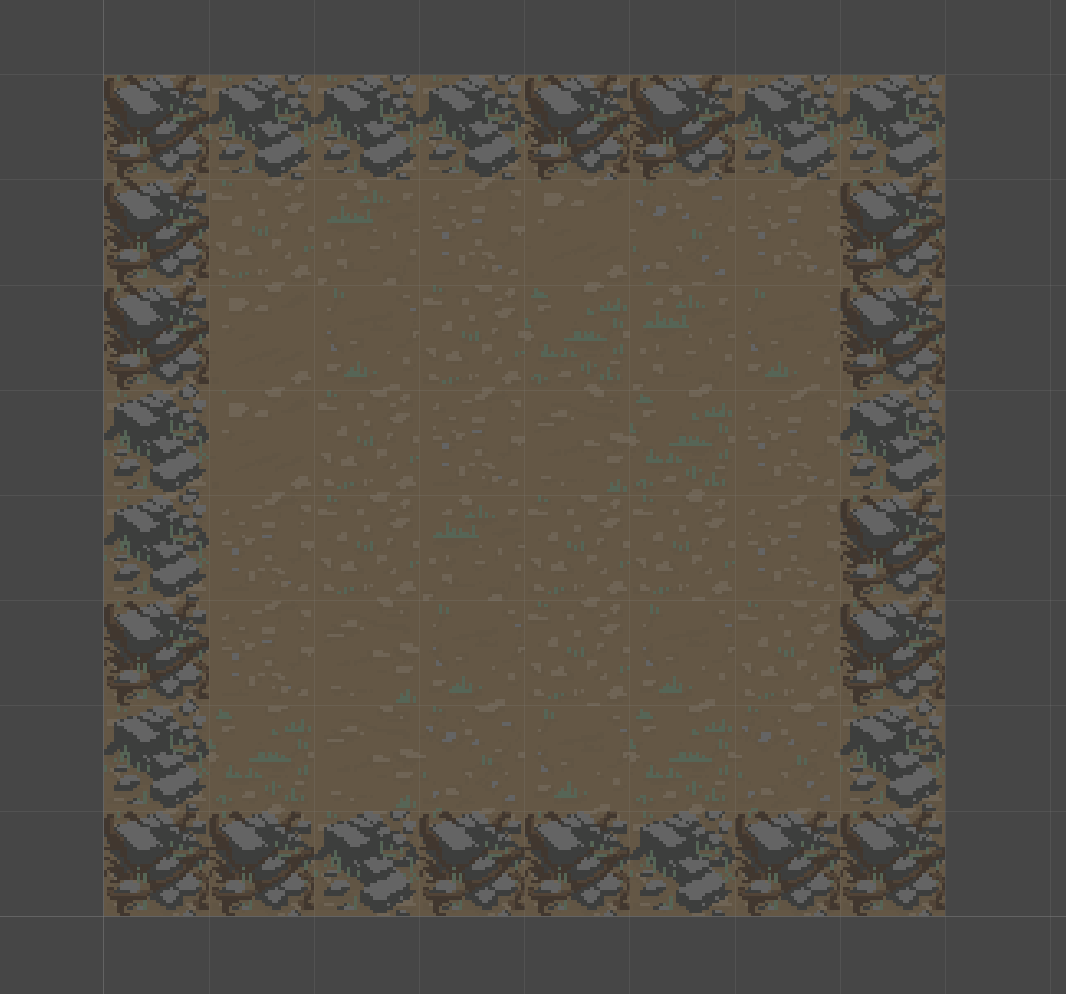
The image below is what the completed board might look like if you use the urban theme, but you can pick any tile you want for the border!
Note: Remember to save your scene now that you’ve added a script to the BoardManager GameObject.
Now that you have a board, let’s display it in the actual game. Let’s set up the Main Camera in the scene correctly.
Remember Version Control
You just finished adding a new feature (generating the board) which added new files and modified the scene. Now that the feature works, it’s a good time to check in your change with Unity Version Control!
6. Camera
As your tilemap is at 0,0,0, and it is 8 by 8, its center is at (4,4,0) so set the Main Camera Position to (4,4,-10) so it aims at the center of your board.
Now, when you try to enter Play mode, your board will look something like this:
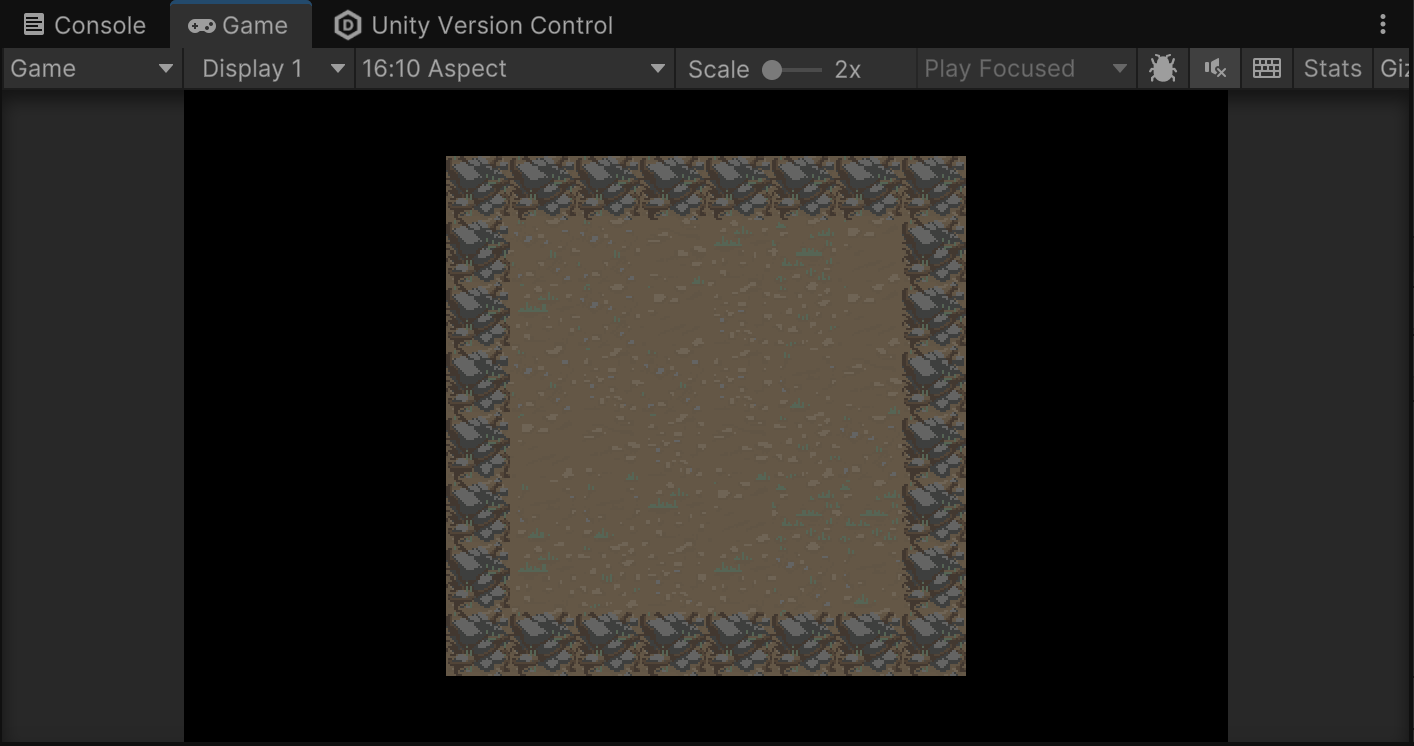
The camera will receive additional work later. For now this basic functionality will allow you to test your game.
7. Board data
Right now, your board is only a collection of tiles, which are just visual. For the game to really function, you'll need to keep more data for each cell than just its sprites; for example, is it passable? Does it contain anything? etc.
To do this, you'll use a 2D array, which is an array that has two indices (in this case, the x and y of the cell). This array type will be a custom C# class, which will allow you to store any kind of data per cell.
At the top of your BoardManager class, add a new class called “CellData” and make its first member variable a boolean that defines if the cell is passable or not. And then let’s declare a private property that is our 2D array board data that we will name m_BoardData.
public class BoardManager : MonoBehaviour
{
   public class CellData
   {
      public bool Passable;
   }

   private CellData[,] m_BoardData;

}
If you're unfamiliar with the concept, it’s possible to declare a class inside another class; this helps organize your code, as this class is only used by the BoardManager. It can be accessed by code from outside the BoardManager class with the full class name BoardManager.CellData
CellData[,] is the way to declare a 2D array containing objects of type CellData. The “,” denotes there will be two indices to access it. So m_BoardData[0,0] is the first item of the first line, m_BoardData[1,3] the fourth item of the second line (indices start at 0!), etc.
In C# you can create an array of any dimension, so CellData[,,] would be a 3D array (three indices)
Finally you can update your Start method. To do this, you’ll need to do the following:
- Initialize the m_BoardData array with your board width/height so it’s size is enough to store the data of all the cells.
- Create each CellData inside your loops and set its Passable value to true if the cell is not a border and false if it is a border.
void Start()
{
    m_Tilemap = GetComponentInChildren<Tilemap>();

    m_BoardData = new CellData[Width, Height];

    for (int y = 0; y < Height; ++y)
    {
        for(int x = 0; x < Width; ++x)
        {
            Tile tile;
            m_BoardData[x, y] = new CellData();

            if (x == 0 || y == 0 || x == Width - 1 || y == Height - 1)
            {
                tile = WallTiles[Random.Range(0, WallTiles.Length)];
                m_BoardData[x, y].Passable = false;
            }
            else
            {
                tile = GroundTiles[Random.Range(0, GroundTiles.Length)];
                m_BoardData[x, y].Passable = true;
            }

            m_Tilemap.SetTile(new Vector3Int(x, y, 0), tile);
        }
    }
}
Note: Remember to save your script and check them in version control to safeguard them!
8. Next steps
You now have a basic, scripted game board. Now you need a way to interact with the board you’ve created. In the next tutorial, you’ll add a player character that responds to your inputs and moves across the board.