Build a new scene with glasses
Tutorial
·
Beginner
·
+10XP
·
45 mins
·
(70)
Unity Technologies
In this next project, you’ll learn how to implement multiple filters that your users can select and customize through a user interface. Specifically, users will choose between sets of glasses and then select a color for those glasses.
In this tutorial you'll do the following:
- Download and import the provided assets.
- Set up your project for face detection and tracking.
- Select the pairs of glasses the user can choose from.
- Build and test your app to preview the glasses.
1. Overview
In the last project, you created a single face filter of your own design using various features, such as face textures, meshes, and animations. Although you added a variety of different features to your filter, it was still only one filter. Often, apps present their users with multiple filters to experiment with.
In this next project, you’ll learn how to implement multiple filters that your users can select and customize through a user interface (UI). Along the way, you’ll explore ways to create a user interface in Unity, deepen your knowledge of the AR face filters, and most importantly, build your first interactive features using visual scripting.
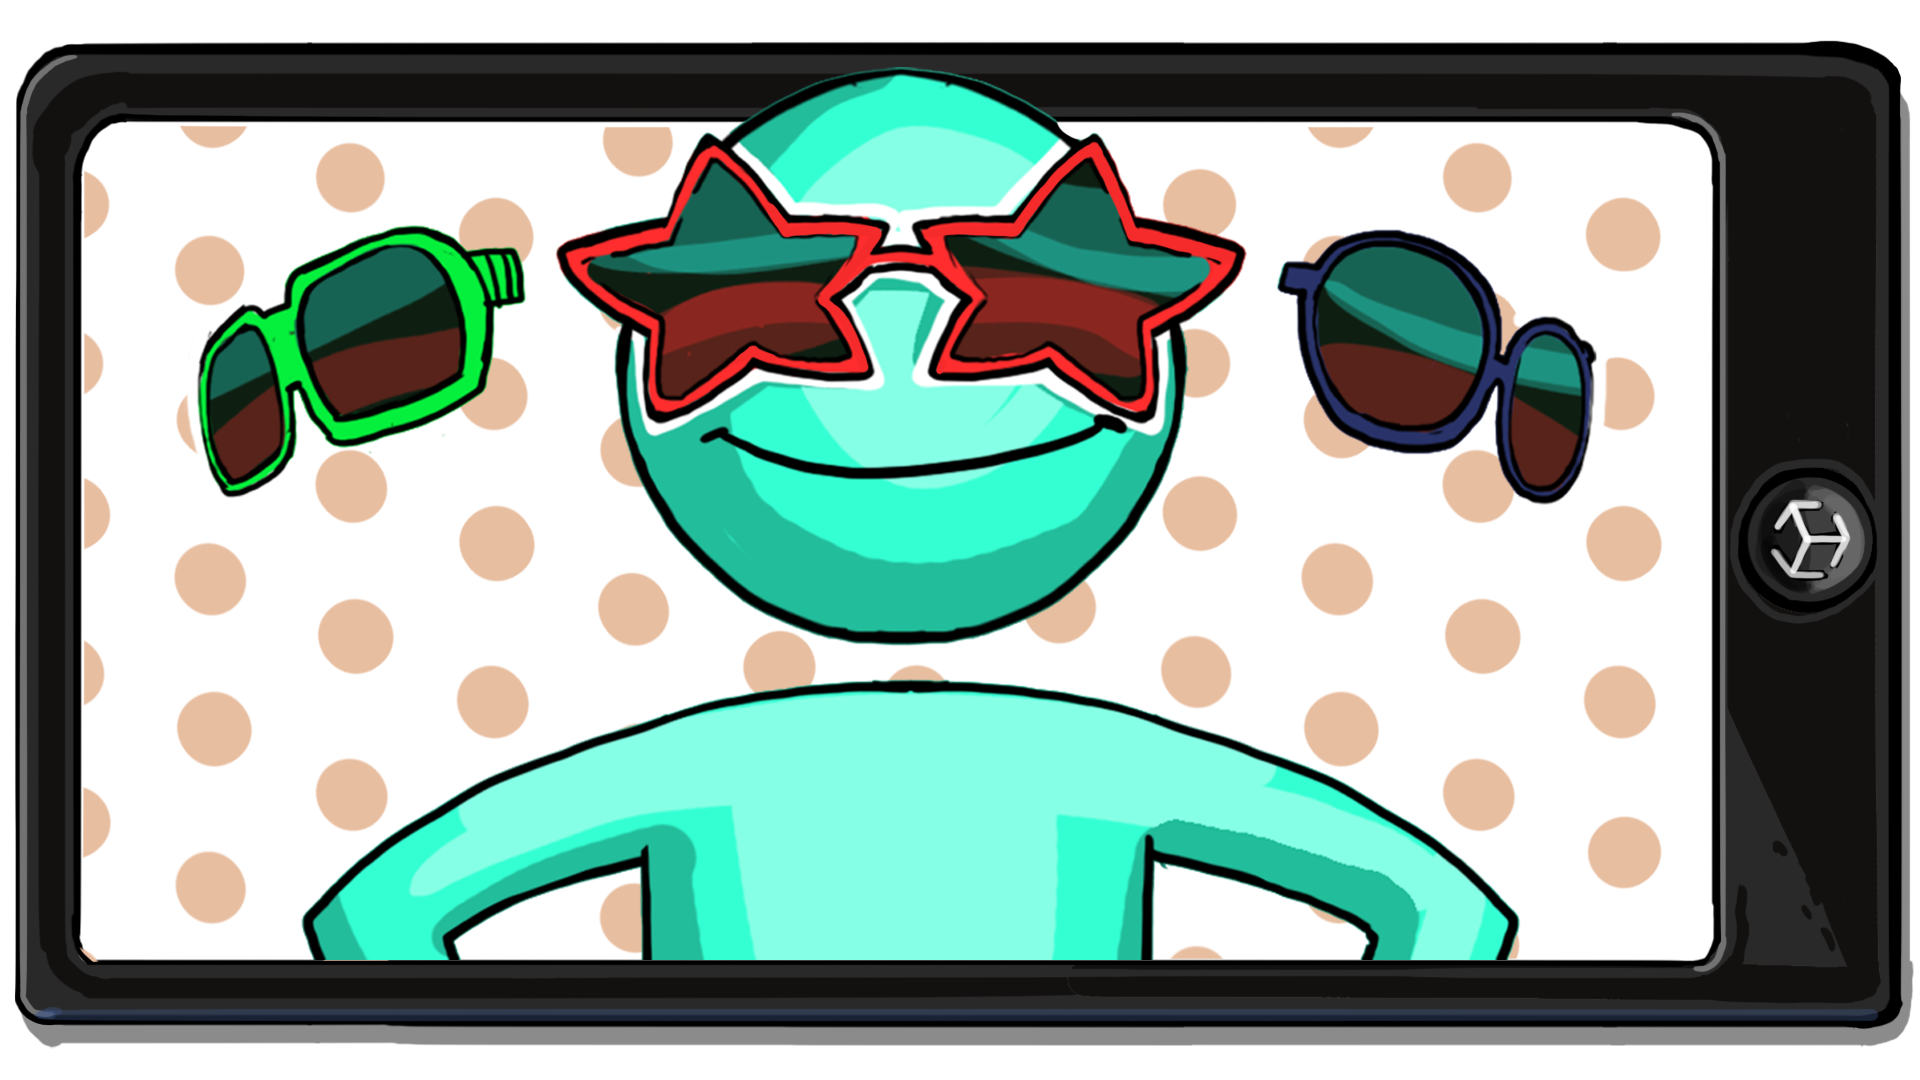
Let’s check out the app you’ll be building:
2. Set up a new scene
Just as you did in the previous project, you’ll begin by creating and configuring a new scene using the provided AR template. These initial steps are exactly the same as what you did before, so try to challenge yourself by following along with these more brief instructions. If you get stuck, you can always review the previous setup tutorial for more details.
Follow these instructions to set up your new scene:
1. Select File > New Scene to create a new scene from the AR template.
2. Select File > Save As, then save the scene as “InteractiveFilter” inside the Scenes folder.
3. In the Hierarchy window, delete the Cube GameObject.
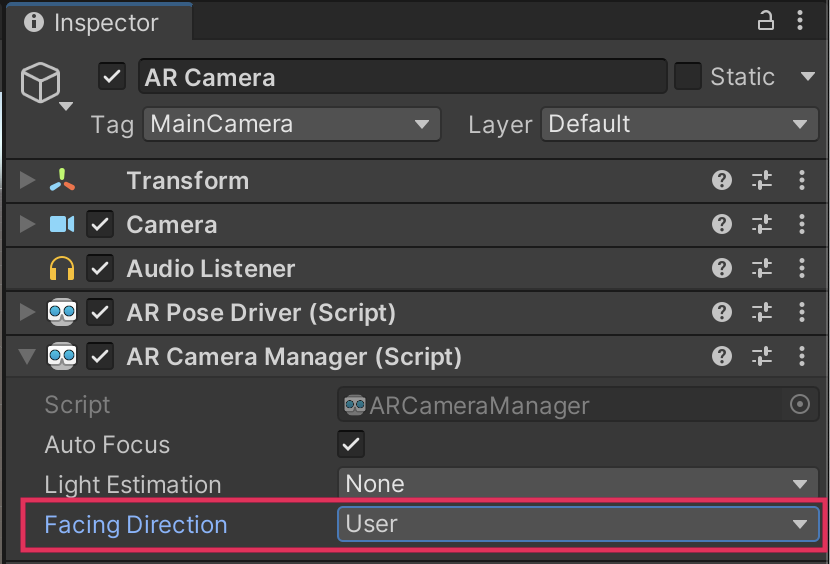
4. In the Hierarchy window, select the Main Camera GameObject (it’s a child GameObject of XR Origin (AR Rig)).
5. In the Inspector window, find the AR Camera Manager component and set the Facing Direction to User.
6. Save the scene.
Your scene is now ready.
3. Configure your build settings
You also need to add the new scene to the build settings and set it as the only scene to be built. This process can happen at any time prior to completing your first build test. However, it’s good practice to add the scene immediately after it is created so you don’t forget later and waste time building a previous scene!
Follow these instructions to update your build settings:
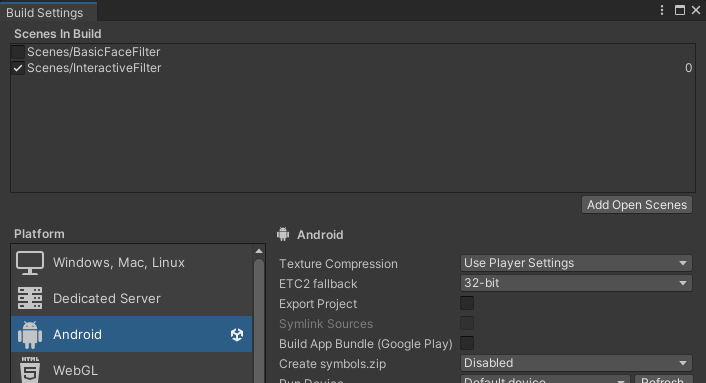
1. Open the build settings (File > Build Settings).
2. In the Scenes in Build section, select Add Open Scenes. This will add your new InteractiveFilter scene to the Scenes In Build list.
3. If the BasicFaceFilter scene is enabled, disable it in that same list.
Tip: You can also right-click a listed scene and select Remove Selection to completely remove it from the list.
Now you’re prepared to build the app when you’re ready to test your progress.
4. Import the new assets
As in the previous project, we’ve provided you with a selection of starting assets that you will customize to your personal preference as you build the app.
Follow these instructions to import the assets:
1. Download the Interactive Face Filter assets.
2. Unzip the downloaded folder and locate InteractiveFaceFilter.unitypackage.
Note: It’s important to fully unzip the folder rather than looking inside by double-clicking. Attempting to import zipped files will result in an error.
3. Drag InteractiveFaceFilter.unitypackage into the Project window of Unity Editor. This is an alternative technique for importing assets than what you did last time.
4. When prompted by the Import Unity Package dialog window, select Import.
The new assets have now been imported into your project.
5. Explore the new assets
Before you continue, take a moment to explore the assets you have imported:
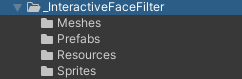
1. Familiarize yourself with the package contents in the Project window. There are four folders:
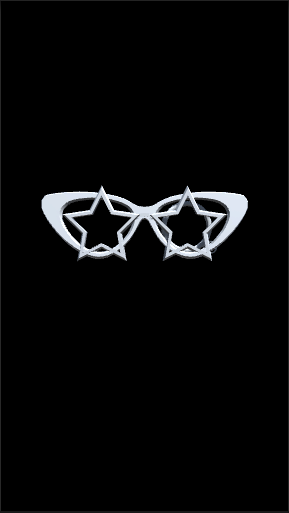
- Meshes: Contains five pairs of uniquely styled glasses.
- Prefabs: Contains an AR_Canvas GameObject, which is the starting point for your app’s UI.
- Resources: Contains a glasses UI icon template in PSD format, in case you want to create your own.
- Sprites: Contains the UI sprites that you will use to create your user interface design.
2. Open the Meshes folder and select each of the assets in turn to review them in the Inspector window — you’ll be choosing three to add to your app soon.

6. Add a Face Manager
The filters for this app will be entirely mesh-based and will work somewhat like the accessories did in the last project. The major difference between the two apps will be the way the prefabs are created.
Before you get to that, you need to configure the XR Origin (AR Rig) GameObject:
1. In the Hierarchy window, select the XR Origin (AR Rig) GameObject.
2. In the Inspector window, select Add Component.
3. Search for and add an AR Face Manager component.
You used the Face Manager in the previous project. This component manages the human faces detected in the scene.
7. Create the GlassesGroup
Rather than make individual prefabs for each pair of glasses, you’ll create a single prefab that contains all of the glasses that you’ve selected for your app called GlassesGroup. Later, you’ll build on this prefab and create a visual script to enable and disable the visibility of each individual pair of glasses in real time based on the user’s button selection.
Follow these instructions to create a single GameObject that contains all pairs of glasses:
1. In the Project window, go to Assets > _InteractiveFaceFilter > Meshes.
2. Drag the three pairs of glasses that you want to add to the app from the Project window into the Hierarchy window.
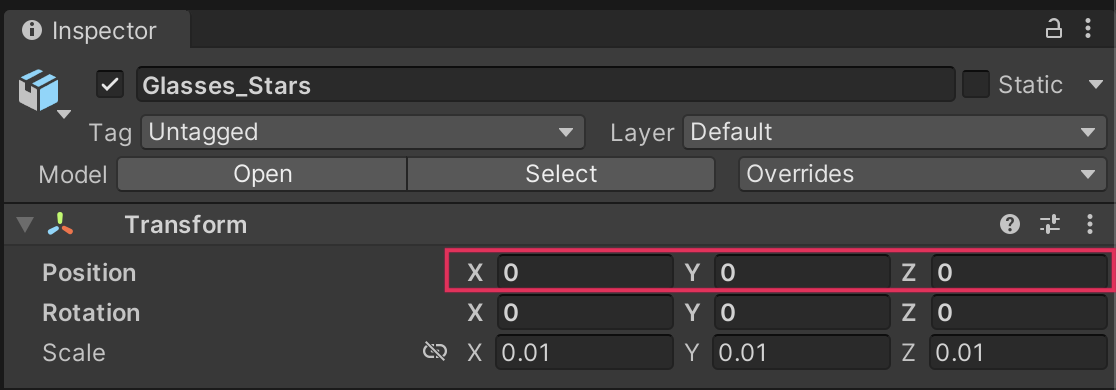
3. In the Hierarchy window, select each pair of glasses and check that its Transform Position property is set to 0,0,0 in the Inspector window.
4. Select all three pairs of glasses in the Hierarchy window. Then, right-click and select Create Empty Parent.
This creates a new parent GameObject for the glasses GameObjects.
Tip: You can select multiple GameObjects by holding Ctrl (macOS: hold Cmd) as you select them.
5. Rename the new parent GameObject “GlassesGroup”.
8. Set up the GlassesGroup as an AR Face prefab
For the GlassesGroup to appear on your face, you need to turn it into a prefab that can be applied to the user’s face.
Follow these instructions to set up the GlassesGroup as an AR Face prefab:
1. In the Inspector window, select the GlassesGroup, then select Add Component and add an AR Face component.

This component will allow the GlassesGroup to track along with a detected face.
2. In the Project window, navigate to Assets > _InteractiveFaceFilter > Prefabs.
3. Drag the GlassesGroup GameObject from the Hierarchy window into the folder in the Project window to make it a prefab.
The GameObject should now appear blue in the Hierarchy window.
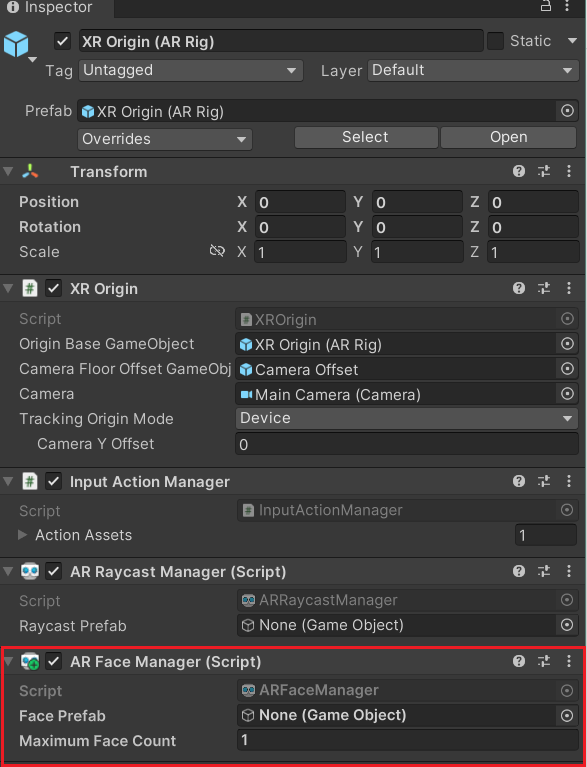
4. In the Hierarchy window, select the XR Origin (AR Rig) GameObject. Locate its AR Face Manager (Script) component in the Inspector window.
5. Drag the GlassesGroup prefab from the Project window and assign it to the Face Prefab property in the AR Face Manager component.
Important: Drag the GlassesGroup prefab from the Project window and not from the Hierarchy window.
9. Prepare your test environment
Throughout this project you will be testing both in the Unity Editor and on your mobile device. Both methods of testing have pros and cons:
- Testing in the Unity Editor is very fast, and you can evaluate precisely how the interactions you’re building are working. However, you won’t be able to see your work-in-progress filters applied directly to your face.
- Testing on your mobile device will demonstrate how your filter actually works on your face, but it can take several minutes to build the app to your device. If something isn’t working as expected, it can also be much more challenging to understand why.
By using both testing methods, you’ll be able to take advantage of their strengths while minimizing the impact of their weaknesses.
First, you’ll prepare the Unity Editor for testing in general, and then you’ll prepare your scene for device testing. Follow these instructions to prepare your test environment:
1. Select the Game view tab.
2. In the Game view control bar, set the Aspect Ratio to 16:9 Portrait using the dropdown.
The aspect ratio of the Game view will change to simulate a phone screen in portrait mode.
3. In the Hierarchy window, select the GlassesGroup GameObject.
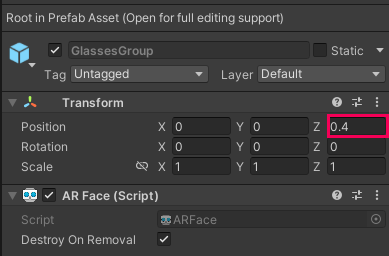
4. In the Inspector window, find the Transform component and change its Position property Z value to 0.4.
The glasses will now appear centered in the Game view.
5. Select the GlassesGroup prefab in the Project window and change its Position property Z value to 0.4 as you did with the prefab in the Hierarchy window.
As shown in previous tutorials, AR foundation includes XR Environments, which allow you to test how some AR projects work directly in the Editor. However, for testing face filters, these simulated environments aren’t as helpful. For the time being you’ll disable XR Environments, but you can turn them back on for later projects.
6. Navigate to Edit > Project Settings, and select the XR Plug-in Management section.
7. Select the Windows, Mac, Linux settings tab and deselect XR Simulation.
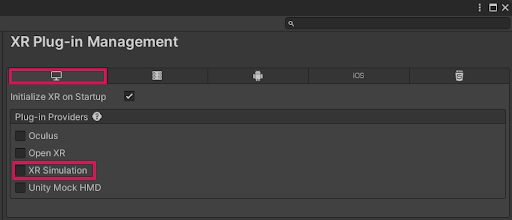
8. Close the Project Settings window.
Both test environments are now complete. When you are testing in the Unity Editor, you’ll use the GlassesGroup prefab in the Hierarchy window. When you test the app on your mobile device, you’ll deactivate the GlassesGroup prefab and then build to your device. Don’t worry if this seems complicated now, we’ll guide you through each step!
10. Build and test
You’re now ready to complete your first test build:
1. In the Hierarchy window, select the GlassesGroup prefab.
2. In the Inspector window, disable the GlassesGroup prefab using the checkbox at the top of the window next to its name.
Important: If you don’t deactivate the GlassesGroup prefab, a pair of glasses will float in the middle of your screen on your mobile device build.
3. Save your scene.
4. Open the Build Settings window (File > Build Settings).
5. Make sure that your device is plugged in. Then, select Build and Run to build the app on your device.
6. The application will open automatically on your device.
When a face is detected, all three glasses that you have selected should be displayed on the face.
Note: For a reminder of how to build to your device, you can review the process for Android or iOS.
11. More to try
If you want to further develop your skills, explore new concepts, or improve your project, check out some of the optional activities below. Each one is tagged as either Easy, Medium, or Difficult, so you can choose the level of challenge.
These activities are entirely optional, so if you’re not interested, no problem – just skip this step. We do recommend attempting at least one of them in order to get the most out of this learning experience. Good luck!
Easy: Modify existing glasses
The current glasses that are in your project have been scaled and arranged so that they will fit the average face. One fun aspect of filters is being able to make silly or funny looks for users. Change the scale or rotation of the glasses to make them more fun to test by modifying the transform properties of the provided glasses.
Medium: Import new glasses from an online resource
There are many models for glasses that are on sites like Sketchfab that can be downloaded and imported into your project. Find a set of glasses on one of these sites that you can bring into your filter project. There are three big considerations when selecting your models:
- Model Format: You want to make sure that you are picking a model that is in a format that Unity can use. The Unity Manual has information about file types that Unity will display.
- Model Complexity: It is important when selecting and downloading these files to look at the complexity of the model. It is also important to find models with simple geometry to help with optimization.
- Model Usage License: It is important to pay attention to the license type for the file and to follow the directions for acceptable use. Many models you find online may have a Creative Commons (CC) license that allows usage, and many of the CC licenses will tell you specifically what the artist has given you permission to do with their model. You can find out more about CC licenses at the Creative Commons website.
The example project above uses "steampunk glasses" (https://skfb.ly/6QX6V) by Kisielev Mikhail is licensed under Creative Commons Attribution (http://creativecommons.org/licenses/by/4.0/).
Difficult: Create your own glasses
You aren’t just limited to the glasses we’ve supplied you with! If you’re a 3D artist, you can create your own pairs of glasses to include in this project. You can design your custom glasses as you like, but here are a few tips to help you get started:
- Only include the front of the frame: You’ll always see all parts of your glasses model, so when the user turns their head, the legs might overlap their ear and break immersion. You might have even seen that in the More to Try Medium challenge example. You can always just model up to the point where the glasses would loop over the ear, but if the user has a slightly longer face, the model might not meet their ear. If you really want to include the full frames, try to find a creative solution for displaying them realistically on the user’s head.
- Keep your poly count low: Remember that you’re building a mobile application, and that your models should be as optimized as possible. Because this app only has three 3D assets, you have more polygons to work with than normal — don’t waste them! If you need a refresher on good mobile optimization tips, review the previous guidance on mesh optimization.
- Limit your model to one material: In later tutorials you’ll implement functionality to change the color of your glasses. The visual script you create will search for a single material on your mesh and swap it out for whatever color the user selected. Make sure your models will work within the scope of this functionality by limiting them to one color.
Model requirements
If you want to create your own glasses models, you should already be familiar with the use of 3D modeling software. All glasses that you create must have their pivot point set to the scene origin, and then be offset to align to the AR Face. You can accomplish this by importing the Face_Reference_Mesh into your 3D modeling software tool of choice and using it to align your glasses.
When you import the Face_Reference_Mesh into your 3D modeling software, leave it at the origin of the scene. This may mean that the mesh appears halfway through the 3D modeling software’s grid, as shown in the Maya video below. Notice the cat eye glasses have an offset pivot set to the origin of the scene. The mesh includes a very simple rig attached to the forehead and nose. The root joint of this rig will be at the scene origin, and this is where the pivots for your glasses must be located as well.
Once you have created your glasses and set their pivot points, complete the following steps:
1. Export the new glasses as an FBX file.
2. In the Project window if Unity Editor, go to Assets > _InteractiveFaceFilter > Models.
3. Drag the FBX file into the Meshes folder.
4. Update your prefab to include the glasses that you’ve created!
12. Next steps
In this tutorial, you configured your new scene and created the base prefab that you’ll use throughout the glasses app. In the next tutorial, you’ll set up the UI for the app so that users can customize their glasses.