
Improve your scene’s quality
Exercise
intermediate
+10XP
45 mins
Unity Technologies
In this tutorial, you’ll learn how to resolve the final issue with your pixel art style by fixing cases where light appears in the wrong places. You’ll also learn how to publish your project online so you can share it with others.
1. The Light leakage issue
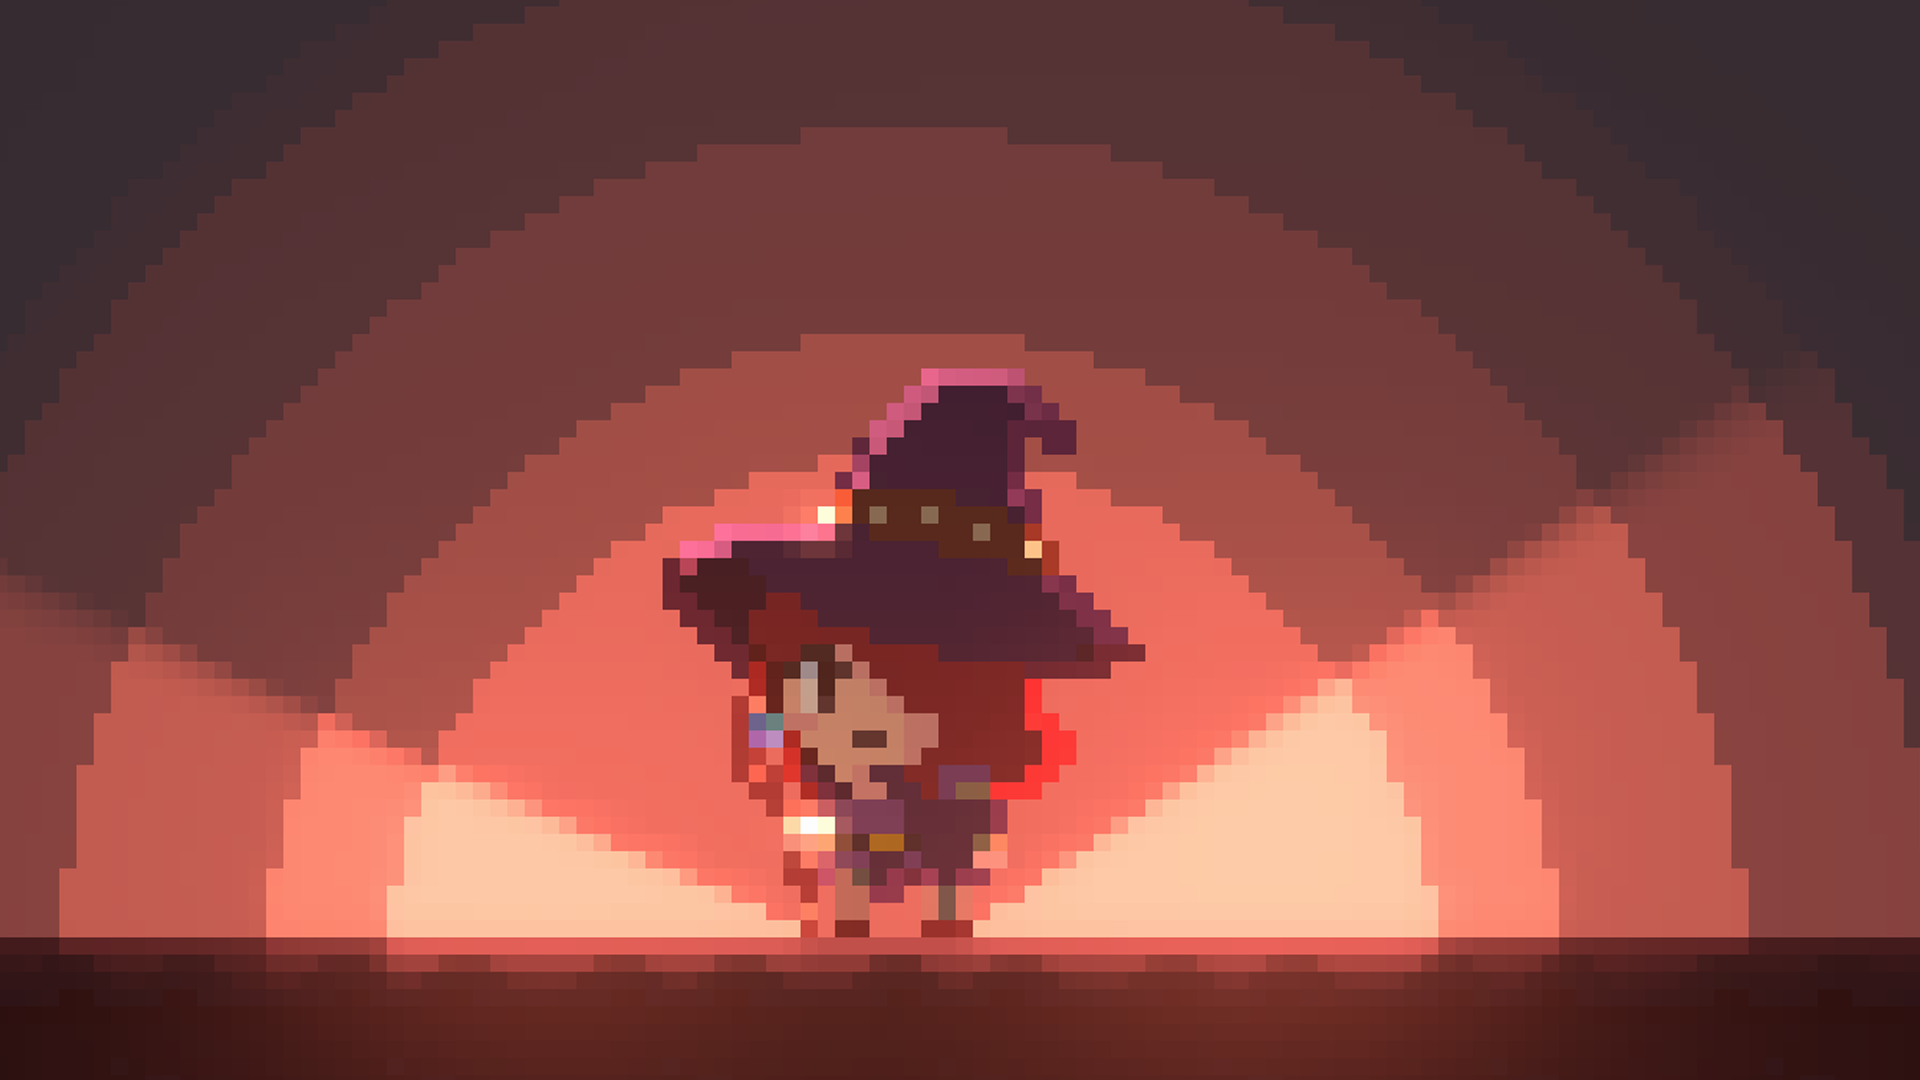
We are almost done with this course, you have learned a lot of different ways to enhance lighting in a 2D pixel scene, but you might have noticed a very visible issue—If you move the Witch GameObject close to the Mineral Light, you can see the light causes severe light leakage making the Witch sprite unrecognizable.
To fix this issue, you’ll use Mask Textures.
2. What are Mask Textures?
In the previous tutorials, when you opened the Witch sprite inside the Sprite Editor window and went to Secondary Textures, there was the option to add a _MaskTex category.
Adding this option tells the Sprite Lit Shader to use a mask texture. A Mask Texture is an image that defines which parts of a sprite are affected by certain effects and which are ignored. The shader then applies lighting only where the mask allows it. Just like with an Emission Map, the regions that react to light are highlighted—in this case in red—while the regions that do not react are shown in black. To apply a Mask Texture to the Witch sprite:
1. Add the Witch_Mask sprite as a Secondary Texture of the original sprite in the Sprite Editor, under the _MaskTex category.
3. Set Lights to recognize Mask textures
Now that you’ve added the Mask Texture to the Witch, you need to configure the lights in the scene to recognize it. To do this, follow these steps:
1. Select all your Rim Light 2D GameObjects in the scene.
2. In the Light 2D component, use the foldout (triangle) to expand the Blending section and locate the Blend Style property.
This property defines how light will blend with the sprites. There are two main ways to mix (blend) the colors of the sprites with the colors of the light:
- Multiply: Multiplies the sprite colors with the light colors.
- Additive: Adds the sprite colors to the light colors.
Both blending modes can also take Mask textures into account. When this option is selected, the shader only uses the red channel (R) of the mask to do the calculation: pixels painted red will be taken into account for light blending, while all other pixels will be ignored.
3. Change the Blend Style of all the Rim Lights to Multiply with Mask (R).
You can see that there are no more light leaks with the Witch GameObject. Because masks are lighter to calculate compared to shadows, you could optimize your project by using masks to represent shadows instead of the Shadow Caster 2D component.
4. Publish to Unity Play
You’ve completed this course and implemented a variety of techniques to enhance your scene’s atmosphere with 2D Pixel lighting. If you feel proud of your result, or have created extra functionality you’d like to showcase, you can follow this tutorial on how to upload your project to Unity Play and share it with others.
Please login to submit
5. Next steps
Congratulations!
You’ve completed the course and gained a solid foundation in 2D Pixel lighting, along with techniques for adding lighting using different tools in the Unity Editor. To keep building your skills, we recommend exploring other courses available on the Unity Learn platform and expanding your Unity toolbox of skills.
Complete this Tutorial
Submission Gallery
Project 5 - 2D Lighting For Pixel Art
So in this course i learned how to play with lighting to make the game more lively and playable

First Sin
FIRST SIN: An Open-World Action + Business Simulation hybrid set in a Miami-inspired neon city. Run your own store (Guns, Antiques, Special Goods), take on mafia jobs, and make risky deals. In this city where commerce and crime collide, you make the rules.

2D Pixel Lighting Tutorial
My results from the Unity Learn 2D Lighting for Pixel Art course
WebGLBuilds
Hi
Unity Test
First Project with Unity