Marker tracking
Tutorial
intermediate
+10XP
30 mins
7
Unity Technologies
Fiducial markers serve as a real-world anchor point for digital experiences and content, which make them incredibly useful tools for XR development. These markers can be used to track relevant locations and positions in an environment relative to the user or to instantiate digital objects into a user’s field of view, which then can be interacted with.
In this tutorial, you’ll learn how to implement marker tracking in your Magic Leap 2 applications, including an example where a marker is used in a 3D model viewer application.
1. Overview
What are fiducial markers?
Fiducial markers are 2D visual patterns used in AR to provide a reference point in the real world to anchor digital content. The most commonly recognized type of fiducial markers are QR codes and EAN codes, also known as barcodes.

Why include marker tracking?
Many AR experiences call for interaction with the physical world in some way, whether that be by recognizing where a user is located in an environment or by overlaying digital content for the user to see in a specific area. Markers provide a quick and easy way to implement this functionality in your application.
What you’ll learn in this tutorial
In this tutorial, you will learn how to implement basic marker tracking in Magic Leap 2 applications. You’ll begin by generating a marker, then you’ll write a simple script to instantiate a 3D object on top of that marker when it is detected in your environment.
You will also explore an example project where marker tracking is used in conjunction with hand tracking, segmented dimming, and spatial audio in a 3D model viewer prototype.
2. Before you begin
Before you begin working through this tutorial, you should make sure your development environment is set up for Magic Leap 2 development and download the example prototype project.
Set up your development environment
If this is your first time developing in Unity for the Magic Leap 2, make sure you have your development environment configured properly using one of the following guided options:
- Follow the Unity: Getting started guide from the Magic Leap 2 developer documentation.
- Follow the Magic Leap 2 in-Editor tutorial project in the Unity Editor.
Download and open the example prototype
This tutorial will guide you through the implementation of this feature in your own application using an example prototype. If you want to explore the code of the prototype yourself, download the accompanying prototype project and open it in Unity.
3. Generate a marker
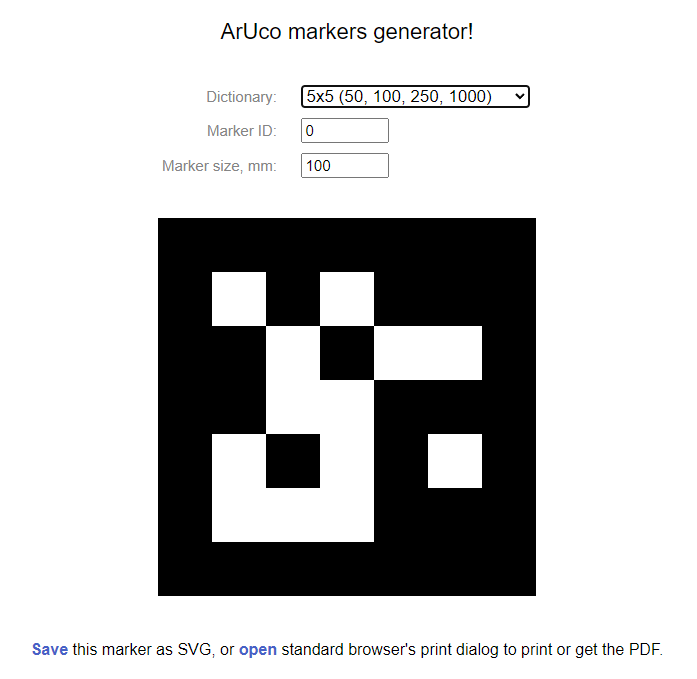
As a first step, you will need to generate a marker to use with your application. This marker will be used digitally within Unity, as well as externally from your application. If you can, it’s recommended that you print out the marker and place it somewhere in your environment for easy testing. Alternatively, you can display the marker on your computer monitor.
As of writing, Magic Leap 2 supports four types of fiducial markers in Unity applications:
- QR
- Aruco
- EAN_13 (experimental)
- UPC_A (experimental)
If you have a preferred marker type or already have markers generated, feel free to use them in your project. If you need to generate a new marker for this project, this Online ArUco markers generator is recommended.

Note: When using Aruco markers it is highly recommended to avoid the use of Aruco Original and 4x4 dictionaries due to issues with false detections. A minimum of 5x5 is recommended for best results.
A note on image markers
Developers experienced with the Magic Leap 1 or mobile AR platforms are likely familiar with image tracking, which occupies a similar role as marker tracking, but with an image, such as a logo. The tracking system that the Magic Leap 2 uses for fiducial markers is separate from the image tracking system. Currently, the image tracking system is disabled for the Magic Leap 2 but will be reenabled in the future.
4. Basic marker setup
Enable the Marker Tracking permission
In order to scan markers in your application, you must have MARKER_TRACKING enabled in your project’s manifest settings. To do this, navigate to Edit > Project Settings > Magic Leap > Manifest Settings. You may also want to include a check in your code to make sure that this permission is enabled at the start of the application.
Add an XR Rig to the Unity scene
Just like with any Magic Leap 2 project, the first step is to add the XR Rig prefab to the scene from the Magic Leap SDK package (Packages > Magic Leap SDK > Runtime > Tools > Prefabs) and then delete the Main Camera GameObject.

Prepare a prefab
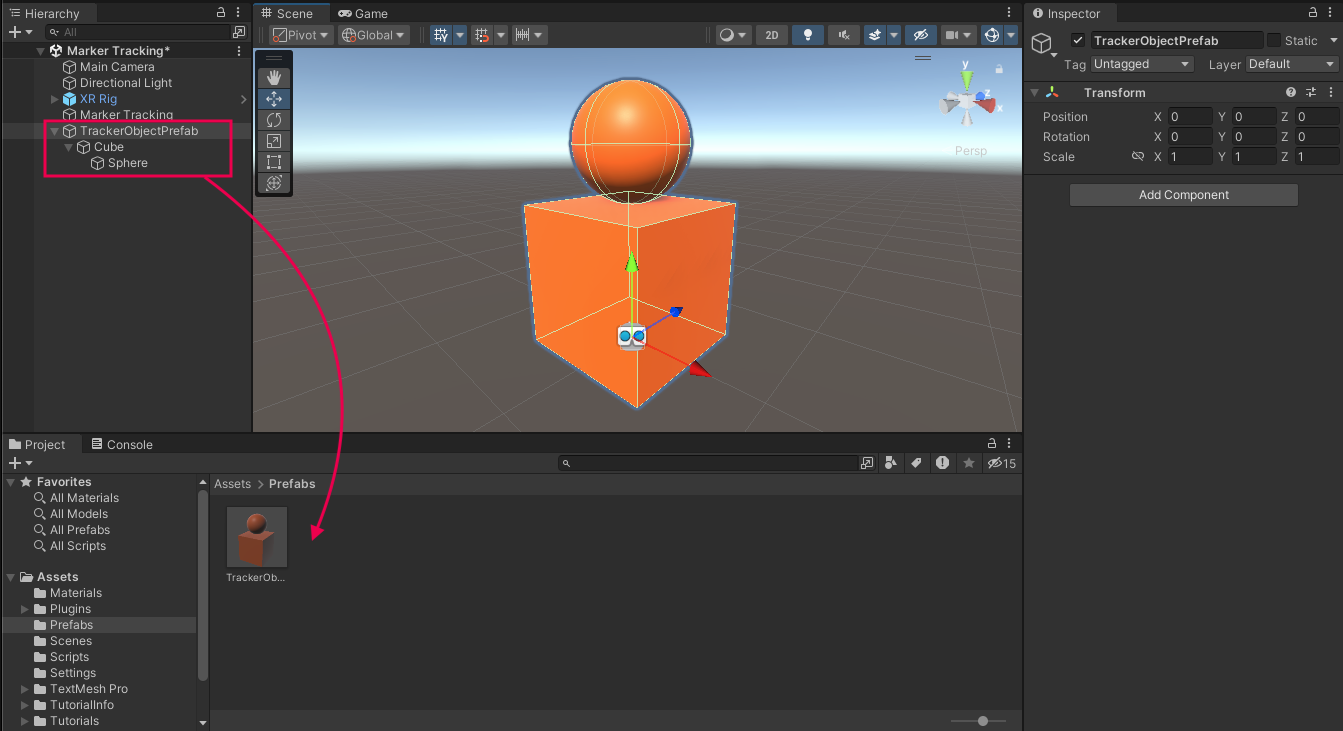
In Unity, create a Mesh prefab to instantiate when the marker is detected. To have more control over the origin point of the prefab, we recommend creating an empty parent GameObject called something like “TrackerObjectPrefab”, then creating child mesh GameObjects that contain the visual components.

For the example in this tutorial, the prefab is a simple cube with a sphere on top of it in order to clearly show which way the object is rotated, but you can use any object, character, or model.
Note: To create a prefab, simply drag a 3D object from the Hierarchy into the Project window. After you’ve created the prefab in your Project window, you can delete it from the Hierarchy.
Create a marker tracking script and assign key variables
Note: This example will only deal with Aruco markers, but if you’re not interested in Aruco markers, there is detailed documentation on how to handle other marker types, like QR codes, in Magic Leap’s documentation.
First, create a new script named something like “MarkerTracking” and attach it to a GameObject in your scene, then paste the code below into that script. The script will perform the following actions:
- Declare the required variables for the marker tracker settings.
- At start, create a new TrackerSettings object using the variables, then start tracking with those settings.
- Subscribe to the event that fires when a marker is detected.
- In the event that a marker is detected, instantiate the prefab, orient it to stand upright, then stop marker tracking.
There are comments in the code provided, but for much more detailed information, read through Magic Leaps’ documentation on the marker tracker settings, the marker tracking profile, and how to start and stop scanning.
using UnityEngine;
using UnityEngine.XR.MagicLeap;

public class MarkerTracking : MonoBehaviour
{
    // marker settings
    public float qrCodeMarkerSize; // size of the expected qr code, in meters
    public float arucoMarkerSize; // size of the expected aruco marker, in meters
    public MLMarkerTracker.MarkerType markerType; // QR? Aruco? EAN_13? etc
    public MLMarkerTracker.ArucoDictionaryName arucoDict; // for Aruco markers, which "dictionary" or type of Aruco markers?

    // the object that will be instantiated on the marker
    public GameObject trackerObject;

    private void Start()
    {
        // create a tracker settings object with variables defined above
        MLMarkerTracker.TrackerSettings trackerSettings = MLMarkerTracker.TrackerSettings.Create(
            true, markerType, qrCodeMarkerSize, arucoDict, arucoMarkerSize, MLMarkerTracker.Profile.Default);

        // start marker tracking with tracker settings object
        _ = MLMarkerTracker.SetSettingsAsync(trackerSettings);
    }

    // subscribe to the event that detects markers
    private void OnEnable()
    {
        MLMarkerTracker.OnMLMarkerTrackerResultsFound += OnTrackerResultsFound;
    }

    // when the marker is detected...
    private void OnTrackerResultsFound(MLMarkerTracker.MarkerData data)
    {
        // instantiate the tracker prefab object and align with worldspace up
        GameObject obj  = Instantiate(trackerObject, data.Pose.position, data.Pose.rotation);
        obj.transform.up = Vector3.up;

        // stop scanning after object has been instantiated
        _ = MLMarkerTracker.StopScanningAsync();

    }
}
After you add this code, make sure to assign values to each of these key variables in the Inspector.
Test the simple marker functionality
Using a marker that aligns to the settings you described above, test your app and look at the marker. Your chosen prefab will appear at the location of the marker. If you made your object grabbable using an XR Grab Interactable component, you will be able to pick it up off the marker.
This is an example of the simplest form of marker tracking: where the marker is only used to generate the 3D content and never used again. For more complex implementations, including handling multiple marker types, defining custom profiles, and responding to different marker-related events such as when a marker is updated or lost, review the examples provided in Magic Leap’s guides.
5. Marker tracking in context
Now that you know how to set up basic marker scanning, let’s check out an example of how this feature can be combined with other interactive functionality.
In this 3D model viewer example, the user scans a marker, which instantiates a model of an electrical panel. The position and rotation of the model are updated as the marker is moved around, but the user can still use hand gestures to grab and interact with the model whenever they choose. The mesh also has segmented dimming and spatial audio associated with it.
6. Next steps and additional resources
In this tutorial, you learned about working with fiducial markers on the Magic Leap 2. You can learn more about them with the following resources:
- Magic Leap’s marker tracking example scene from the samples project
- Magic Leap’s guide on marker tracking
- Magic Leap’s scripting documentation for the MLMarkerTracker object
You may also want to learn more about out the other features highlighted in the example prototype:
Otherwise, feel free to go back to the overview page, where you can explore other tutorials and resources.