
Spatial audio
Tutorial
intermediate
+10XP
30 mins
Unity Technologies
Spatial audio is a specialized form of audio that creates a three-dimensional sound experience and is used extensively in XR applications. Spatial audio more accurately represents sounds in the real world and, more importantly, the user’s proximity to the sound’s source. This setup gives users a greater sense of presence in a scene.
In this tutorial, you will learn how to implement spatial audio in an application, including an example where spatial audio is used on a mesh in a 3D model viewer.
1. Overview
What is spatial audio?
Traditionally, audio is captured and reproduced in two channels: this is known as stereo audio. These channels are commonly assigned to the left and right playback devices, such as a set of earbuds or pair of left and right speakers, and offer distinct audio signals. This configuration can help generate a perception of sound directionality, but it falls short of achieving genuine spatial audio fidelity.
Spatial audio, on the other hand, uses sophisticated algorithms to consider both the position of the listener and the sound source, enabling it to replicate how the sound would behave in a particular environment. Spatial audio allows users to precisely identify the source of the audio in relation to their position in all directions, including whether the source is coming from in front of, behind, above, or below the listener.
Why include spatial audio?
Spatial audio gives user’s a greater sense of presence in applications. This sense of presence can aid in immersion for entertainment applications, but it can also be very useful in training and testing applications where it’s important to test a user’s ability to identify important audio cues they would experience in a real-world site.
What you’ll learn in this tutorial
In this tutorial, you’ll learn how to configure a project to use the Magic Leap Soundfield Plugin, apply spatial audio to an object, and review an example of spatial audio in use in a 3D model viewer.
2. Before you begin
Before you begin working through this tutorial, you should make sure your development environment is set up for Magic Leap 2 development and download the example prototype project.
Set up your development environment
If this is your first time developing in Unity for the Magic Leap 2, make sure you have your development environment configured properly using one of the following guided options:
- Follow the Unity: Getting started guide from the Magic Leap 2 developer documentation.
- Follow the Magic Leap 2 in-Editor tutorial project in the Unity Editor.
Download and open the example prototype
This tutorial will guide you through the implementation of this feature in your own application using an example prototype. If you want to explore the code of the prototype yourself, download the accompanying prototype project and open it in Unity.
3. Basic 3D audio setup
Add an XR Rig to the Unity scene
Just like with any Magic Leap 2 project, the first step is to add the XR Rig prefab to the scene from the Magic Leap SDK package (Packages > Magic Leap SDK > Runtime > Tools > Prefabs) and then delete the Main Camera GameObject.
Add basic Audio Sources to your scene
Now that your camera is configured, add a few simple objects to the scene, such as grabbable cubes that you can move around. Add Audio Source components to these objects and select an Audio Clip for those sources. For your convenience, we have provided a few simple sounds for you to experiment with. You may also want to enable Looping for testing purposes. Configure the Audio Source as you typically would for spatial audio by enabling Spatialize and set the Spatial Blend to 3D.
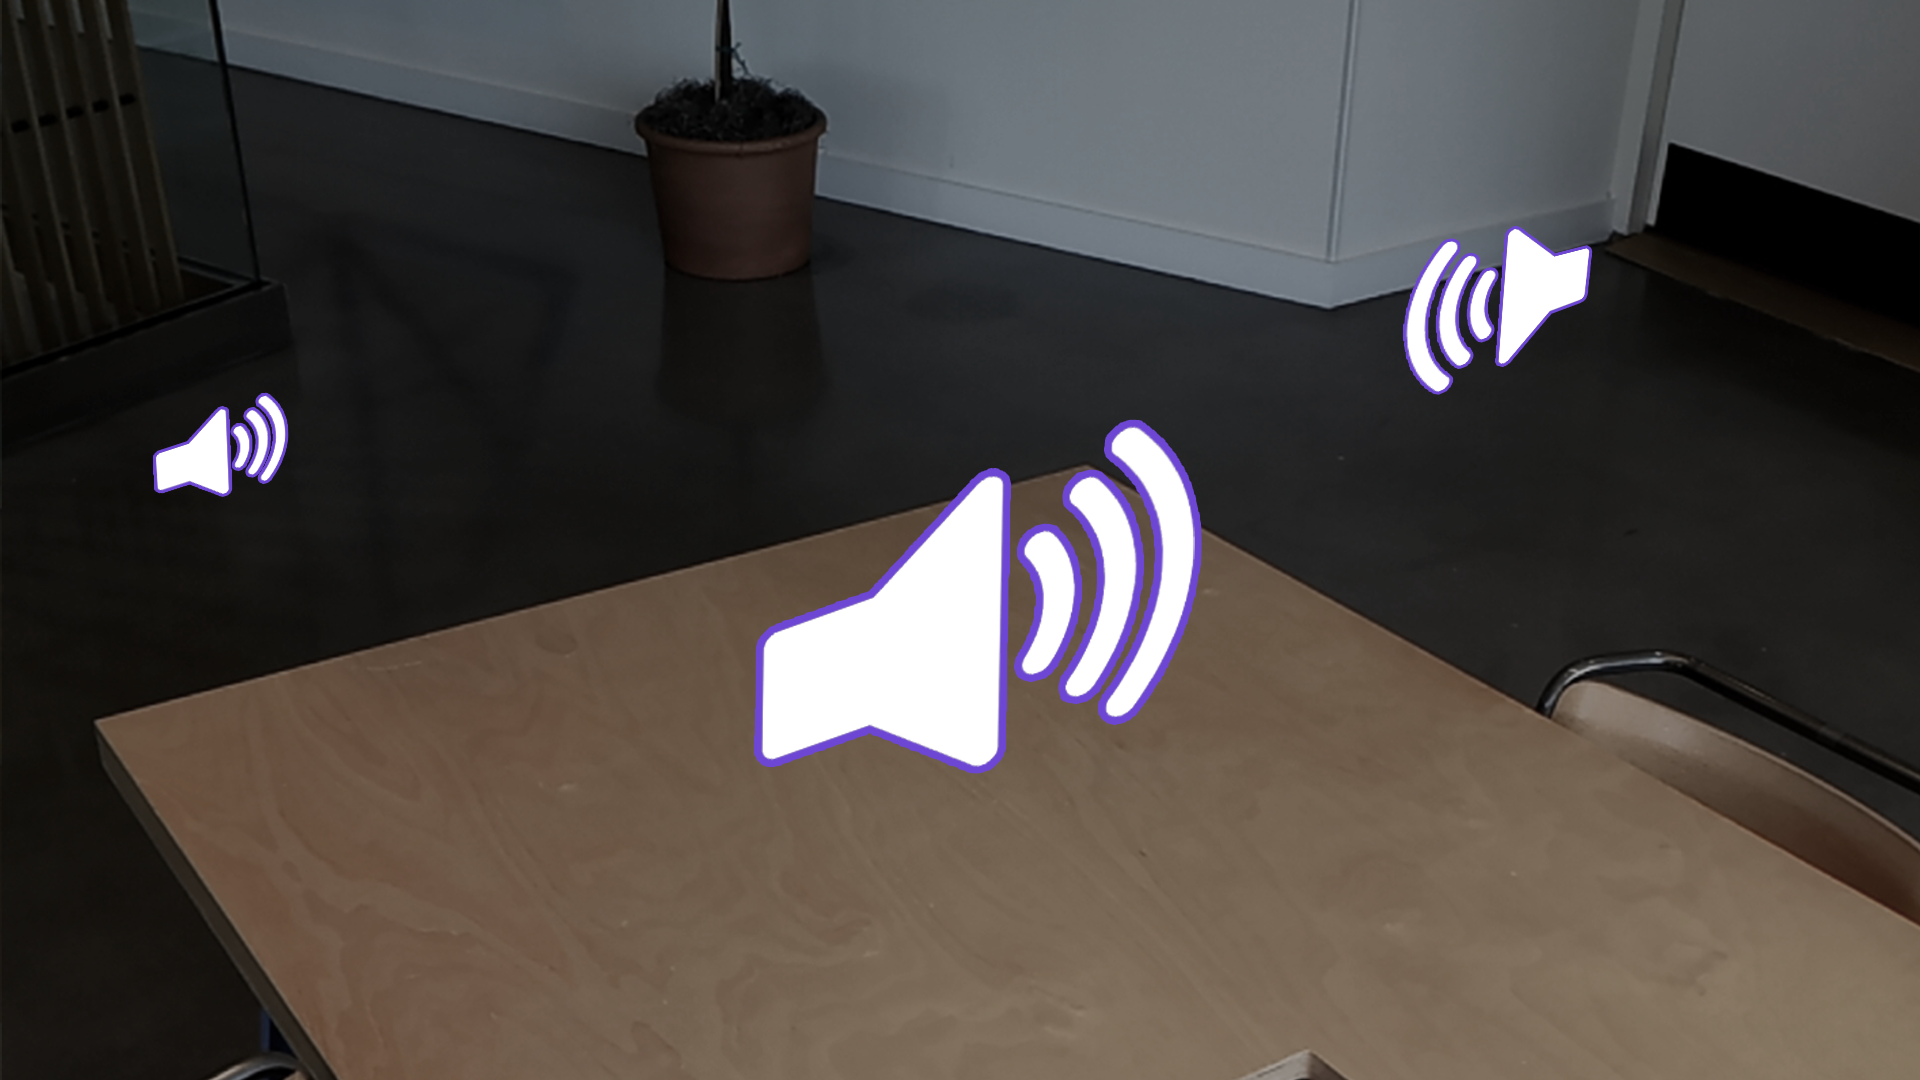
Test your simple audio
If you tested your project now, you would have simple 3D audio that you would expect from a typical 3D project. You can even test audio in the Editor and get the same result by moving the Audio Sources around relative to the XR Rig. You will hear the volume increase and decrease as the distance changes and the balance between left and right channels change when the source is moved from side to side relative to the XR Rig. In the example shown here, we have also added toggles for each source’s audio and labels to make testing a bit easier.
4. Magic Leap Spatialized audio setup
The following setup instructions are also detailed in Magic Leap’s Soundfield Plugin for Unity documentation, but the high-level steps are also outlined below.
Install the Soundfield Plugin
The Soundfield Plugin is located in the Unity Packages section of the Magic Leap Hub Package Manager. The Soundfield Plugin will be saved to the same MagicLeap folder that was created when you downloaded the first set of Unity tools through the Magic Leap Hub Package Manager. You can see the file path by selecting the "Open Folder" button under the package name in ML Hub Package Manager.
Make note of this file path, as it is needed to install the package in Unity.
To install the Magic Leap Soundfield plugin from the Package Manager, select Add Package from Disk, navigate to the Soundfield Plugin location, then select the package.json file in the most up to date version folder.
During the installation, a few warning dialogs may pop up to indicate that certain aspects of your spatializer are not configured yet — you’ll fix that next.
Enable the plugin in your project
Once the Plugin is installed, all that remains is to enable it in your project. In the Audio section of the Project Settings tab, set the Spatializer and Ambisonic Decoder plugins to MSA Spatializer and MSA Ambisonic, respectively.
Note: If you are a Windows user and encounter errors when loading the Soundfield plugin, you may be missing the Visual Studio Redistributable C++ libraries on your machine. You can get the necessary libraries directly from this download link.
Add an ML Listener to your scene
With the Soundfield Plugin enabled, you can now add Magic Leap’s spatial audio to a scene. The Soundfield Plugin requires an additional component to be added to both the Audio Source GameObject as well as the audio listener located on the Main Camera GameObject of your XR Rig prefab.
To enable the Soundfield spatial audio on your camera, add a MLListener component.
The MLListener component allows you to customize the way that audio is perceived in your application. You can leave this component’s settings at their defaults for now, but if you want to customize the component, you can learn more about its properties in Magic Leap’s ML Listener component documentation.
Add ML Point Source components
Once the basic Audio Sources are configured to your liking, add an MLPointSource component to the audio source GameObjects. These additional options will allow you to configure other, more nuanced sound properties for the audio for your environment, which you can learn much more about in Magic Leap’s documentation on this component. If you select Enable Gizmo, you will be able to visualize some of these properties in the Scene view.
Note: Distance properties are in real-world meters.
Test your spatialized audio
If you test your project now, the soundscape will feel more intuitive and realistic.
5. More things to try with the spatializer
The Soundfield spatializer is incredibly powerful and we encourage you to explore some of its other features detailed in Magic Leap’s Soundfield Audio documentation.
For example, Audio Sources with the Soundfield components applied to them will be obstructable by any object that has a collider attached to it. To test this, you could add another mesh to your scene and arrange it so that the mesh can be placed between the user and the Audio Source. Make sure to scale the mesh up so that it is a meaningful sound barrier.
You can also visualize the sound during runtime using custom runtime gizmo components.
6. Spatial audio in context
Now that you know how to set up spatial audio, let’s check out an example of how this feature can be combined with other interactive functionality.
In this example, the user is using a 3D model viewer with hand tracking, and the audio emanating from the model is spatialized.
7. Next steps and additional resources
In this tutorial, you learned how to implement spatialized audio on the Magic Leap 2 with the Soundfield plugin. You can learn more about spatialized audio with the following resources:
- Magic Leap’s guide to the Soundfield Plugin
- Magic Leap’s documentation on the Soundfield components
You may also want to learn more about out the other features highlighted in the example prototype:
Otherwise, feel free to go back to the overview page, where you can explore other tutorials and resources.